Welcome to the PERI Guide
Discover the comprehensive guide for using PERI, your go-to platform for professional management solutions. Whether you're new to the platform or a seasoned user, this guide provides valuable insights to maximize your experience and leverage the full potential of our management system offerings.
Table of Contents
Registration
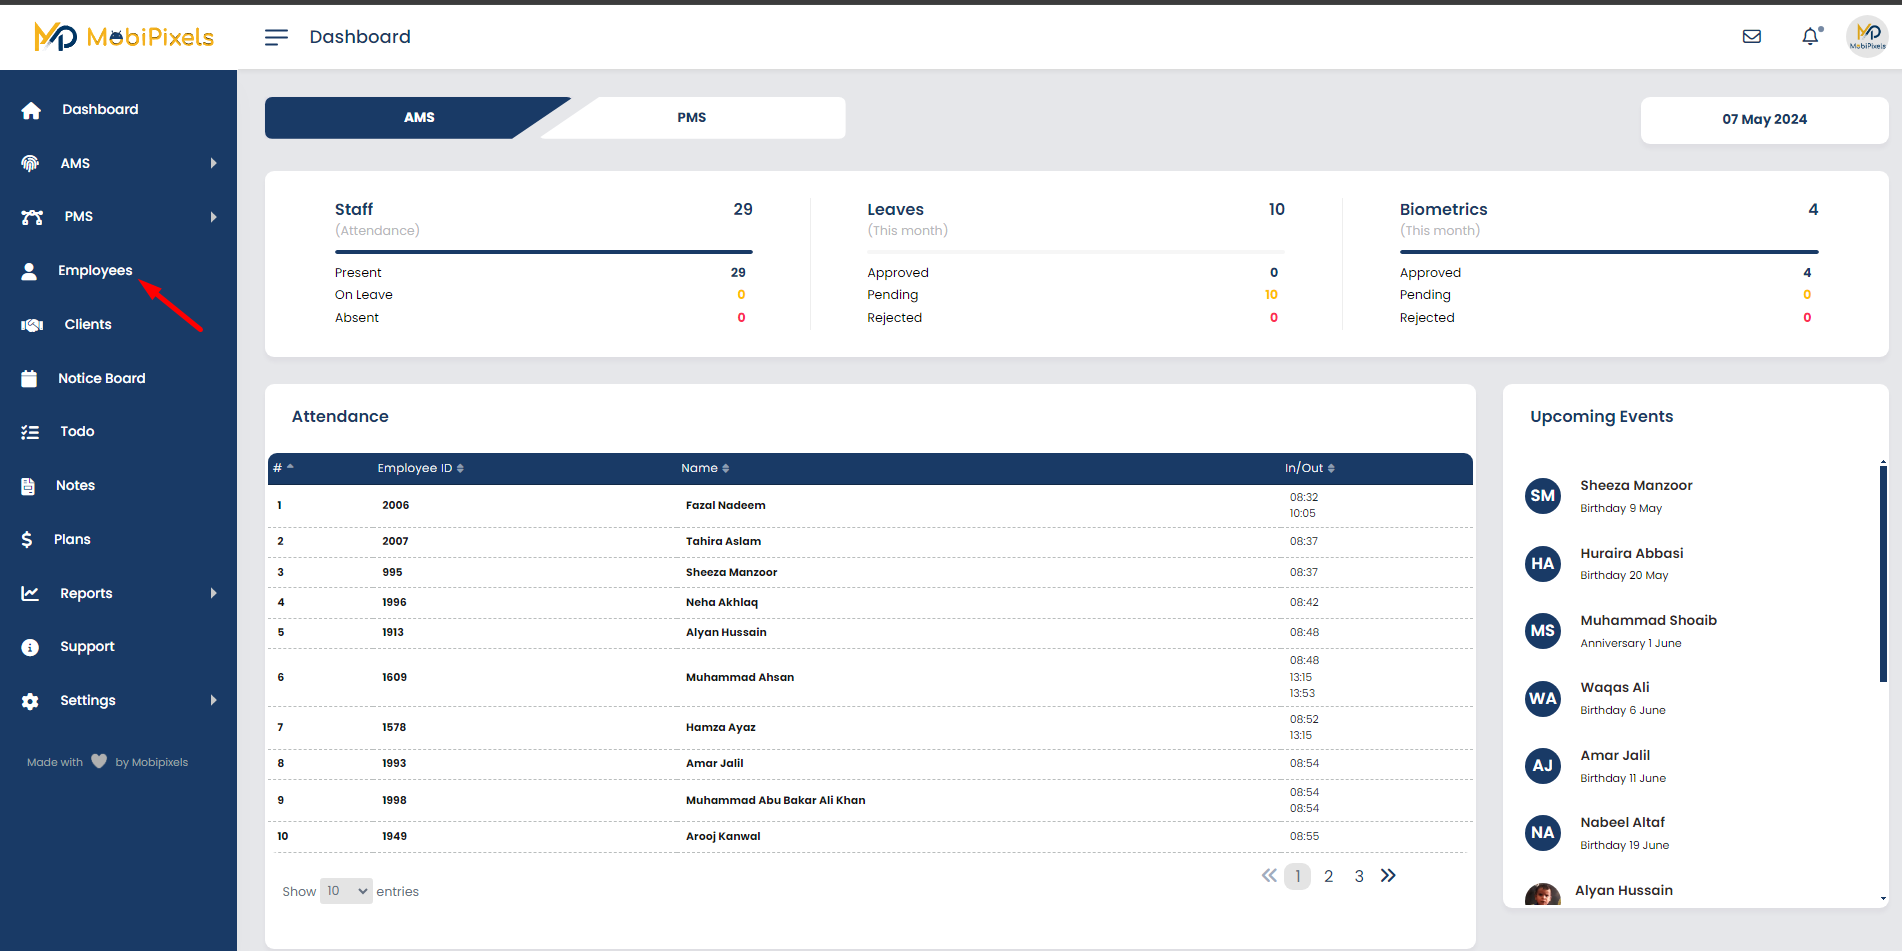
- For user registration, go to Employee in the sidebar
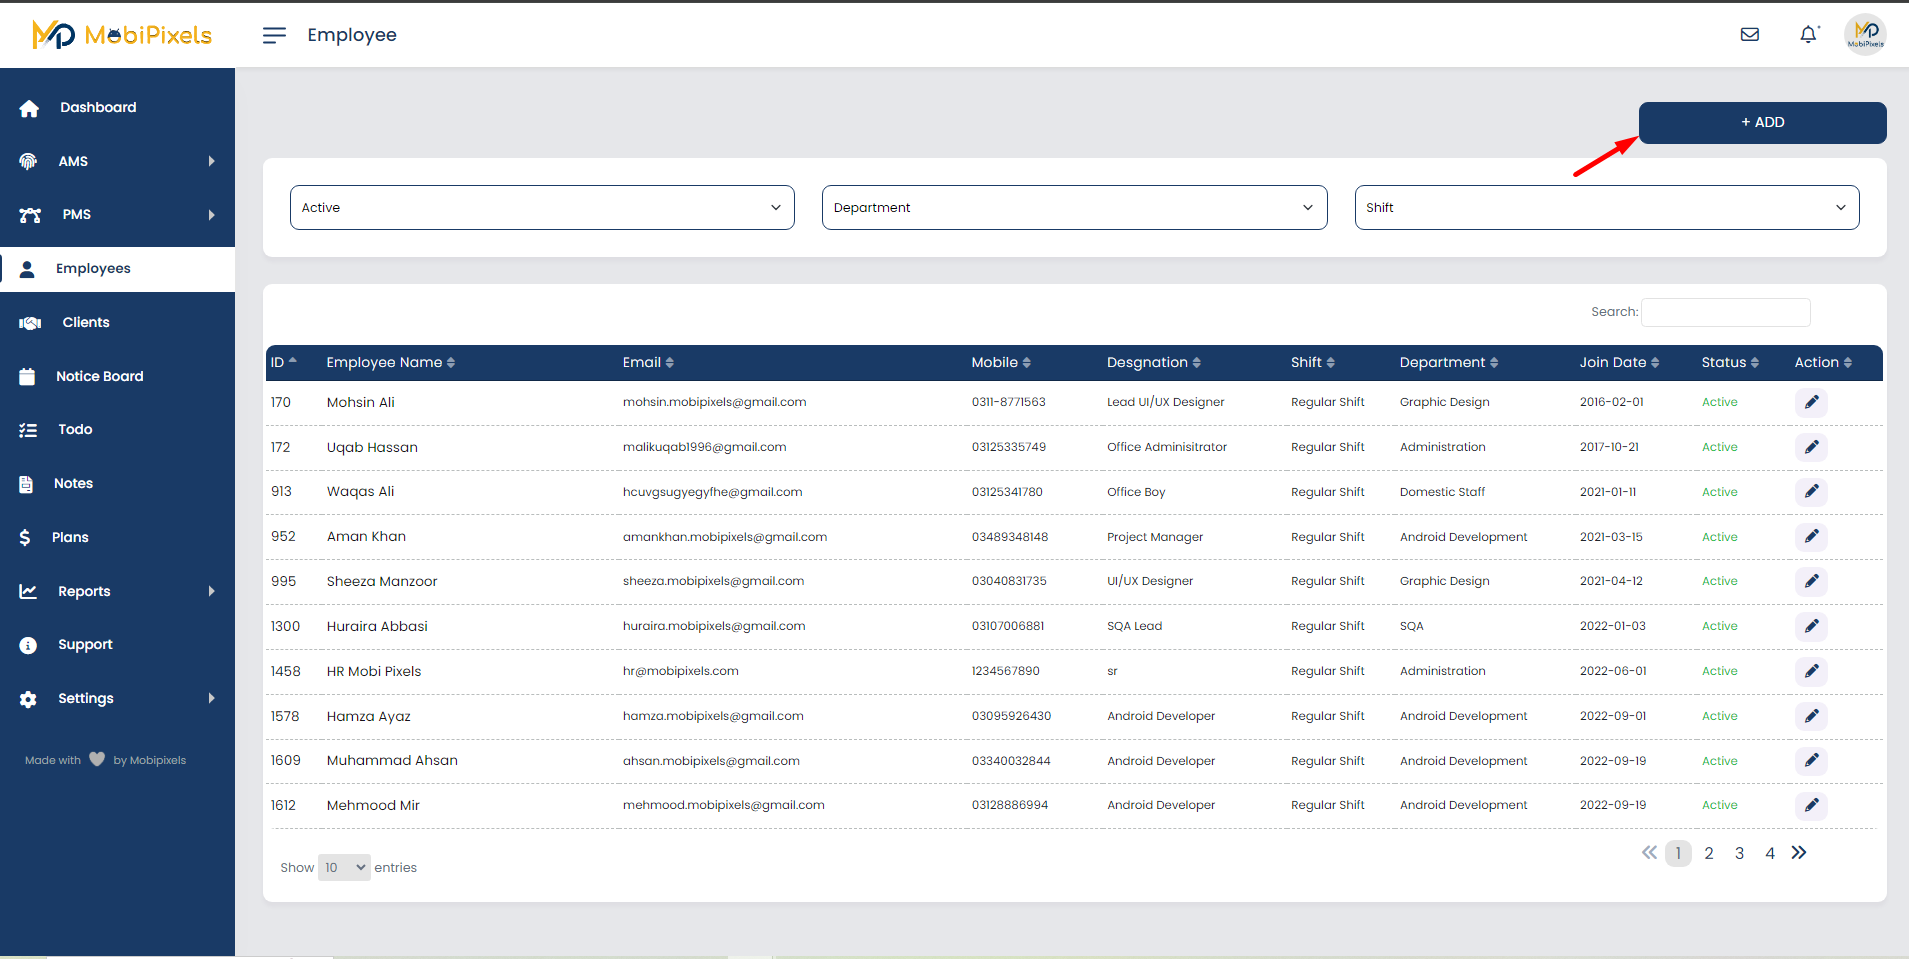
- Click on the Add button
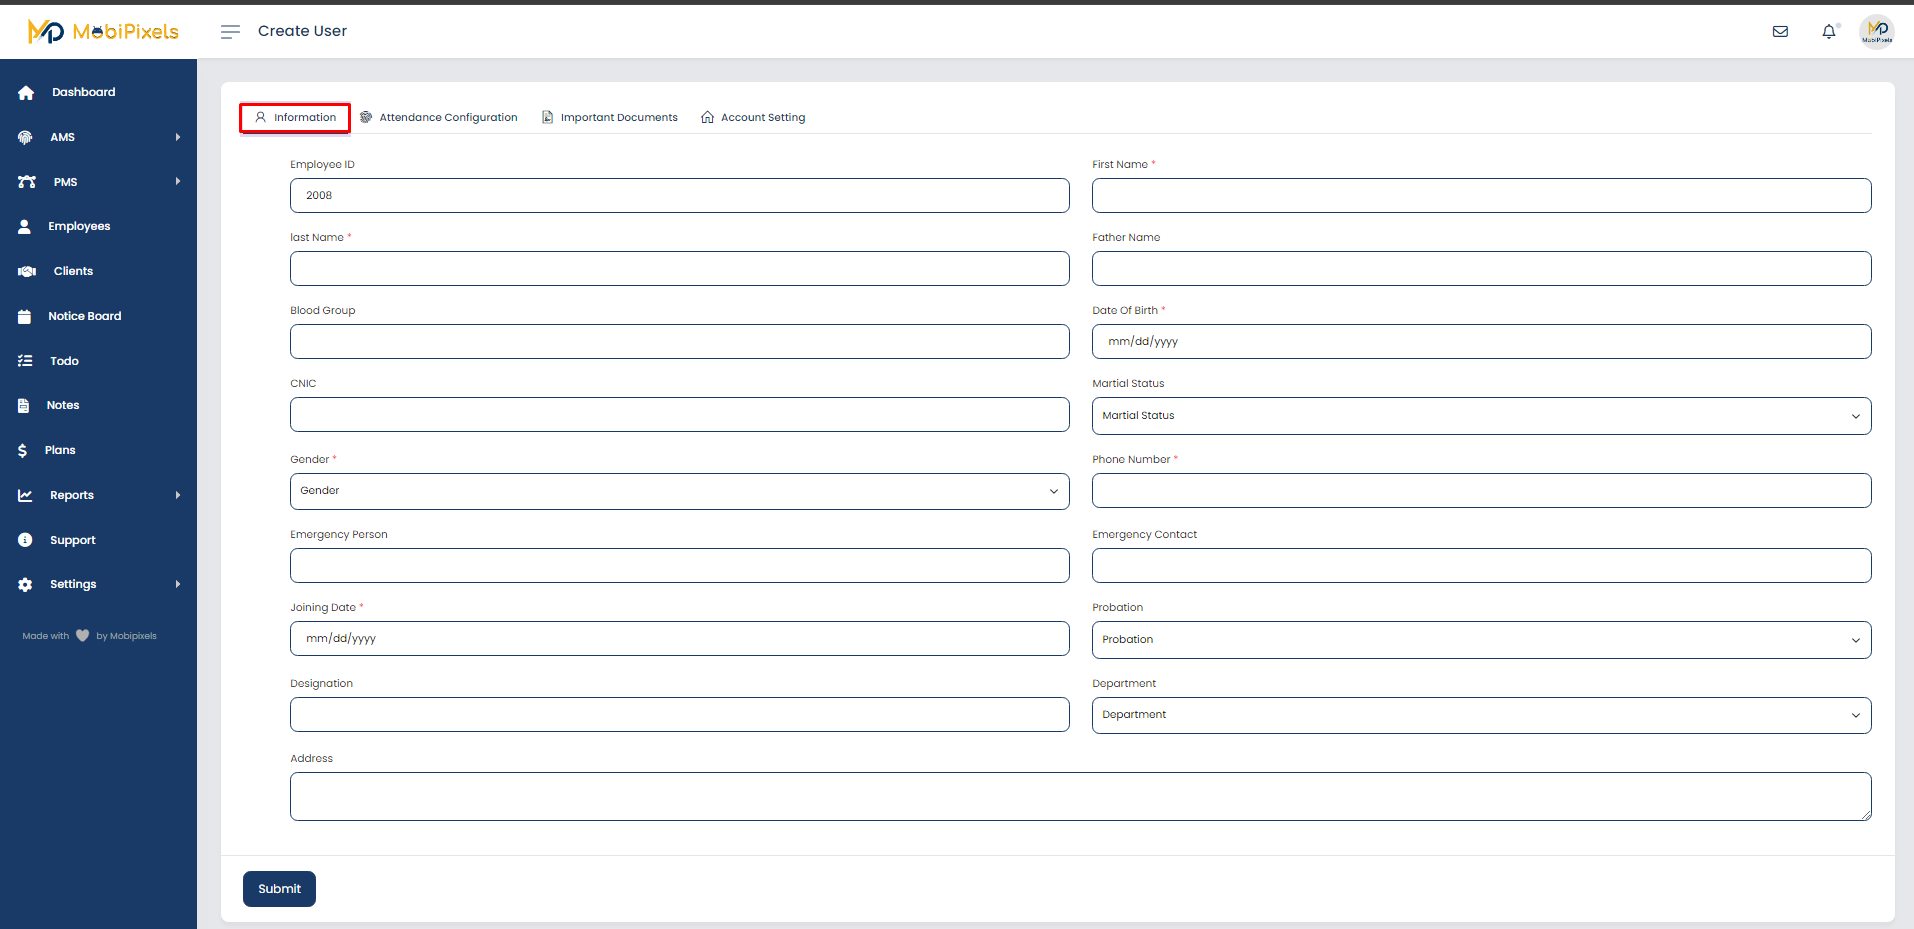
User Registration Process
- Add user personal information
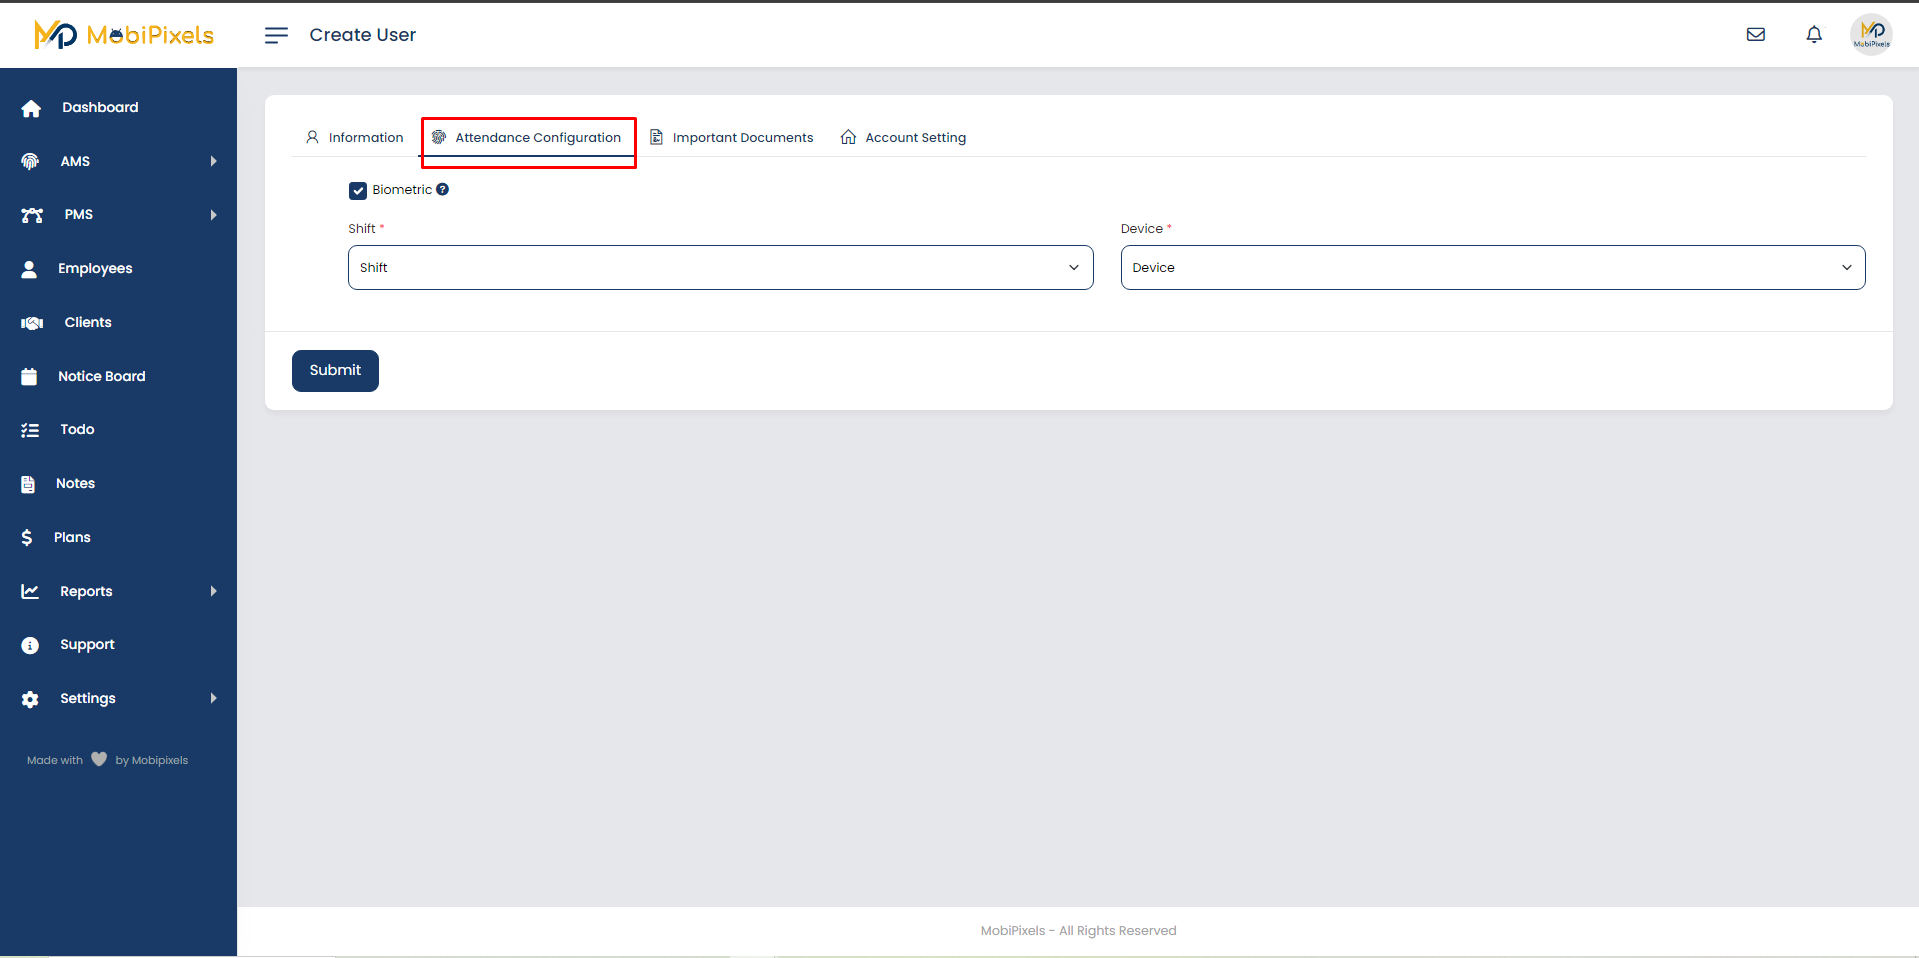
- Add user shift, punch in/out device, and enable/disable biometric in attendance configuration.
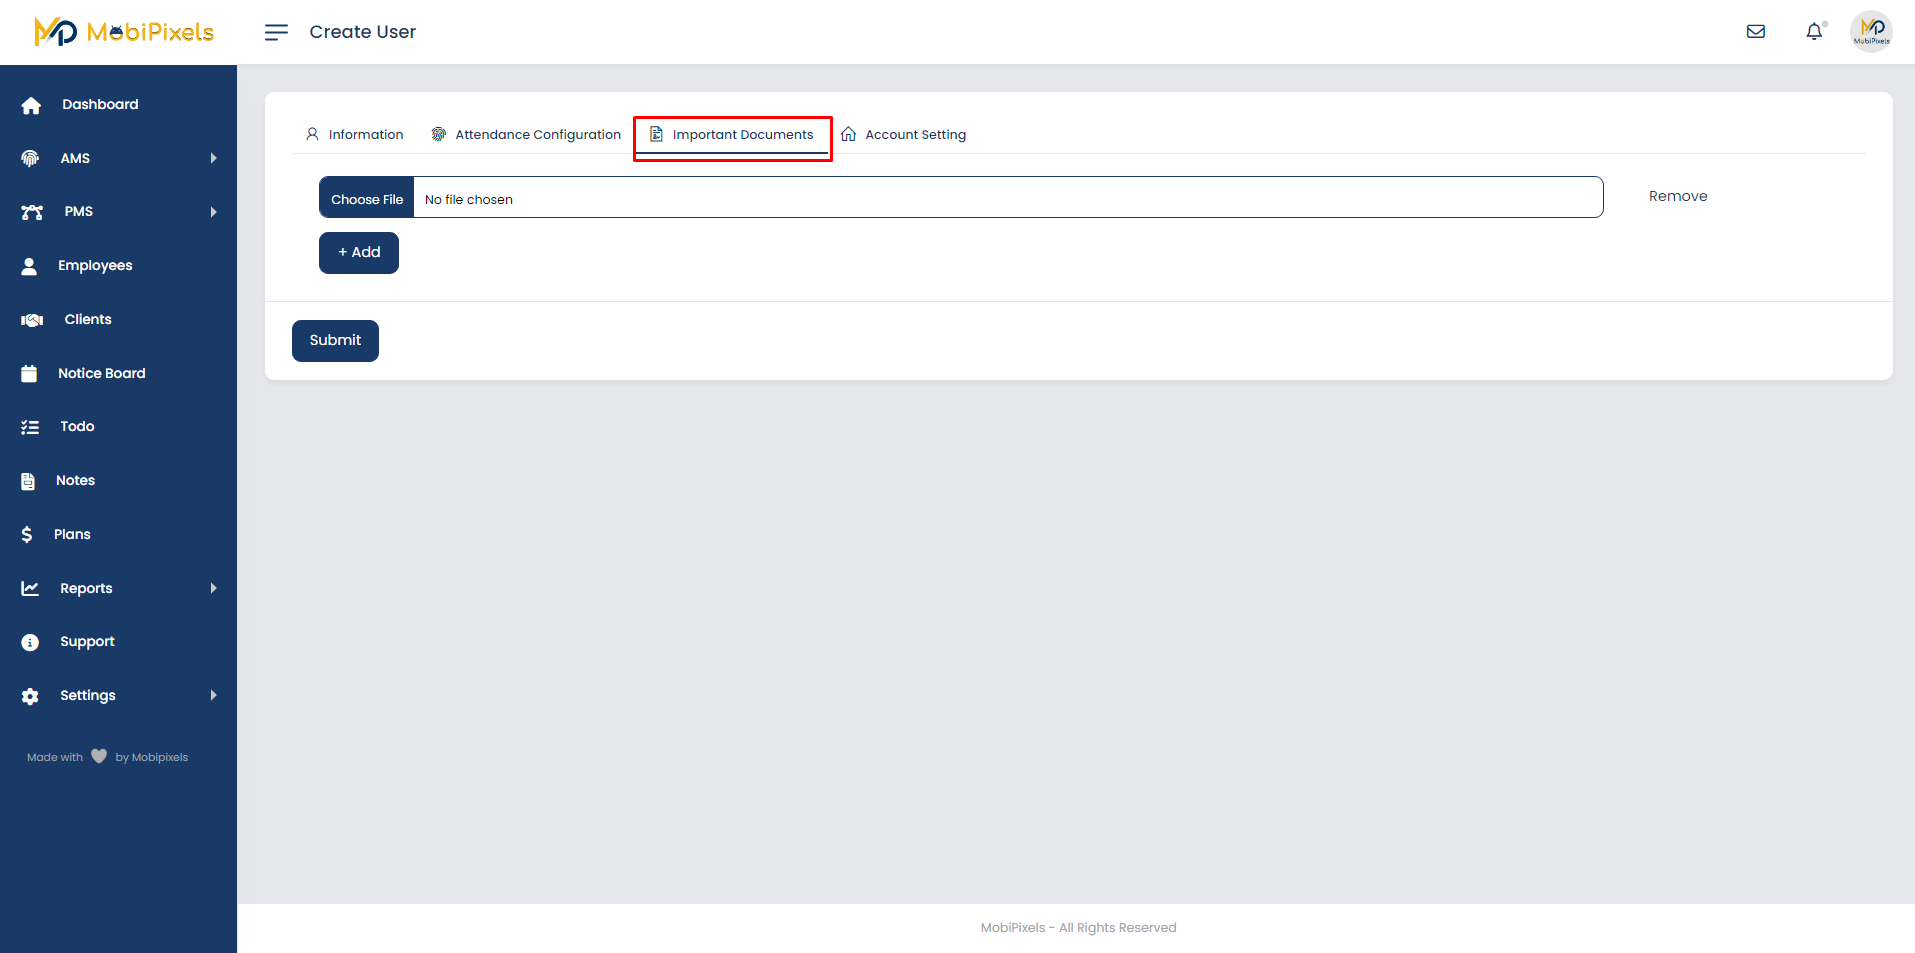
- Upload user documents
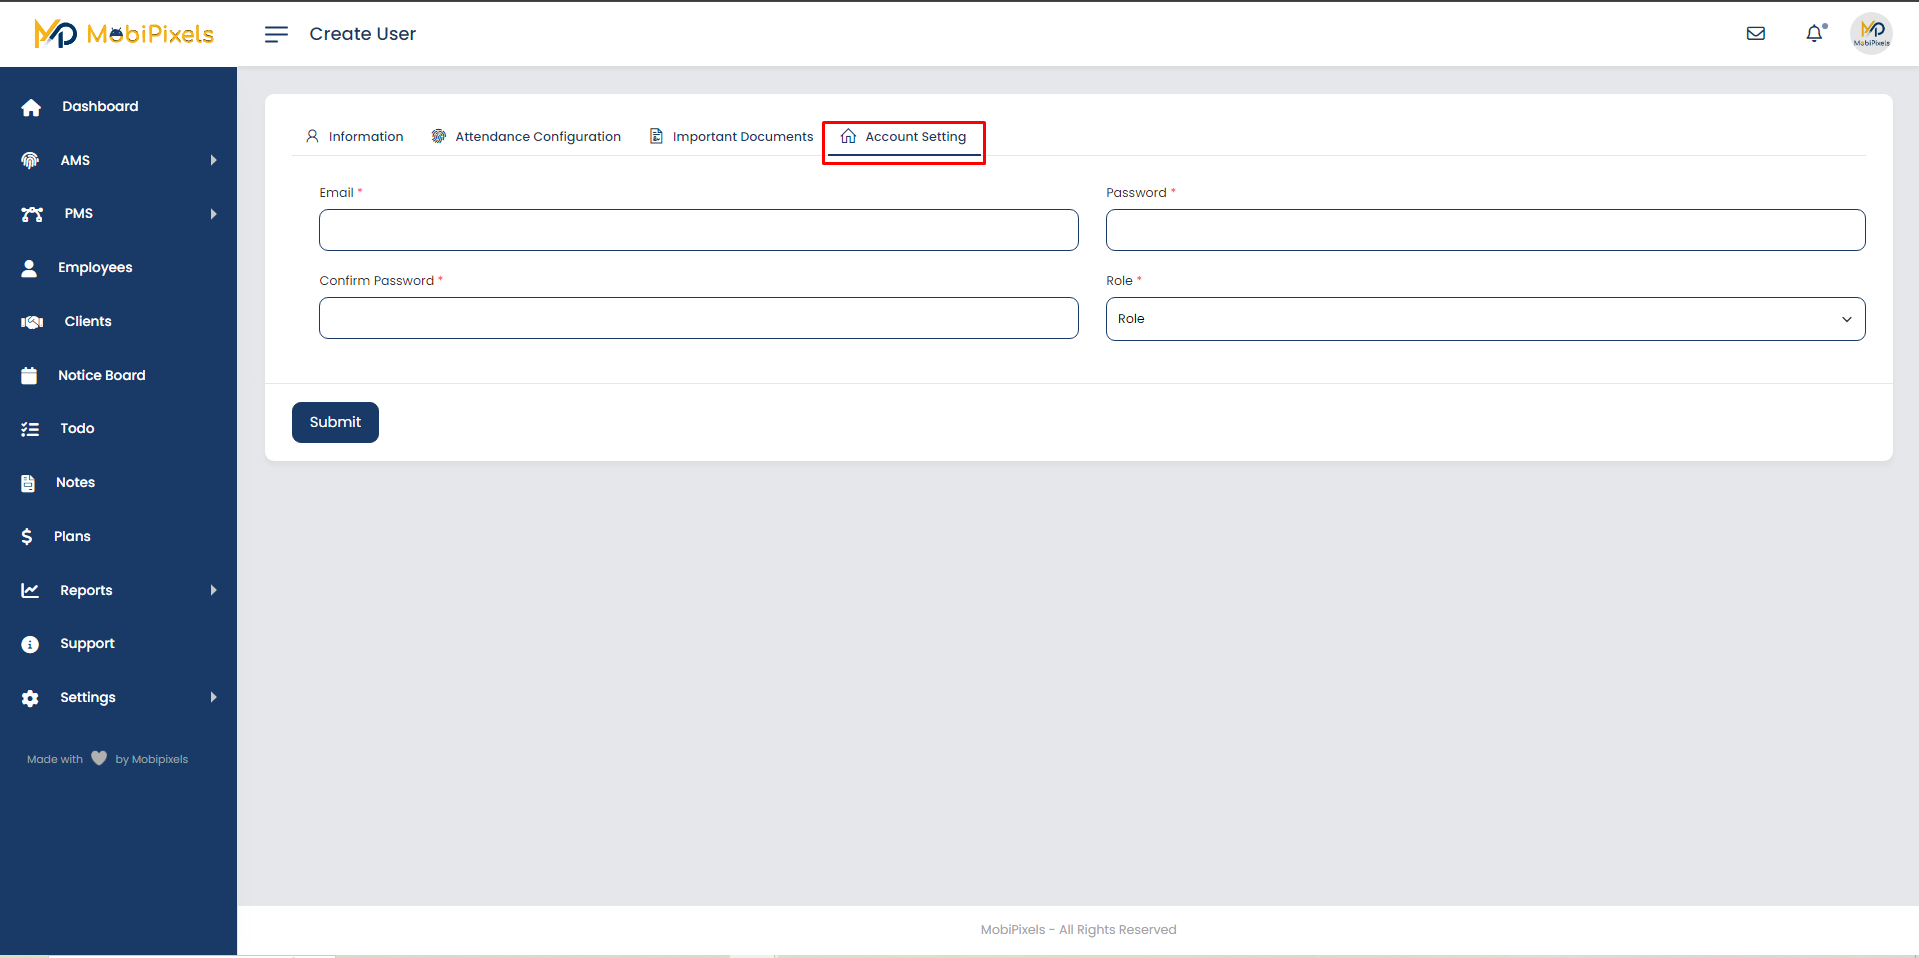
- Add user login email and password to account sharing
The free trial will be for 7 days.
For an upgrading plan, go to Plan and click on the subscribe button.
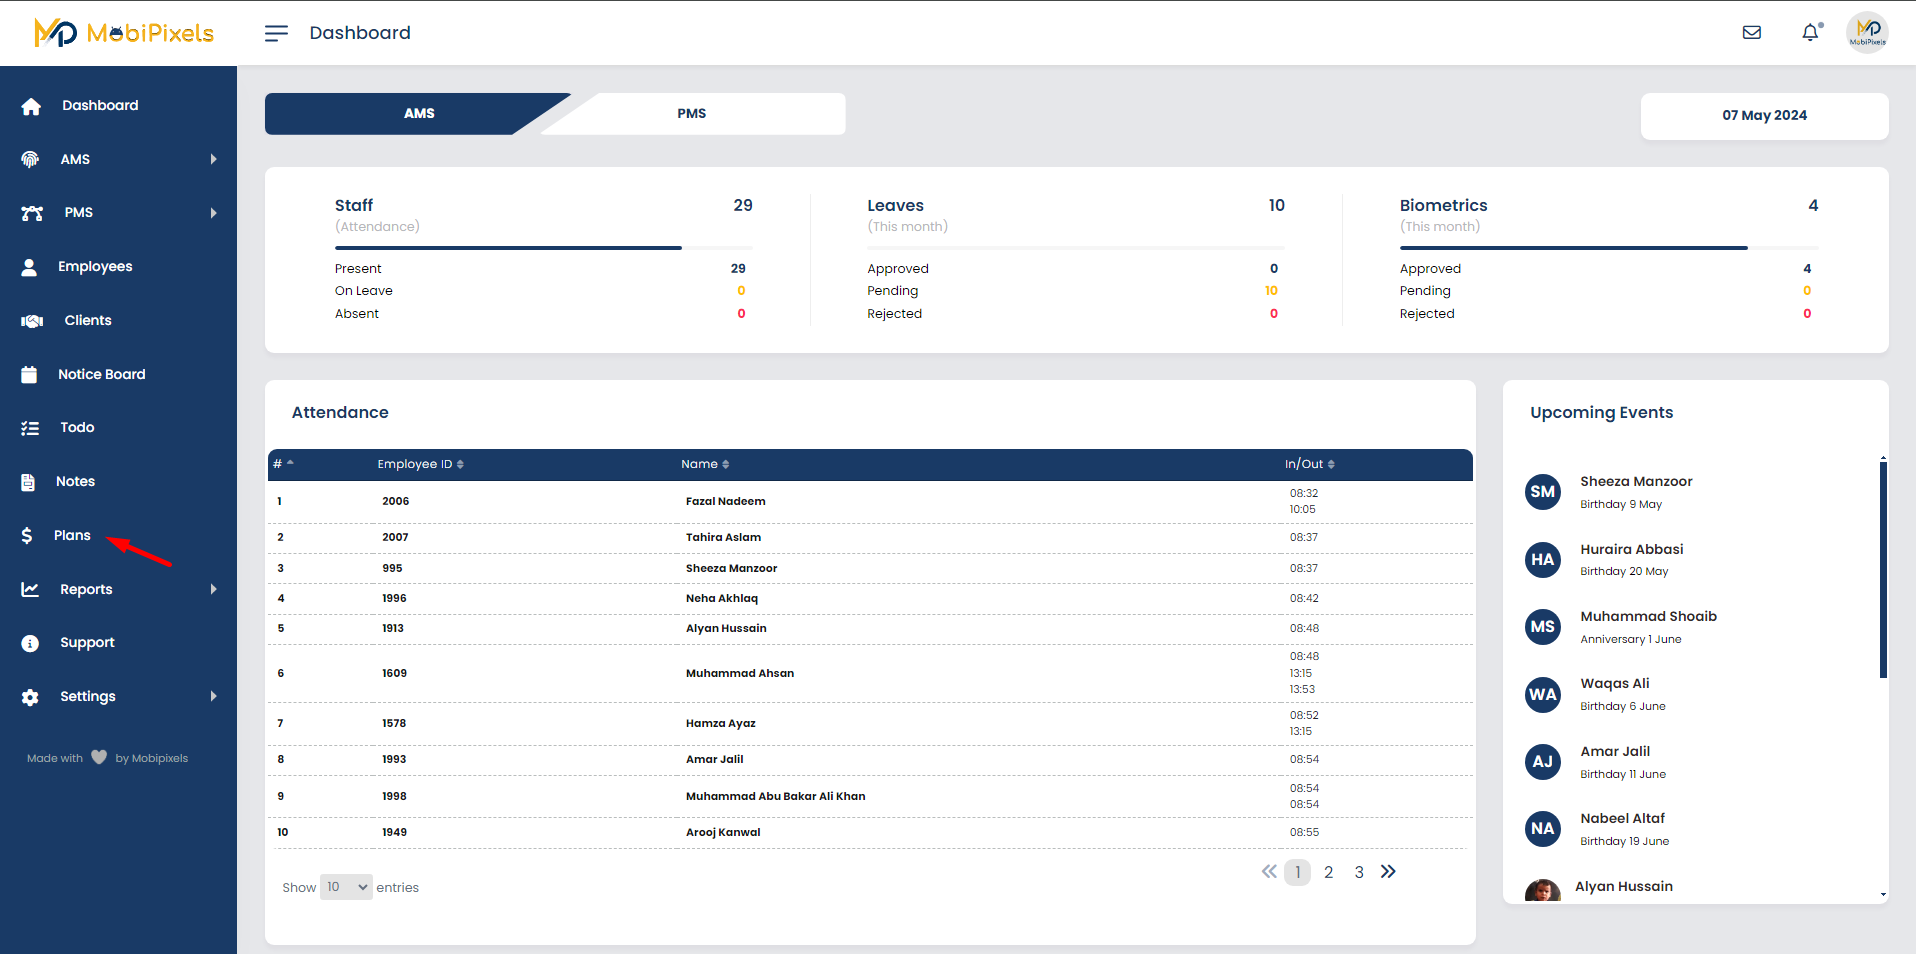
The plan screen will be open with available plans.
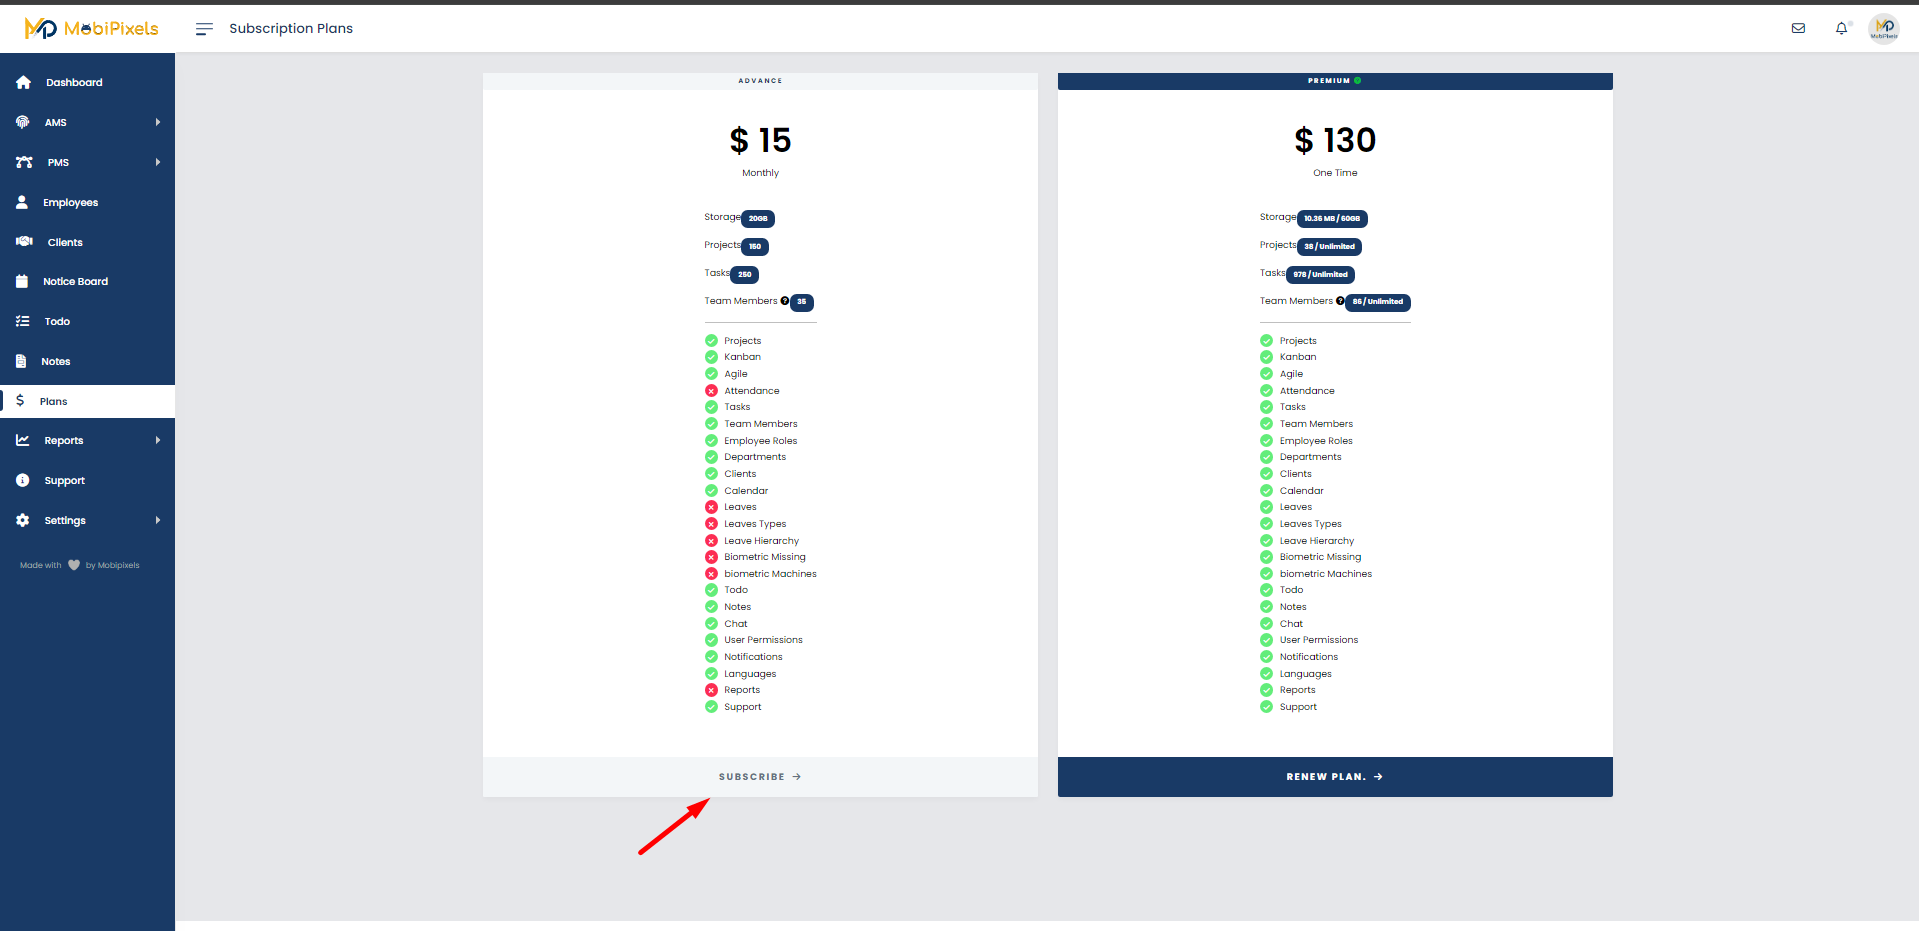
The plan will be renewed after clicking on the Renew Plan button.
Employee Management System
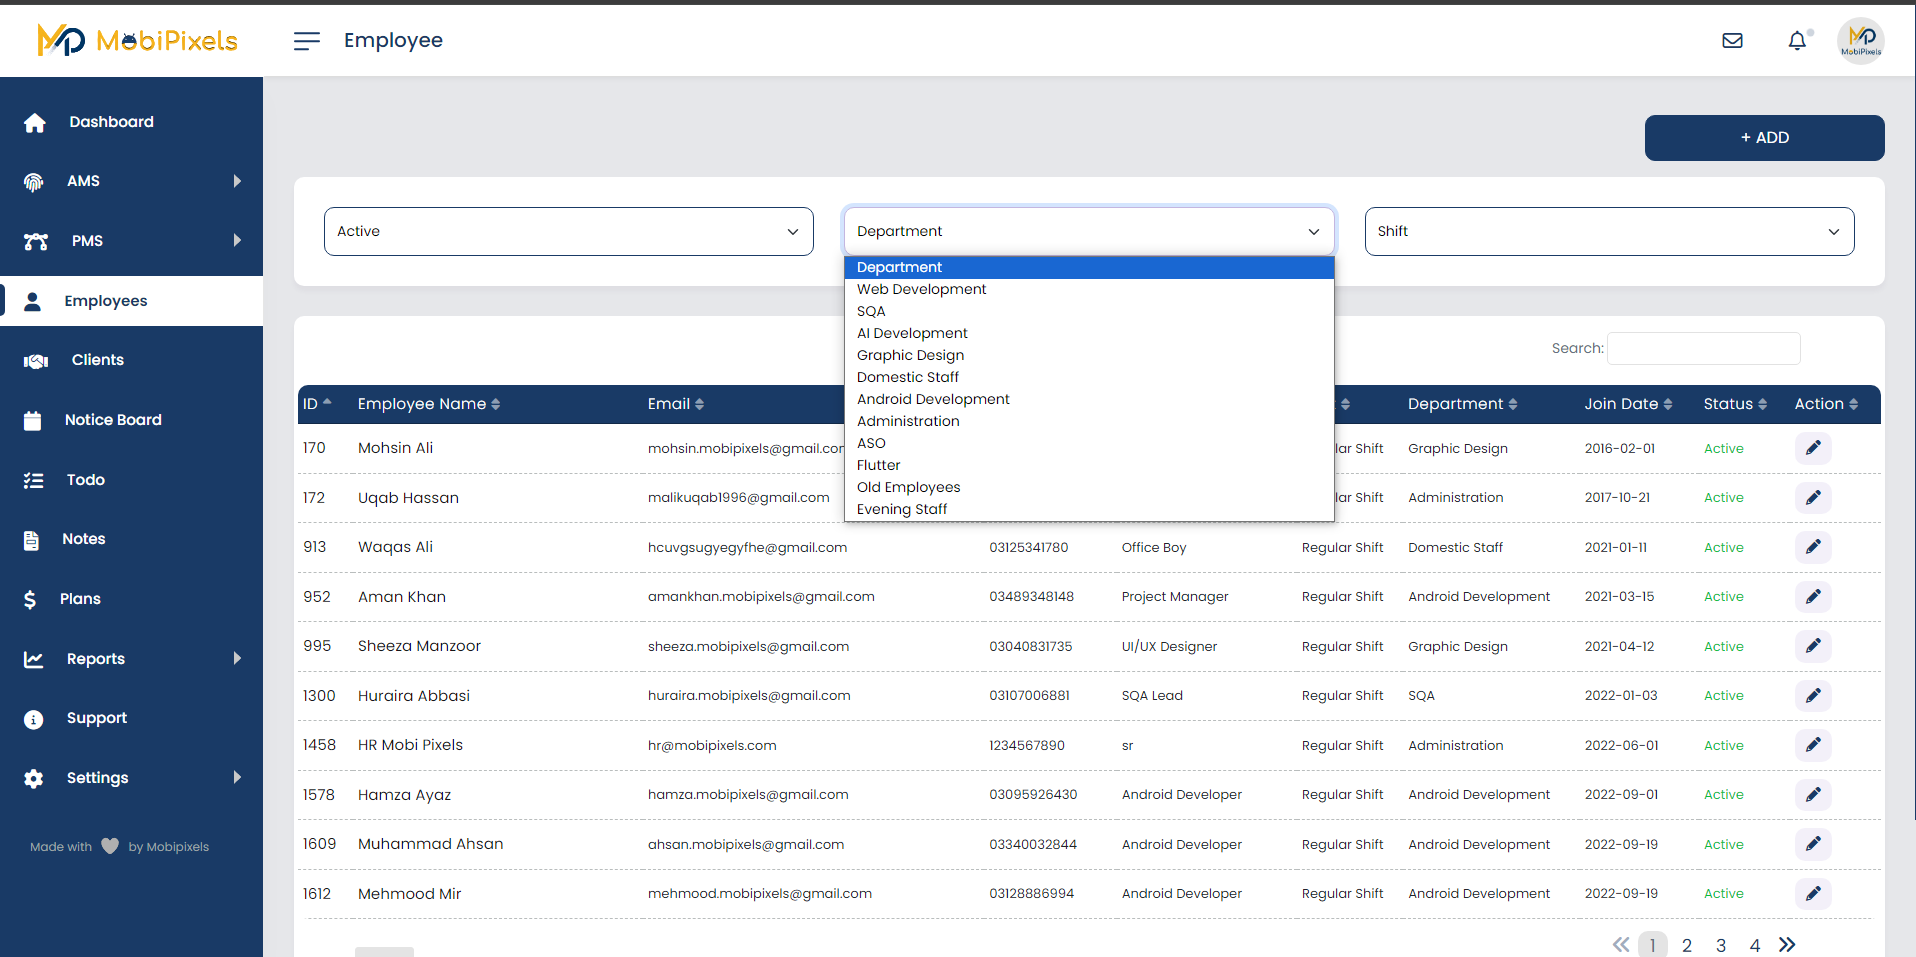
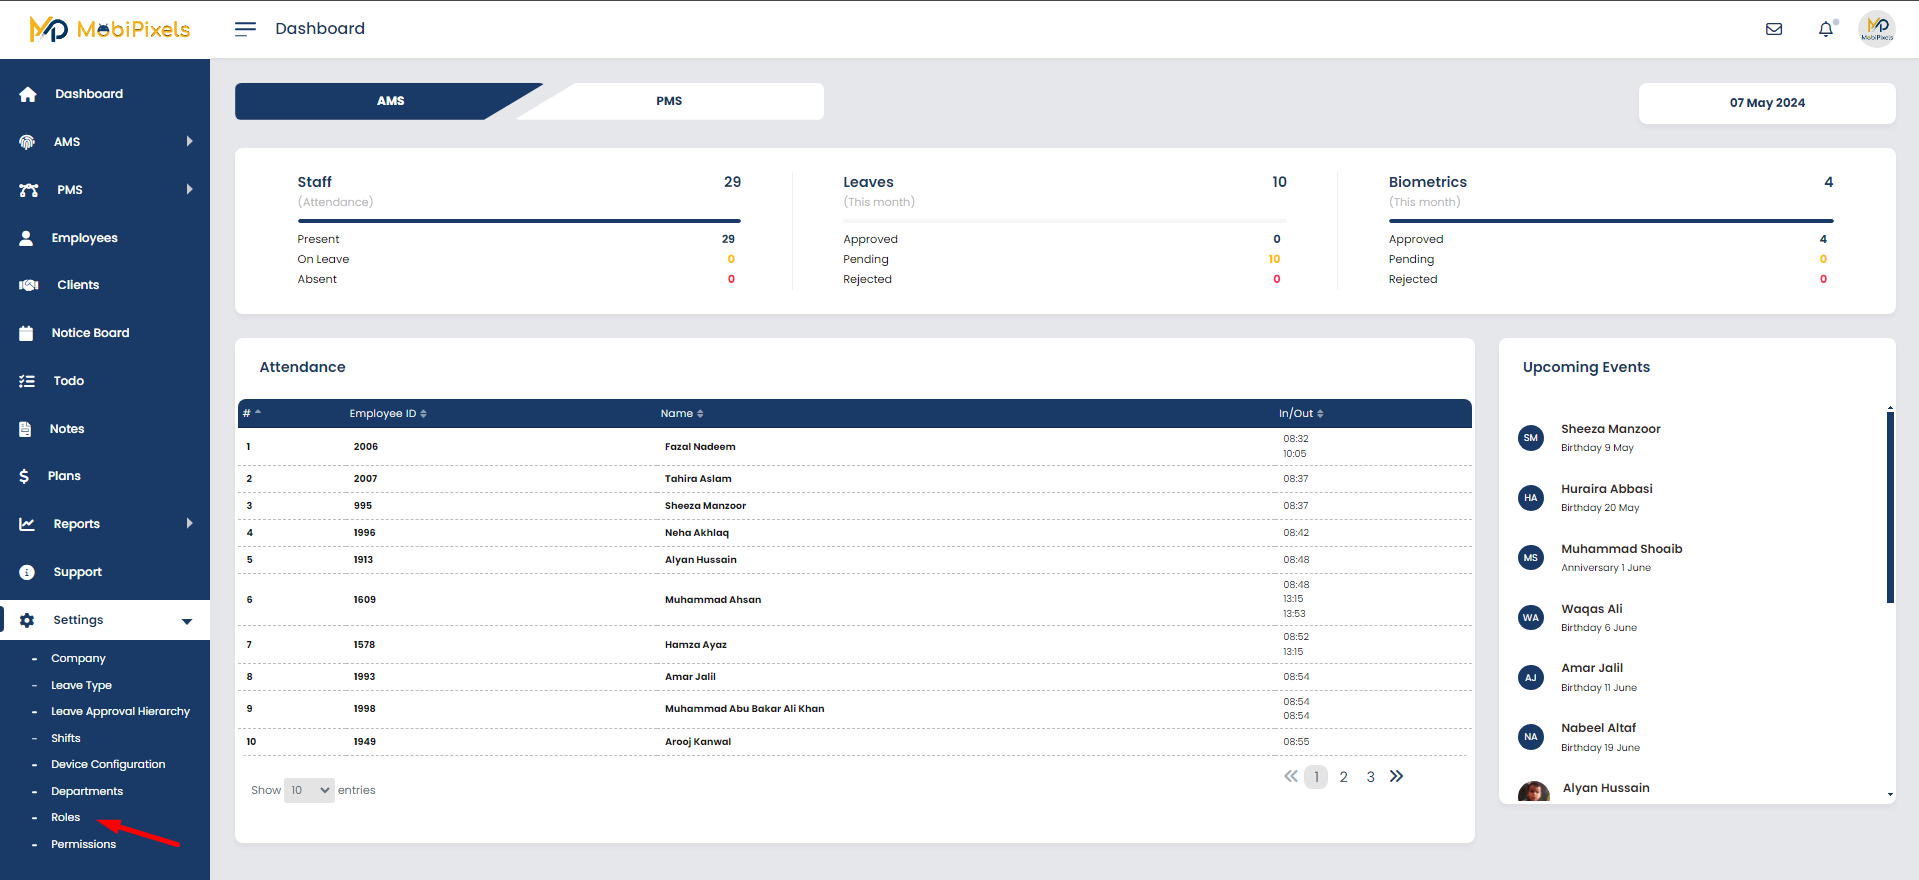
To go to the Employee module, click on Employee at the sidebar.
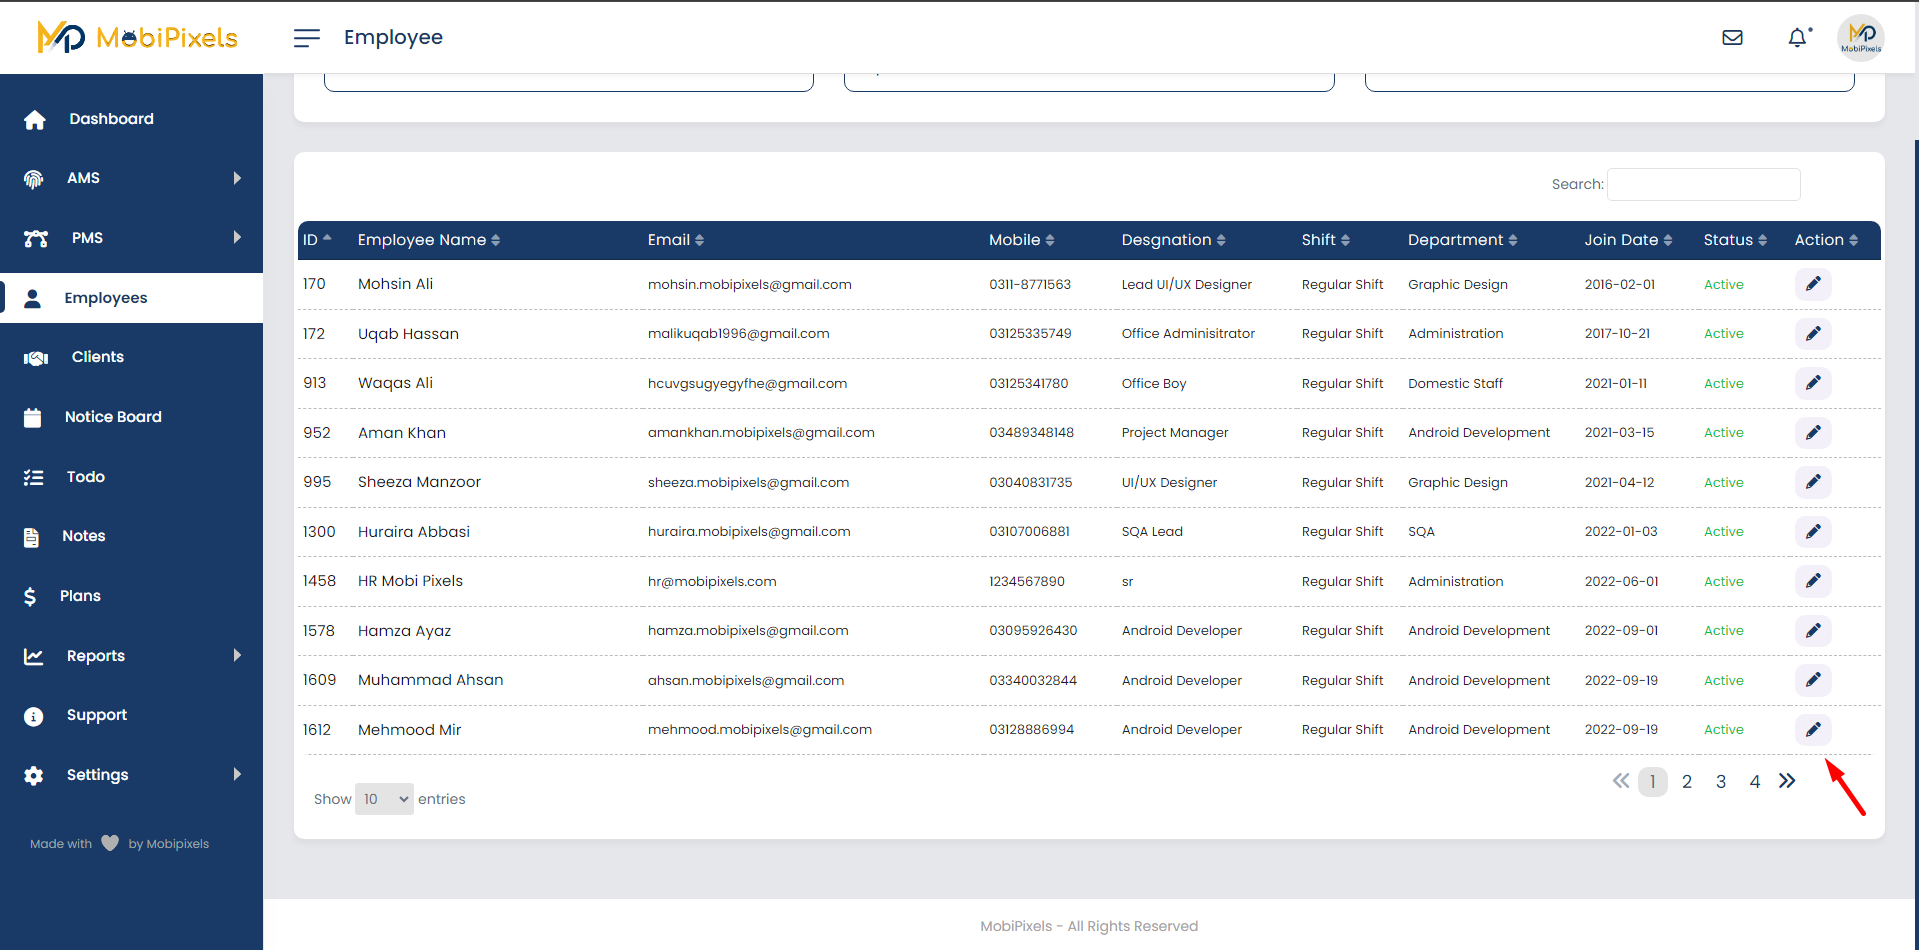
All employees will be displayed on the screen.
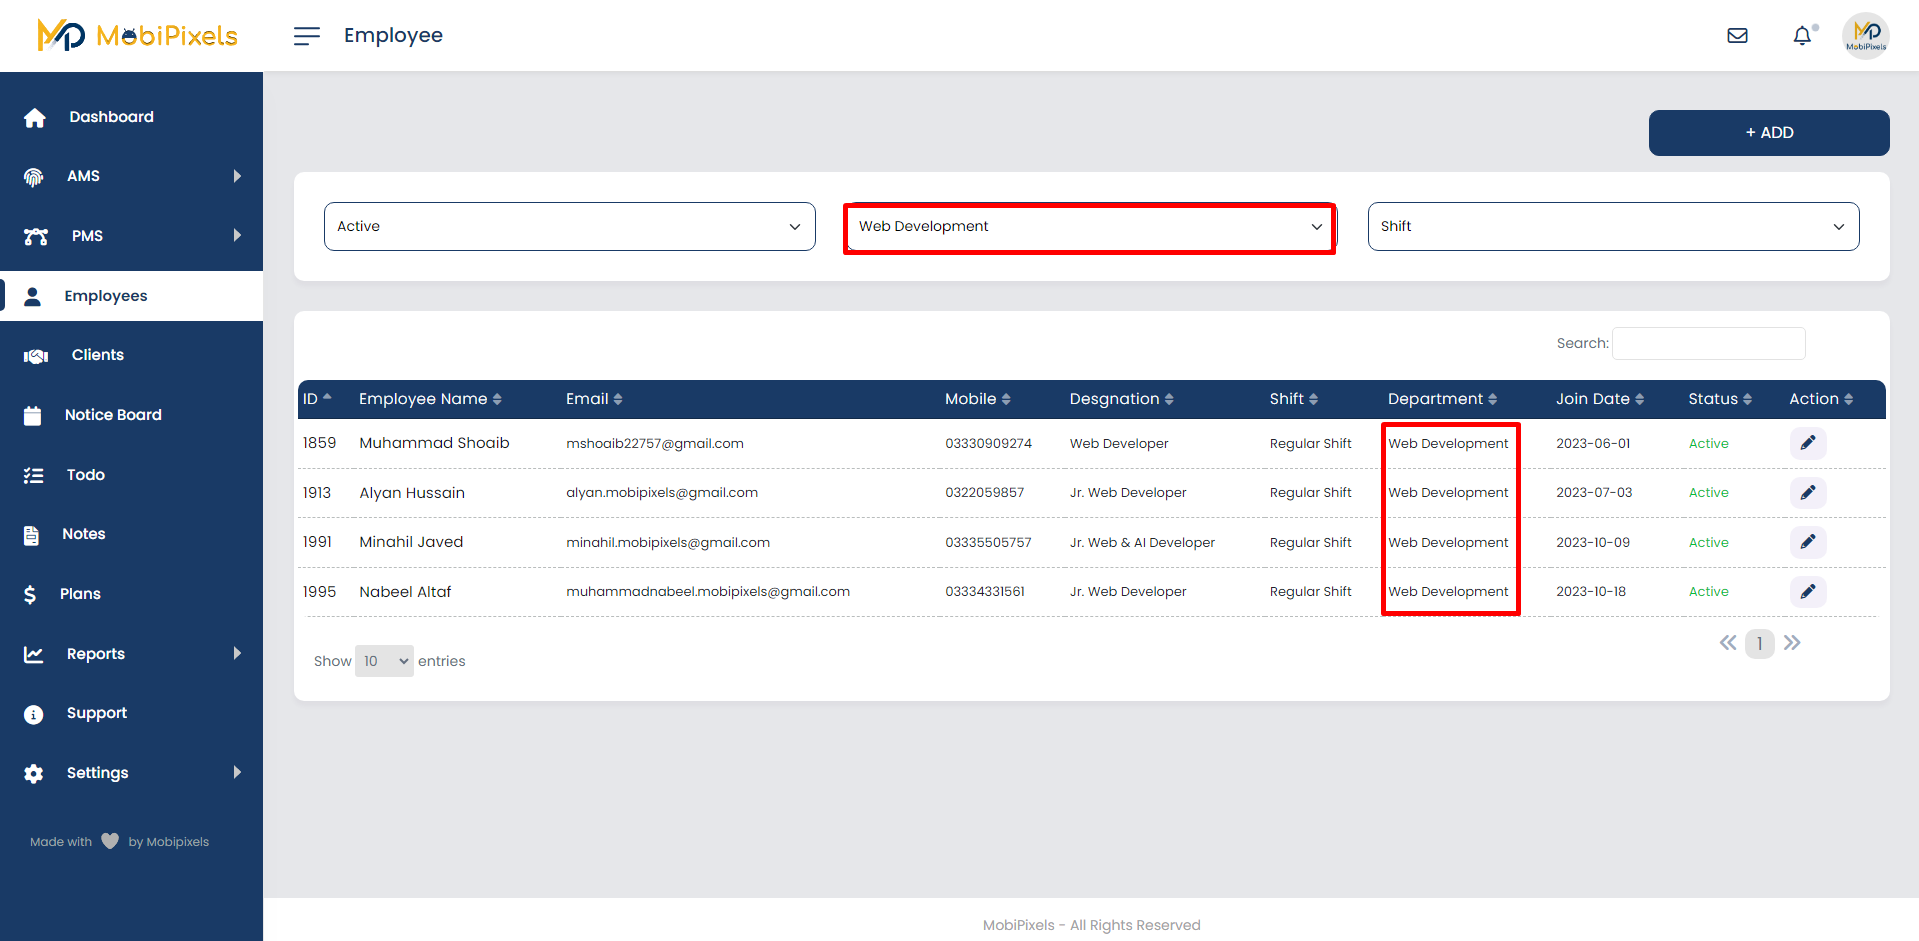
Filters can also applied to show specific employees.
After Web Department Filter Applied.
Employee details can be Edit by clicking on the Edit icon ✏️.
- Personal Information
- Attendance Configuration
- Documents
- Account Setting
- Resignation/Termination
details can be edited.
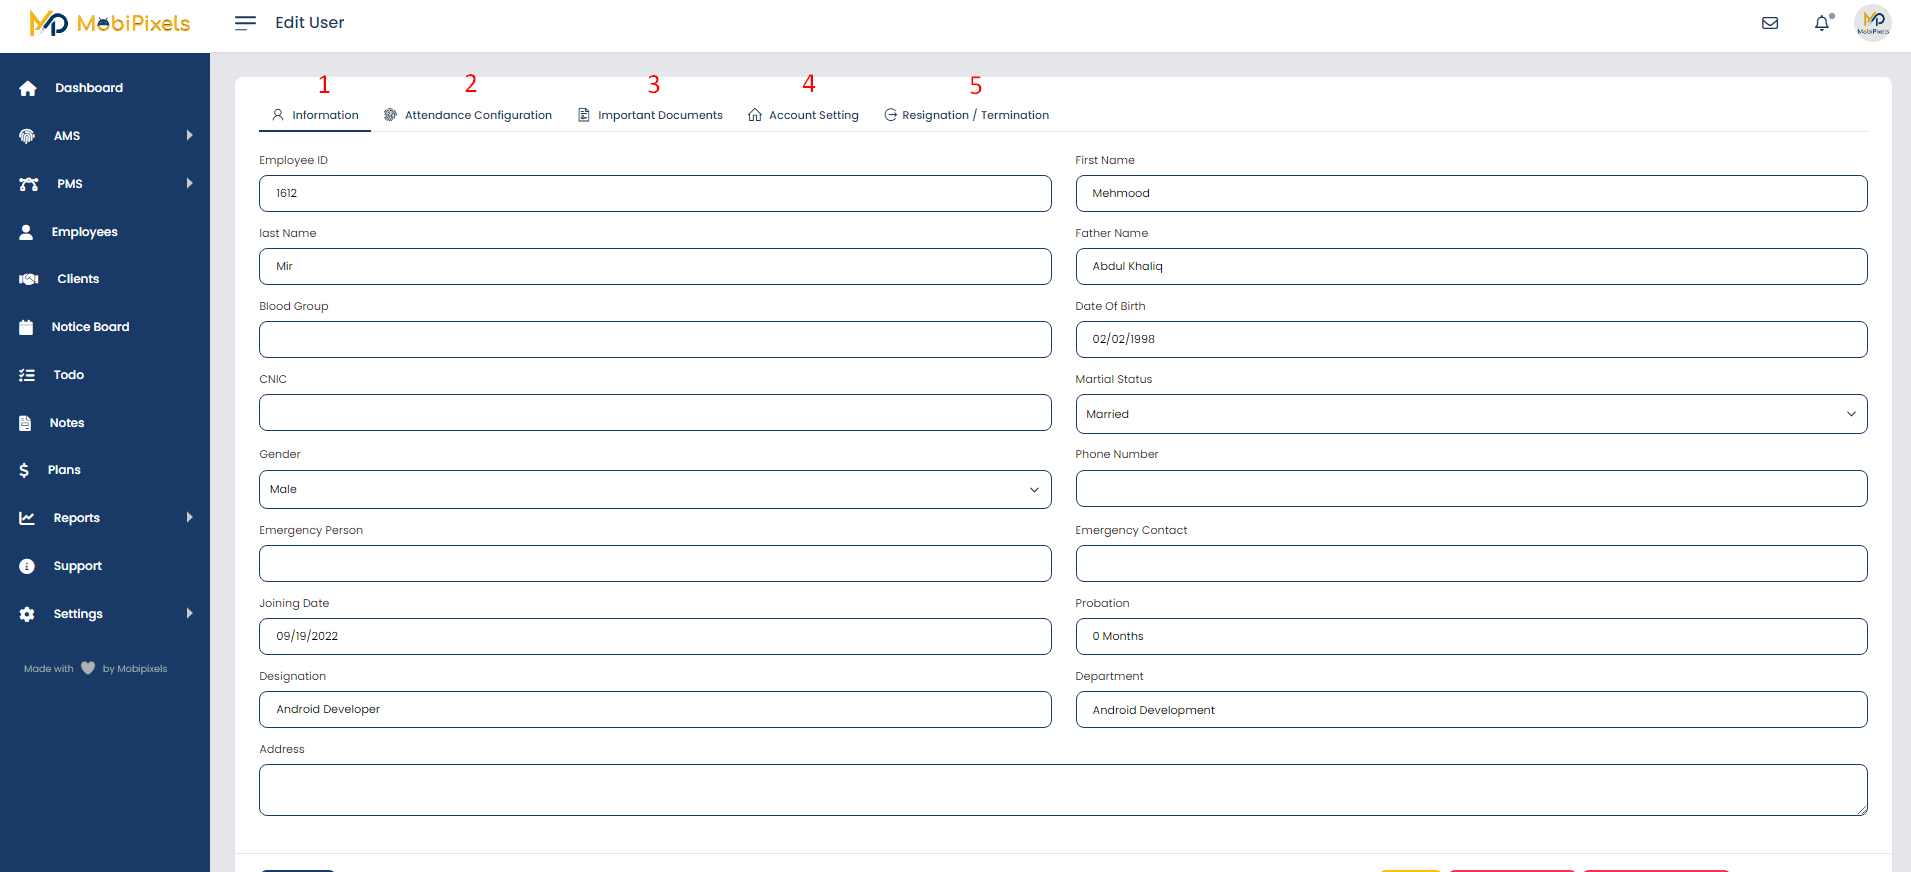
Employee ID in the registration process must be the same and used in registering employee details on punch in/out machine.

Roles and Permissions
There are 3 major roles in the System.
- Admin - which has all access
- Employee - which has access to own contents
- Client - which can access to view own project performance
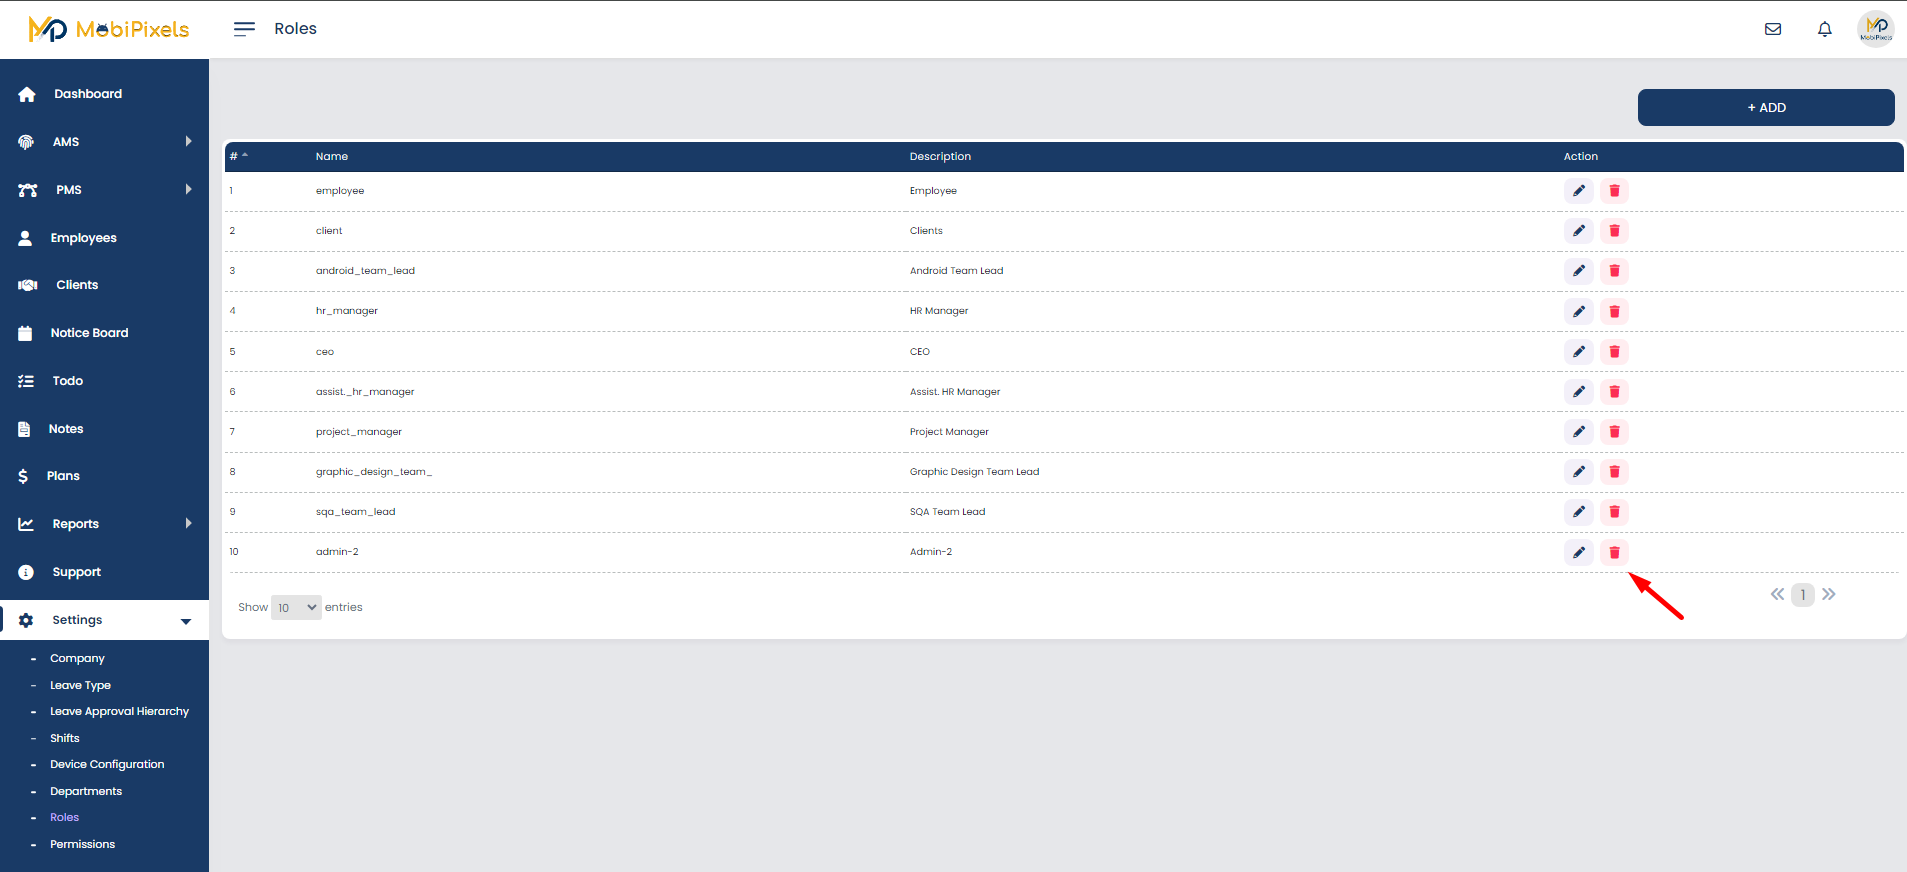
Roles
To view roles, select Roles, by selecting Setting > Roles
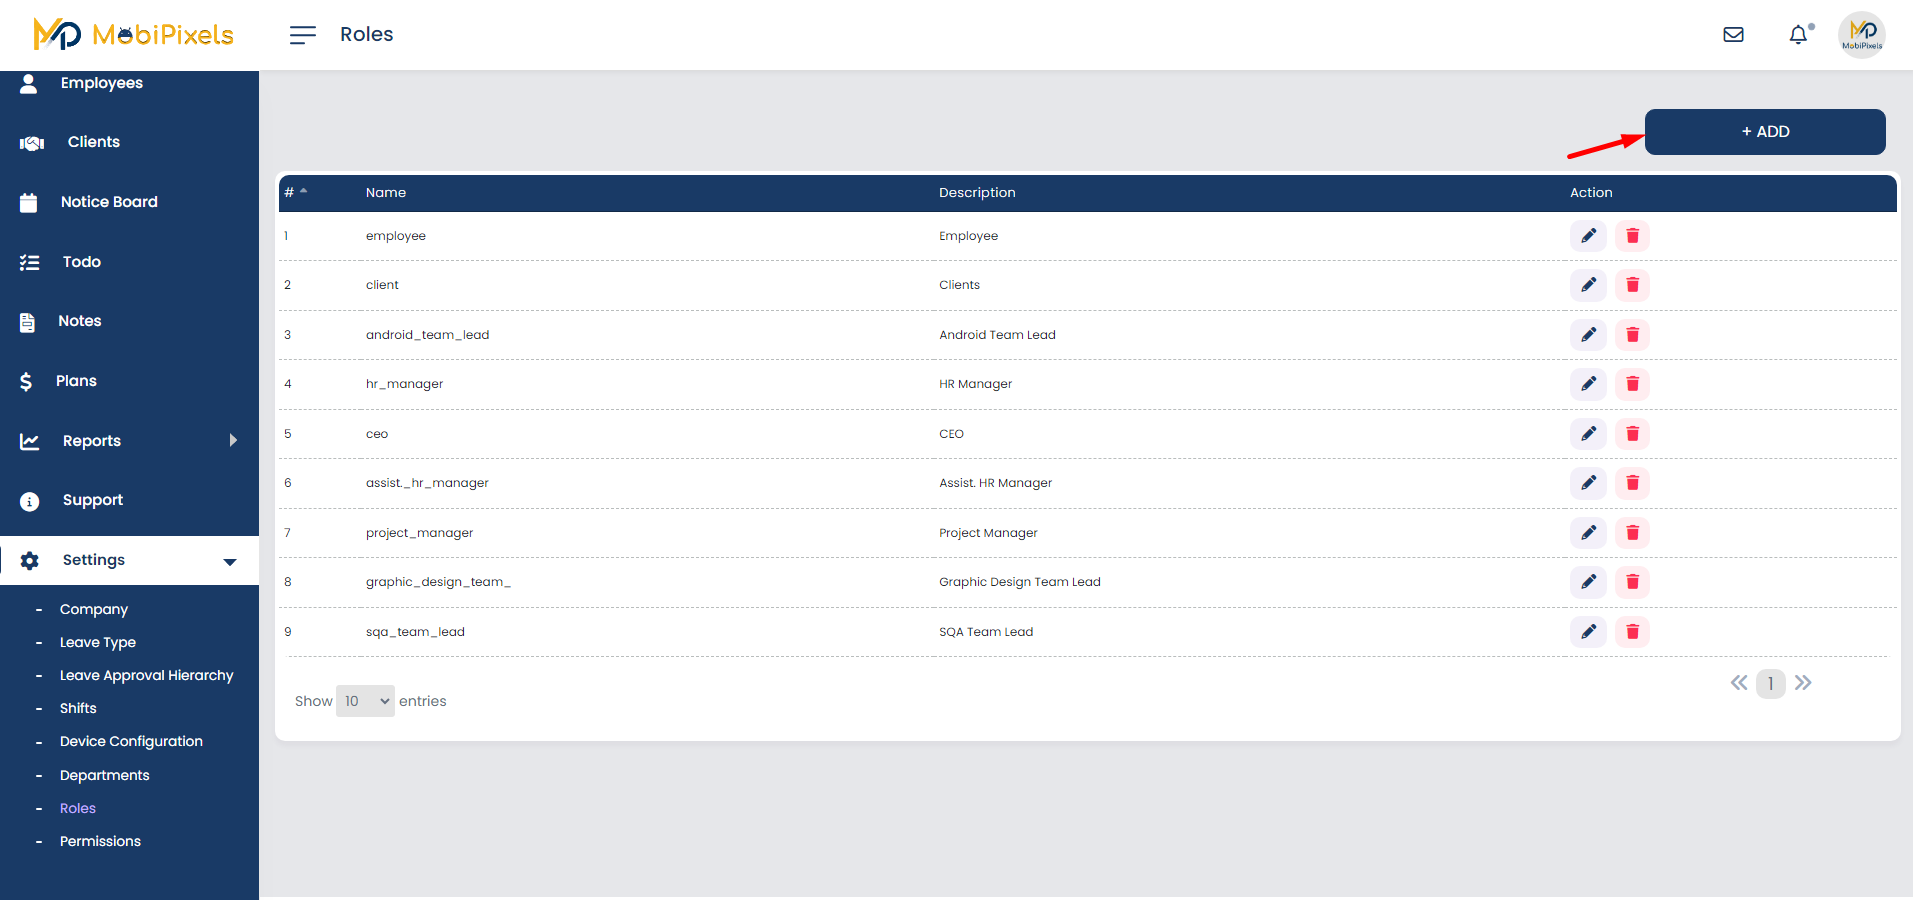
All roles are shown on screen,
Roles can be 1 Edit ✏️ or 2 Delete

New roles can be added by clicking on the Add button.
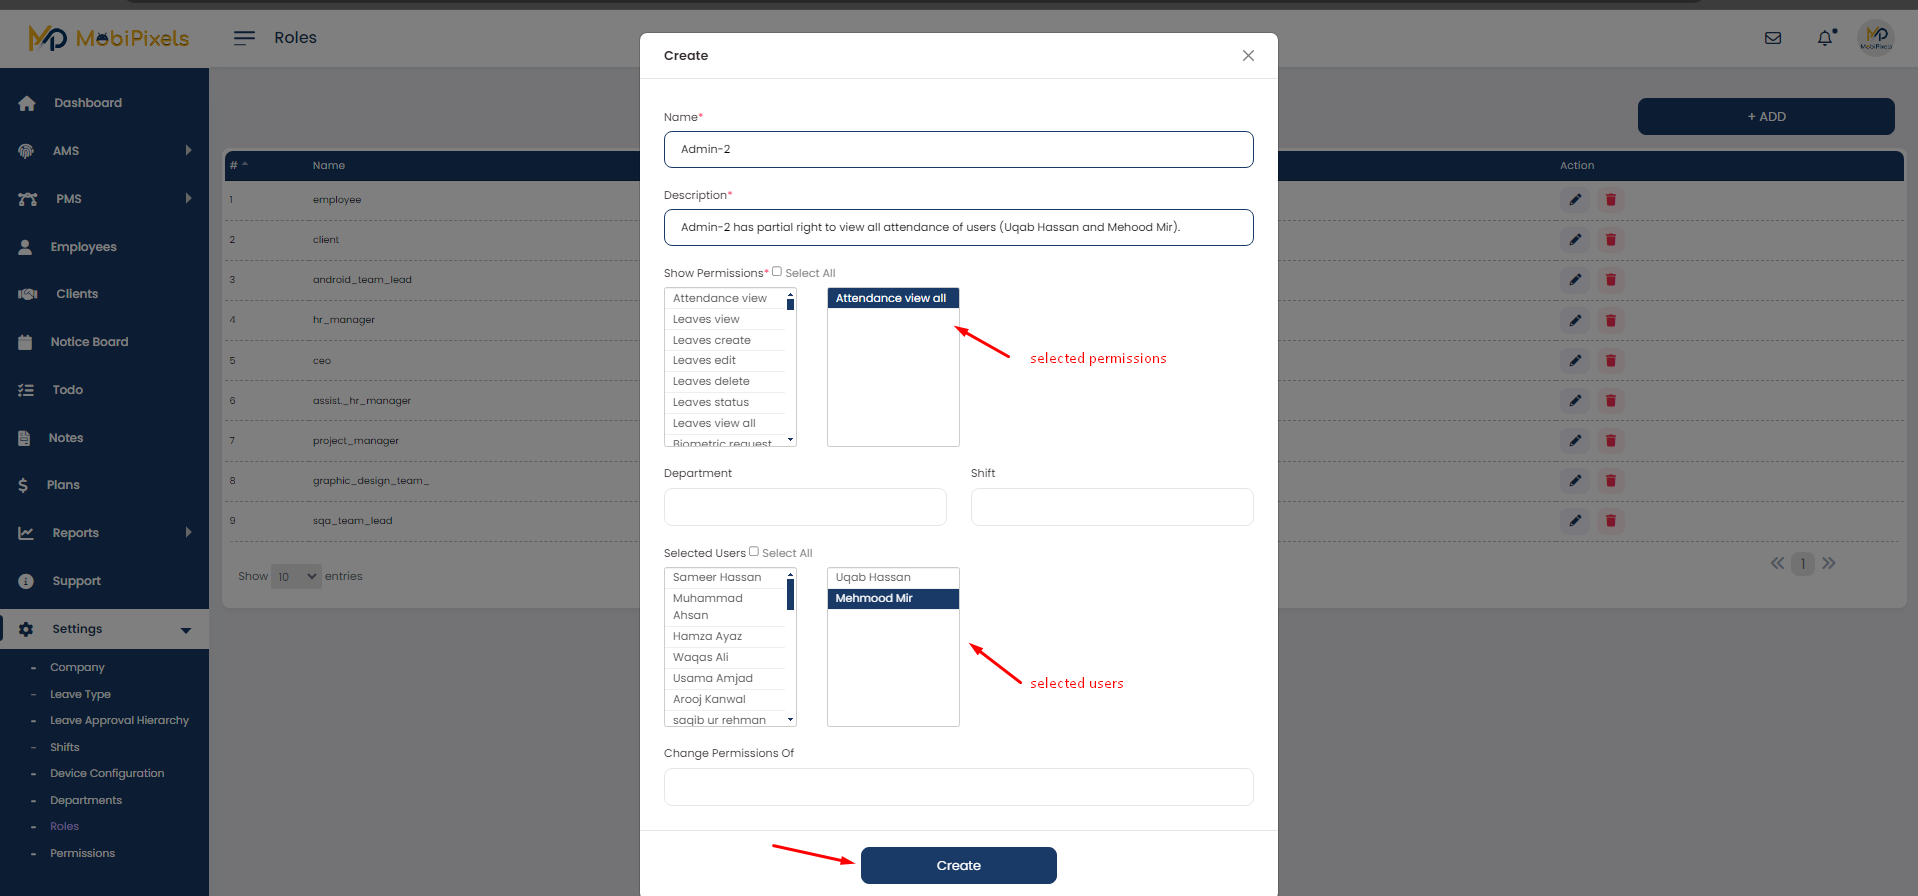
Create Role window will be open to add users and permissions.
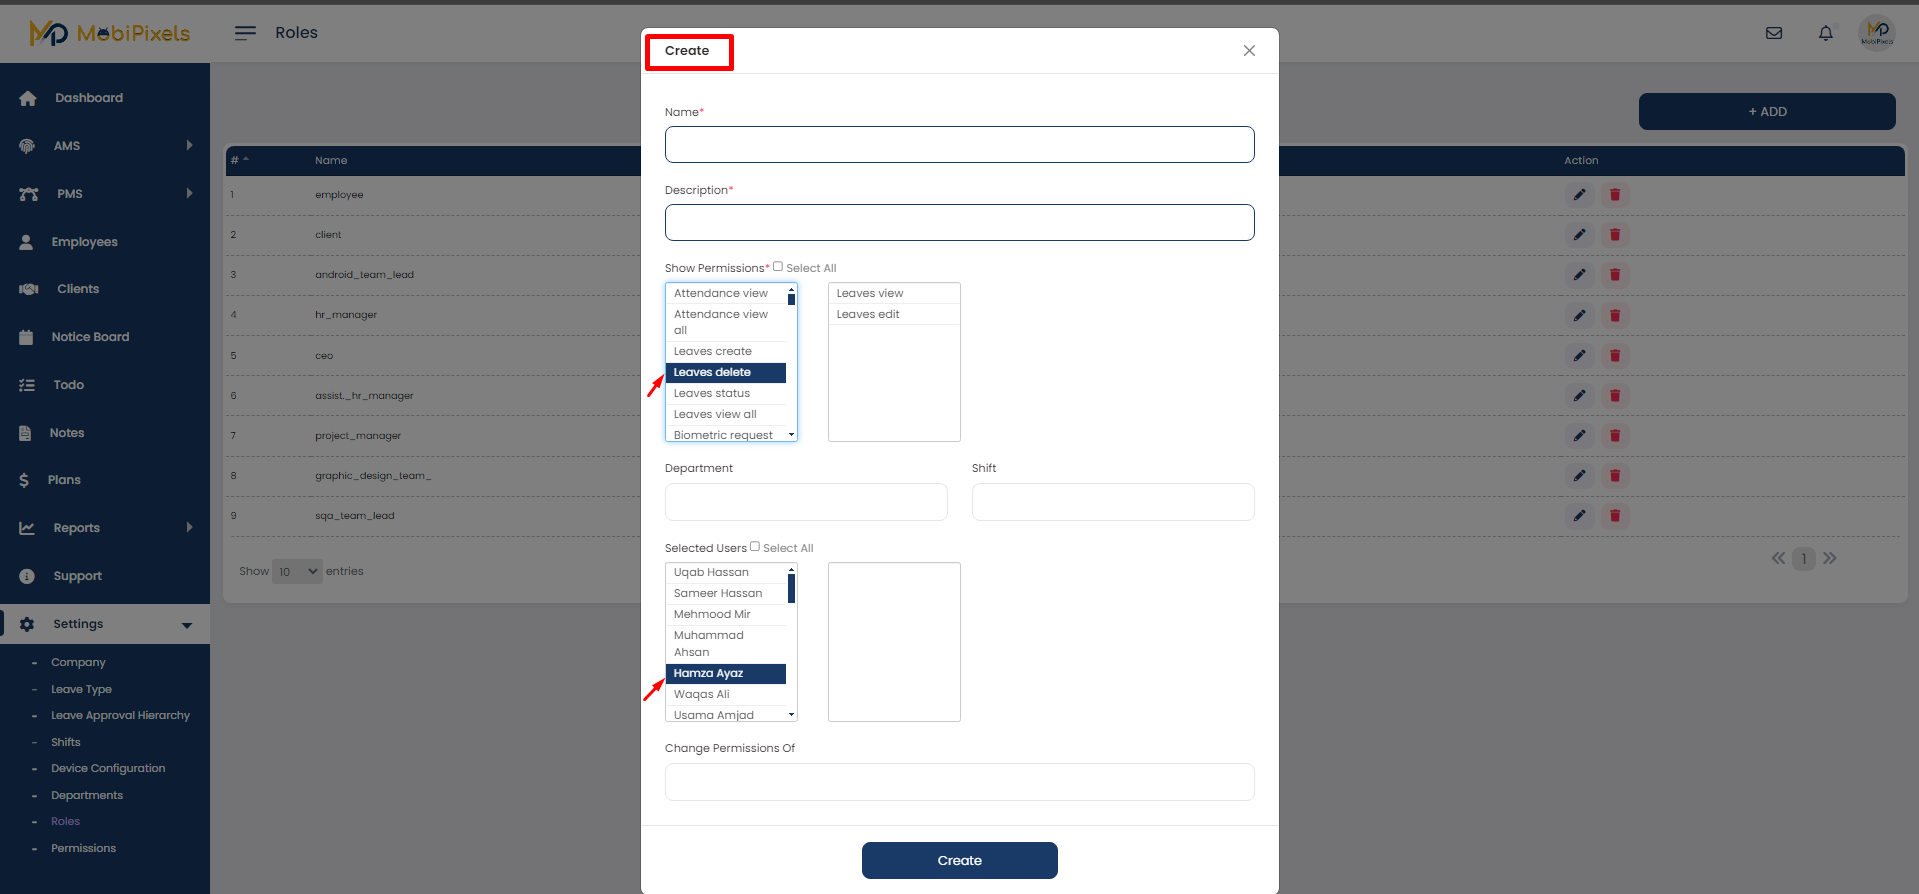
Permission and Users can be selected after clicking on it.
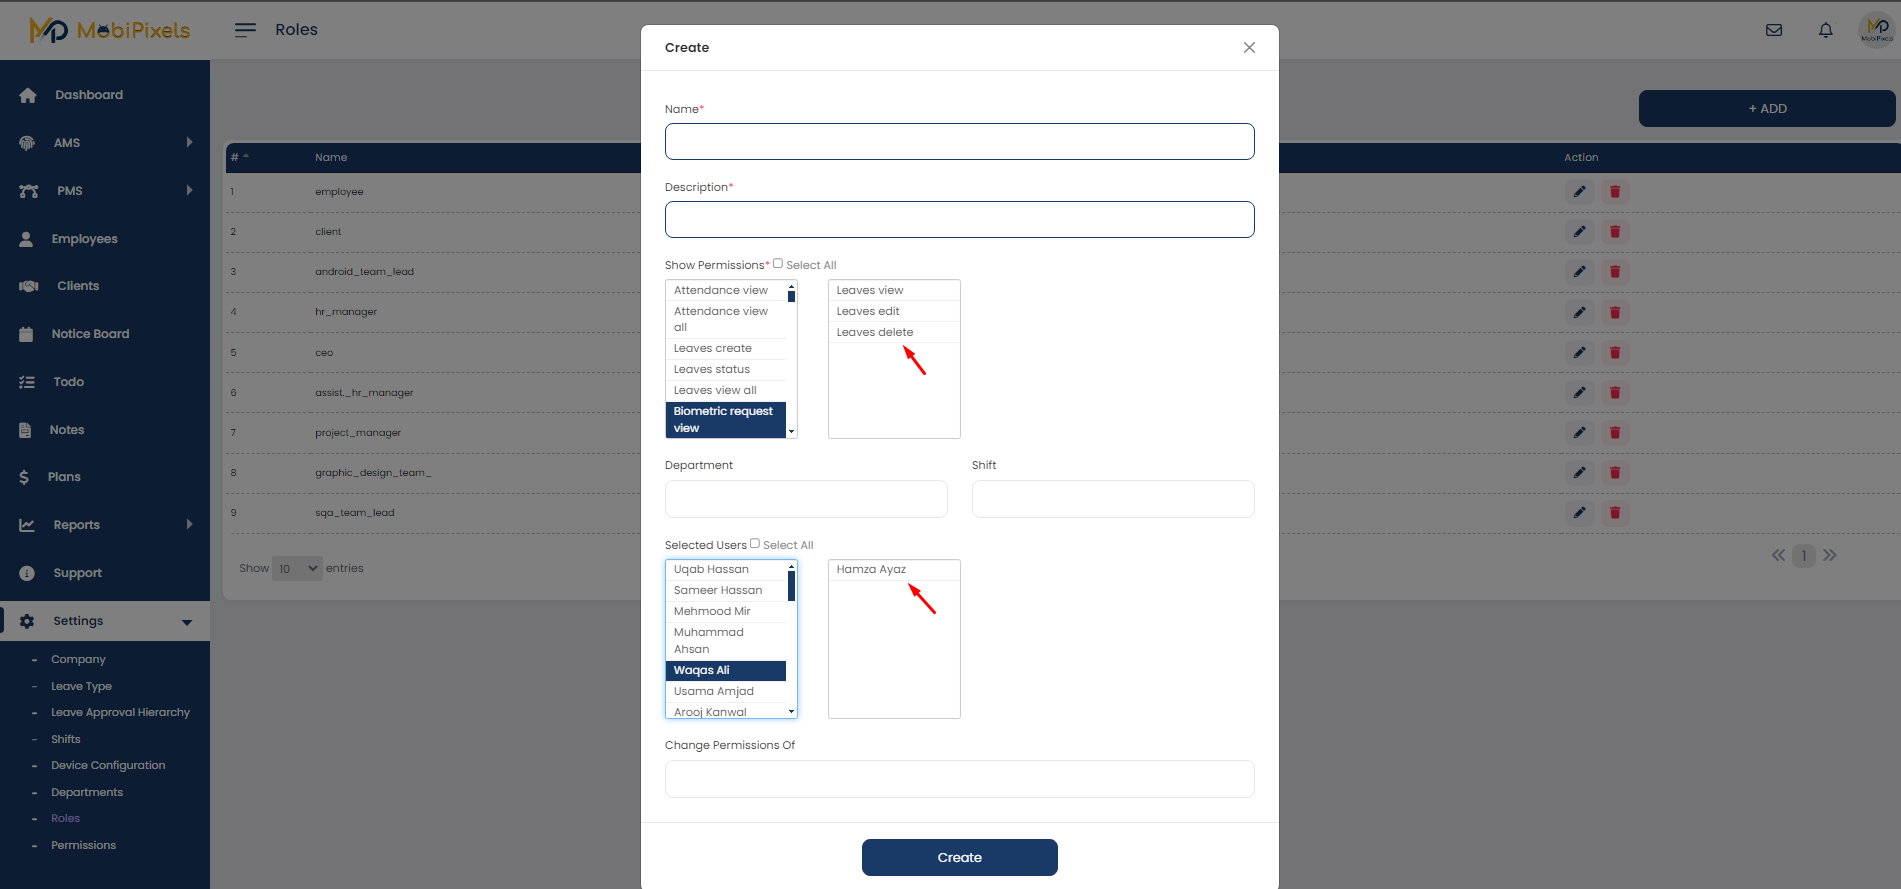
Role will be created after clicking on the create button.
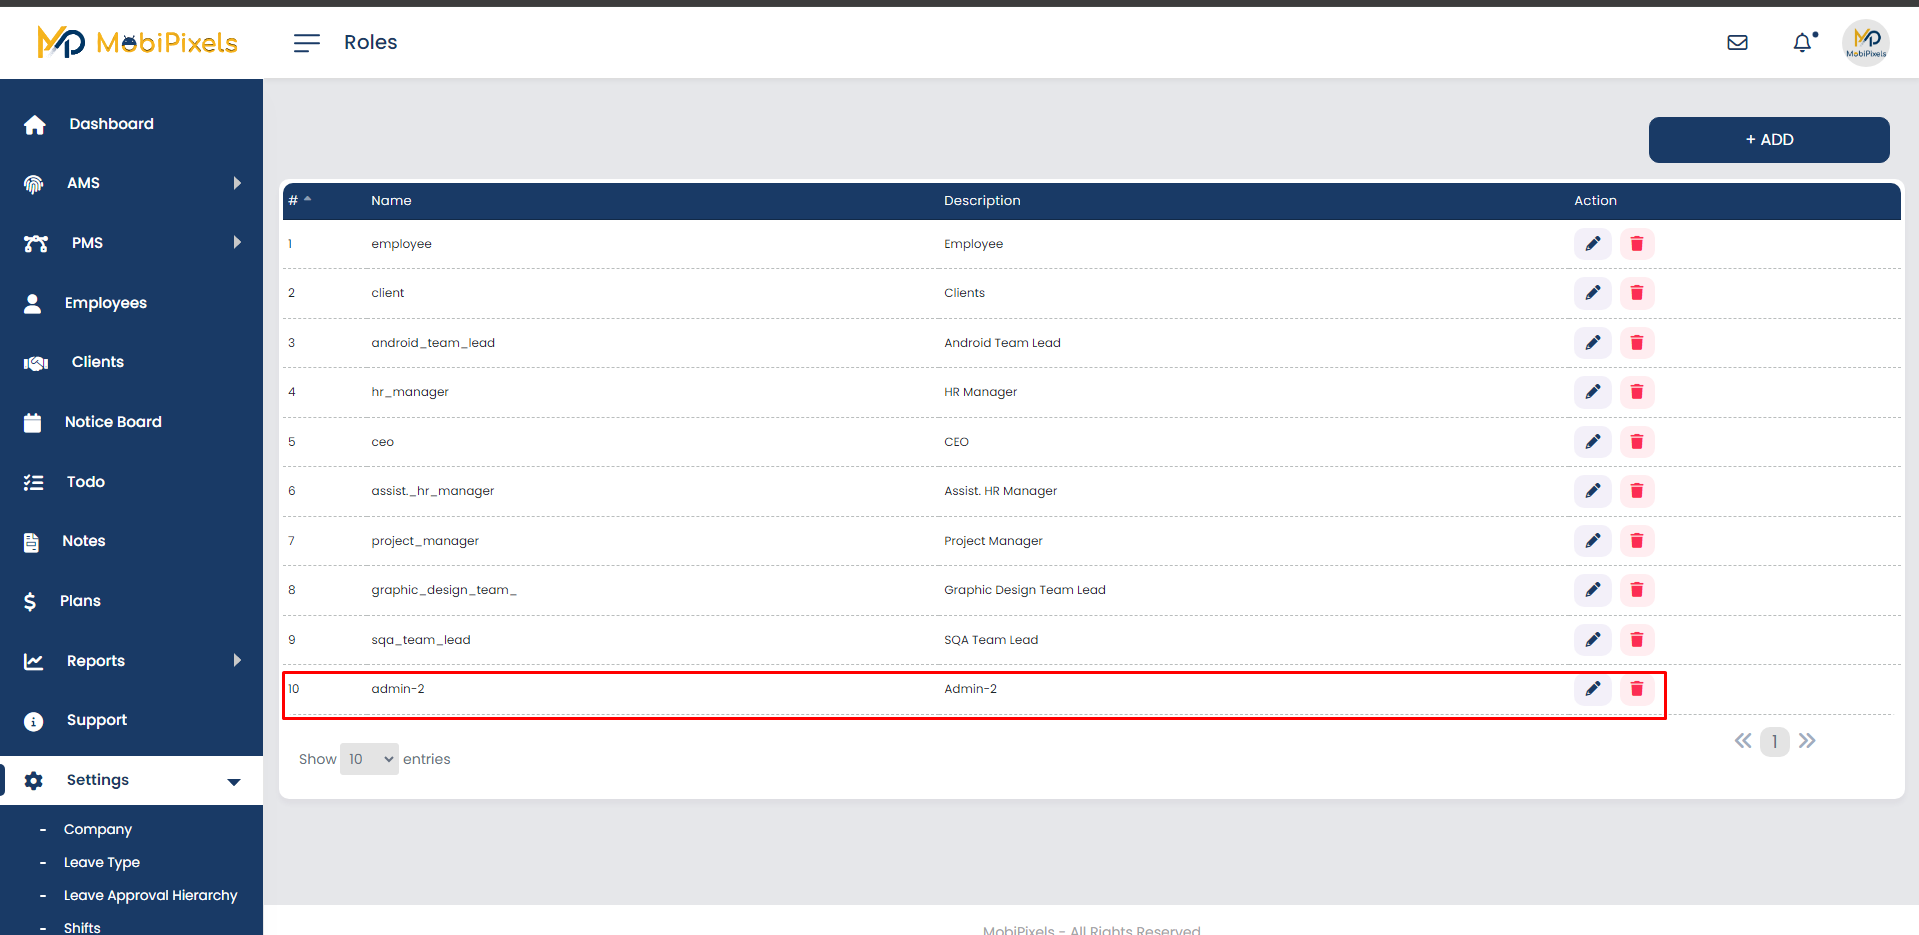
A new role will be added and displayed on the roles screen
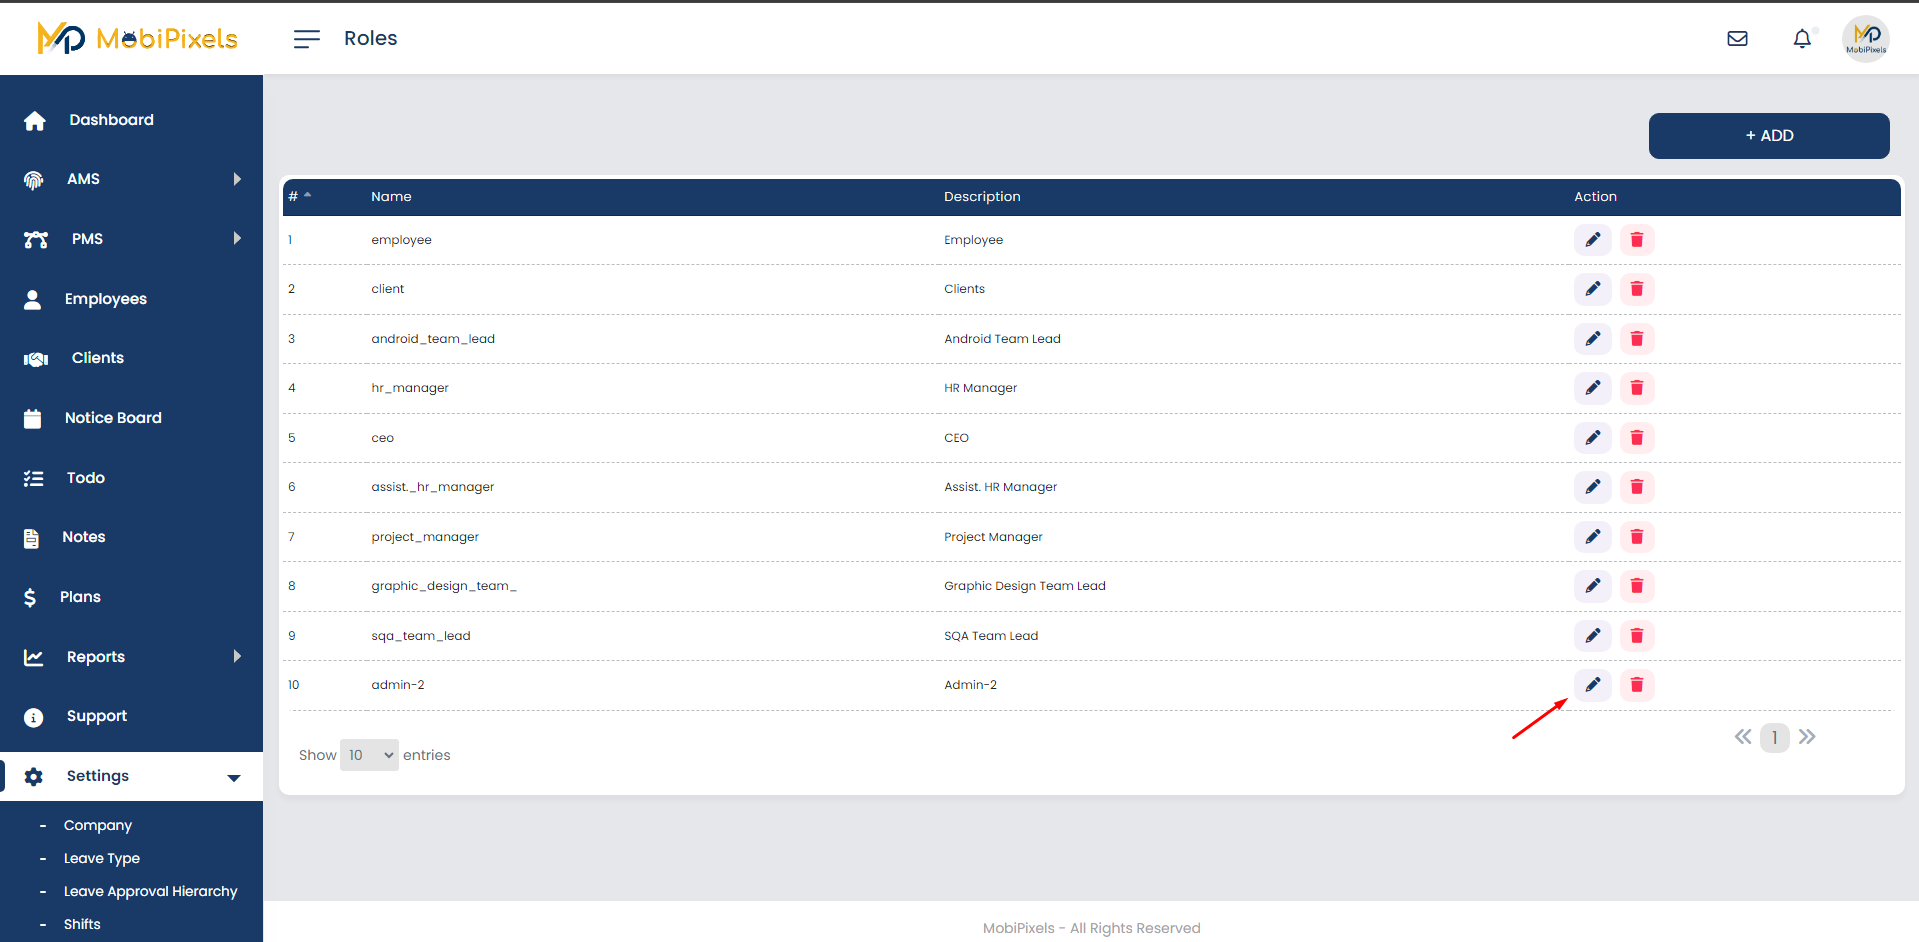
The role can be edited by clicking on edit icon ✏️
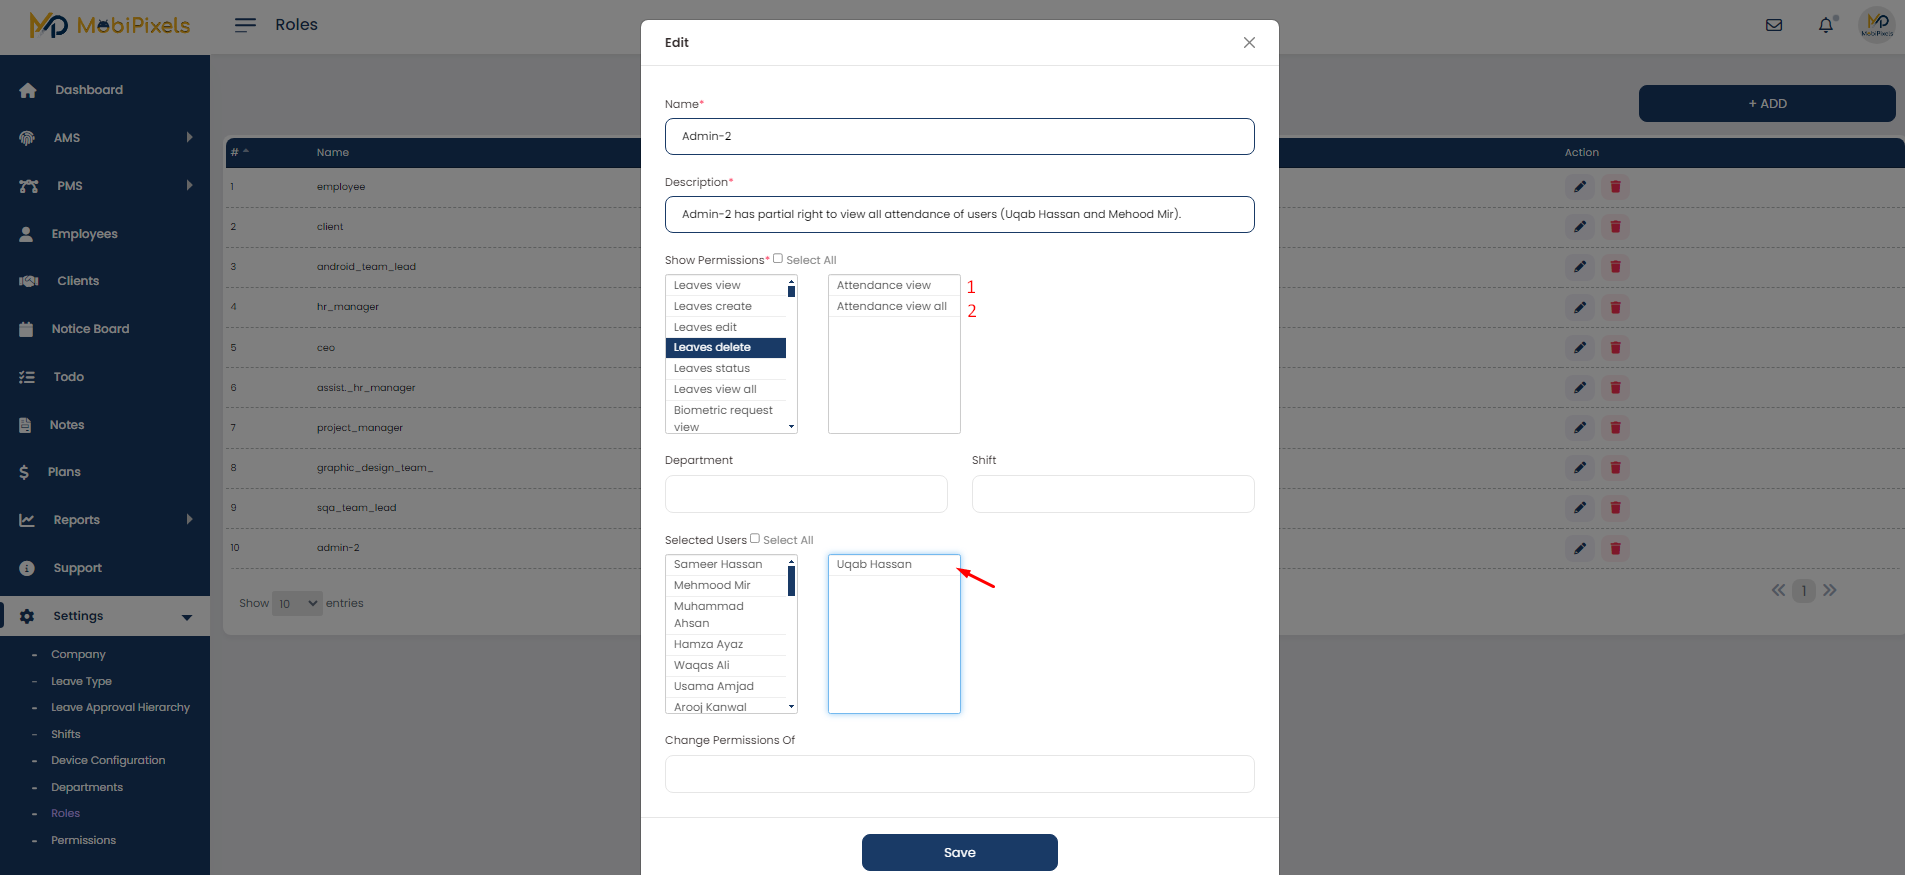
The edit role window will be open to edit users and permission,
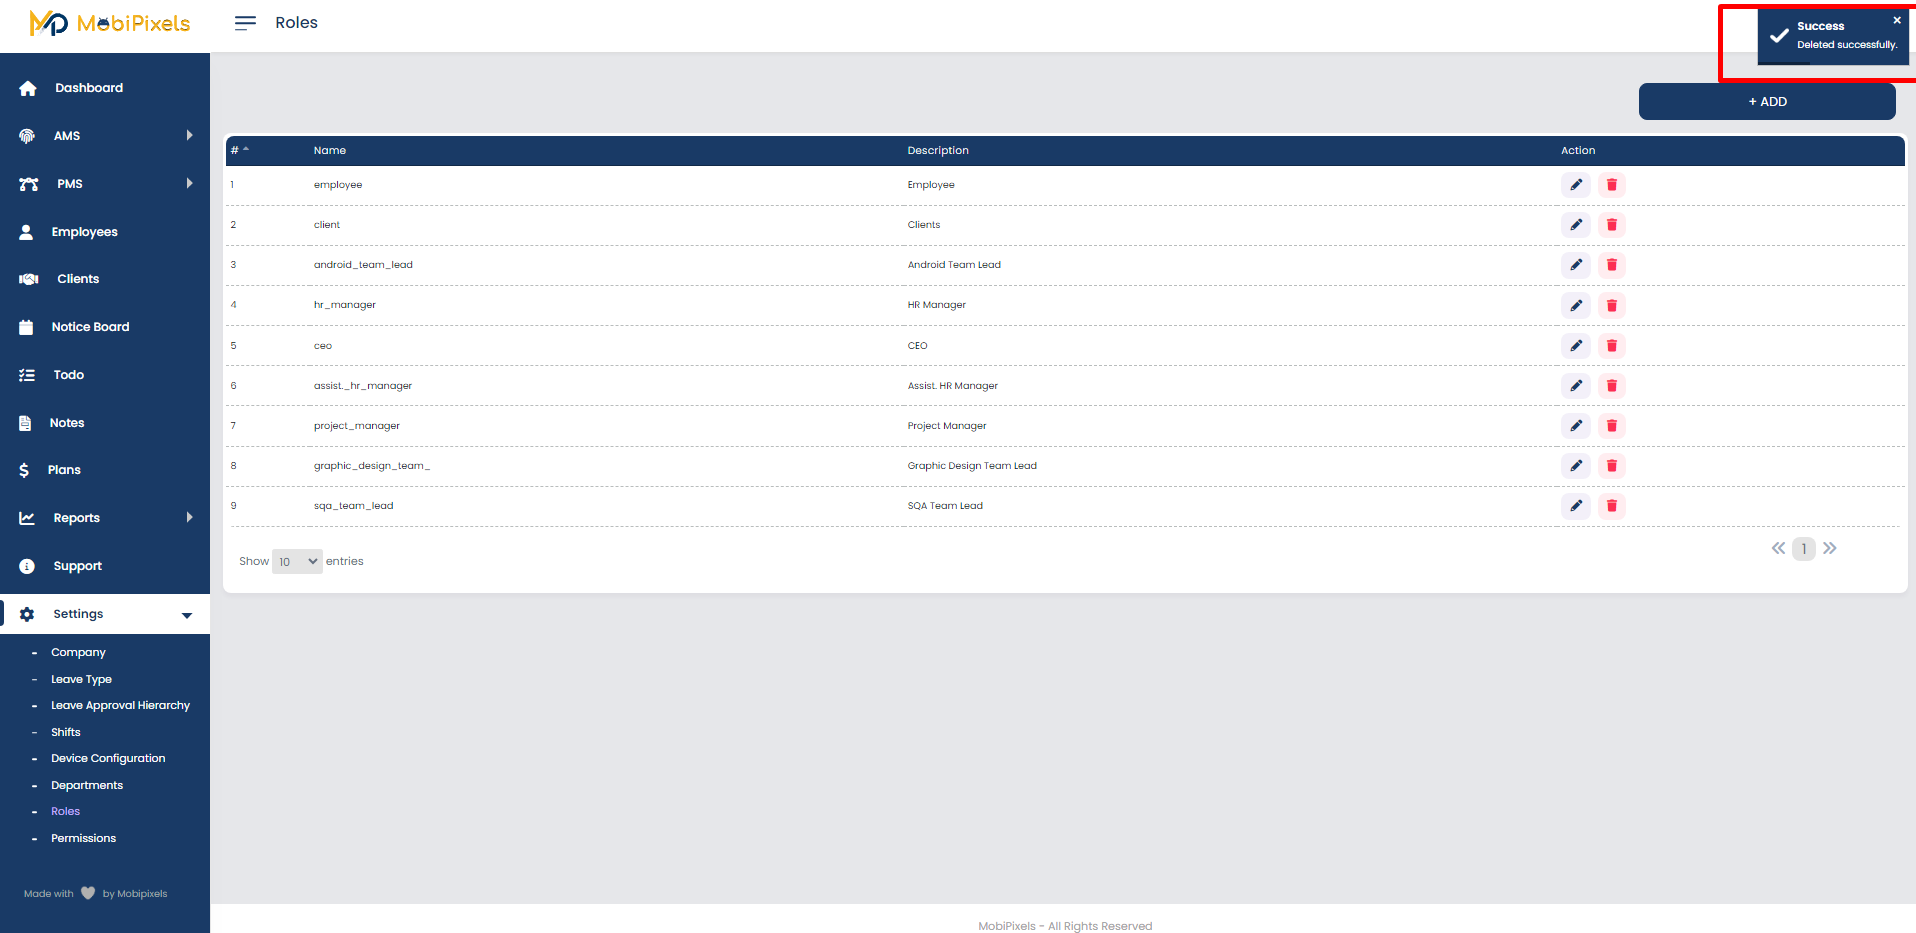
The role can be deleted by clicking on the delete icon.
The role will be deleted and a confirmation message will be displayed on the screen.
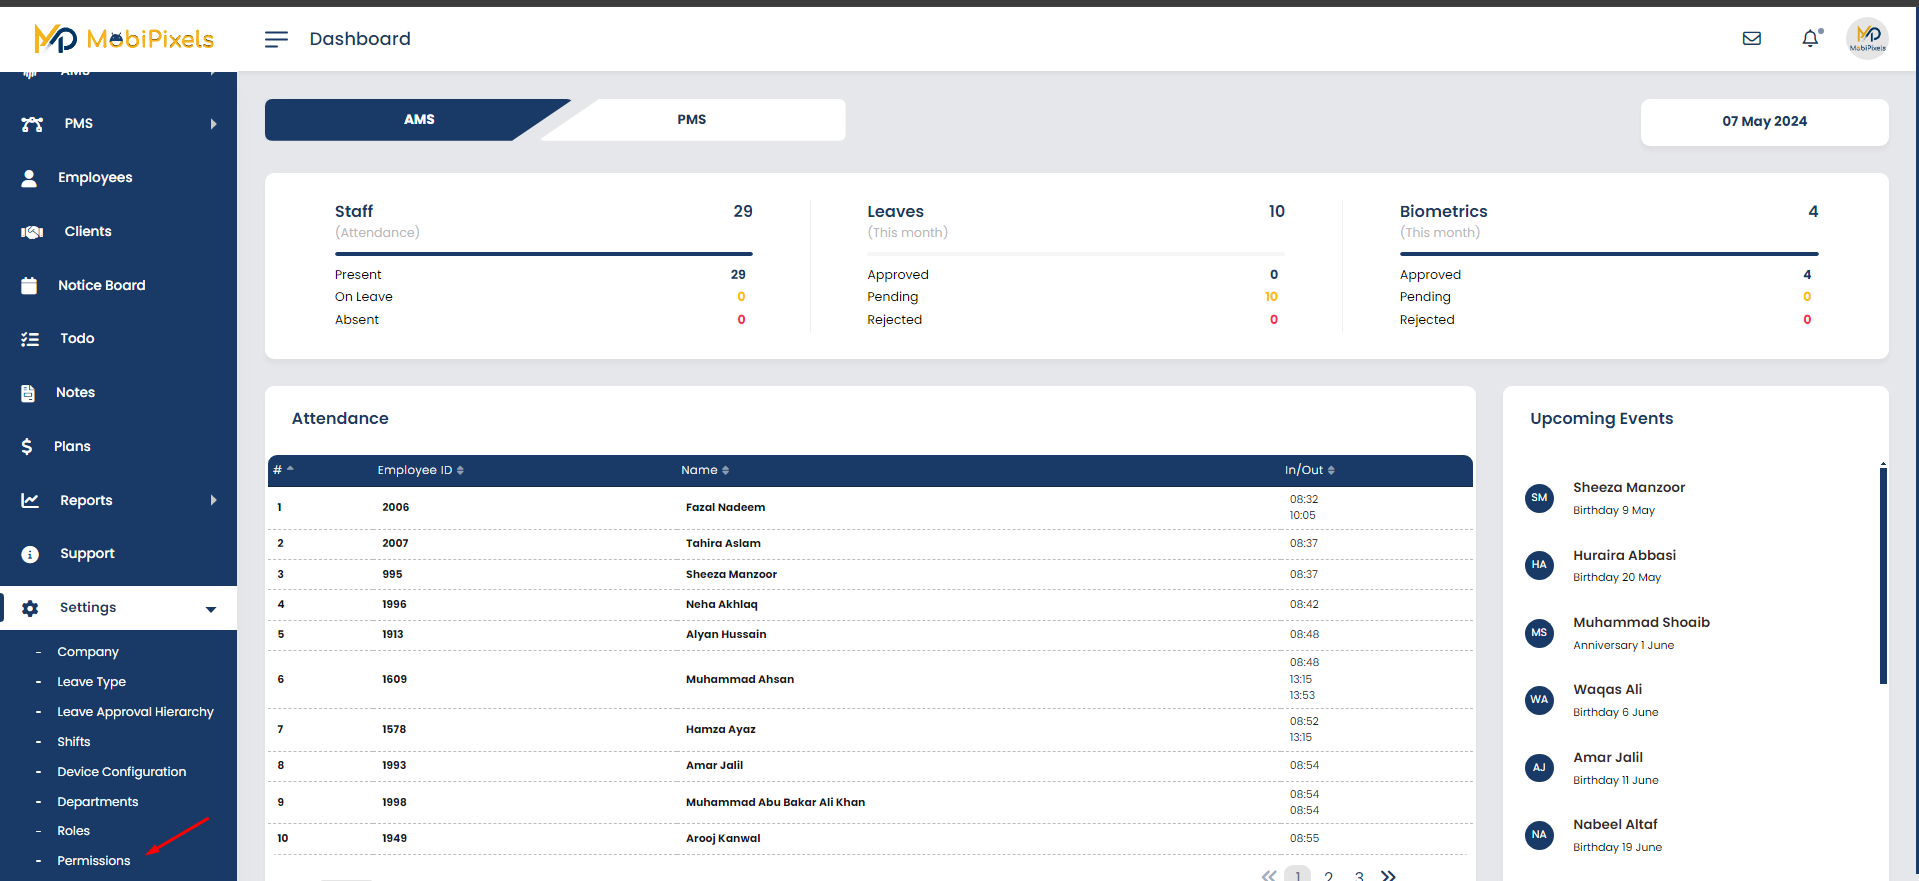
Permissions
To go to the Permission screen, Click on Permission, at Settings > Permissions
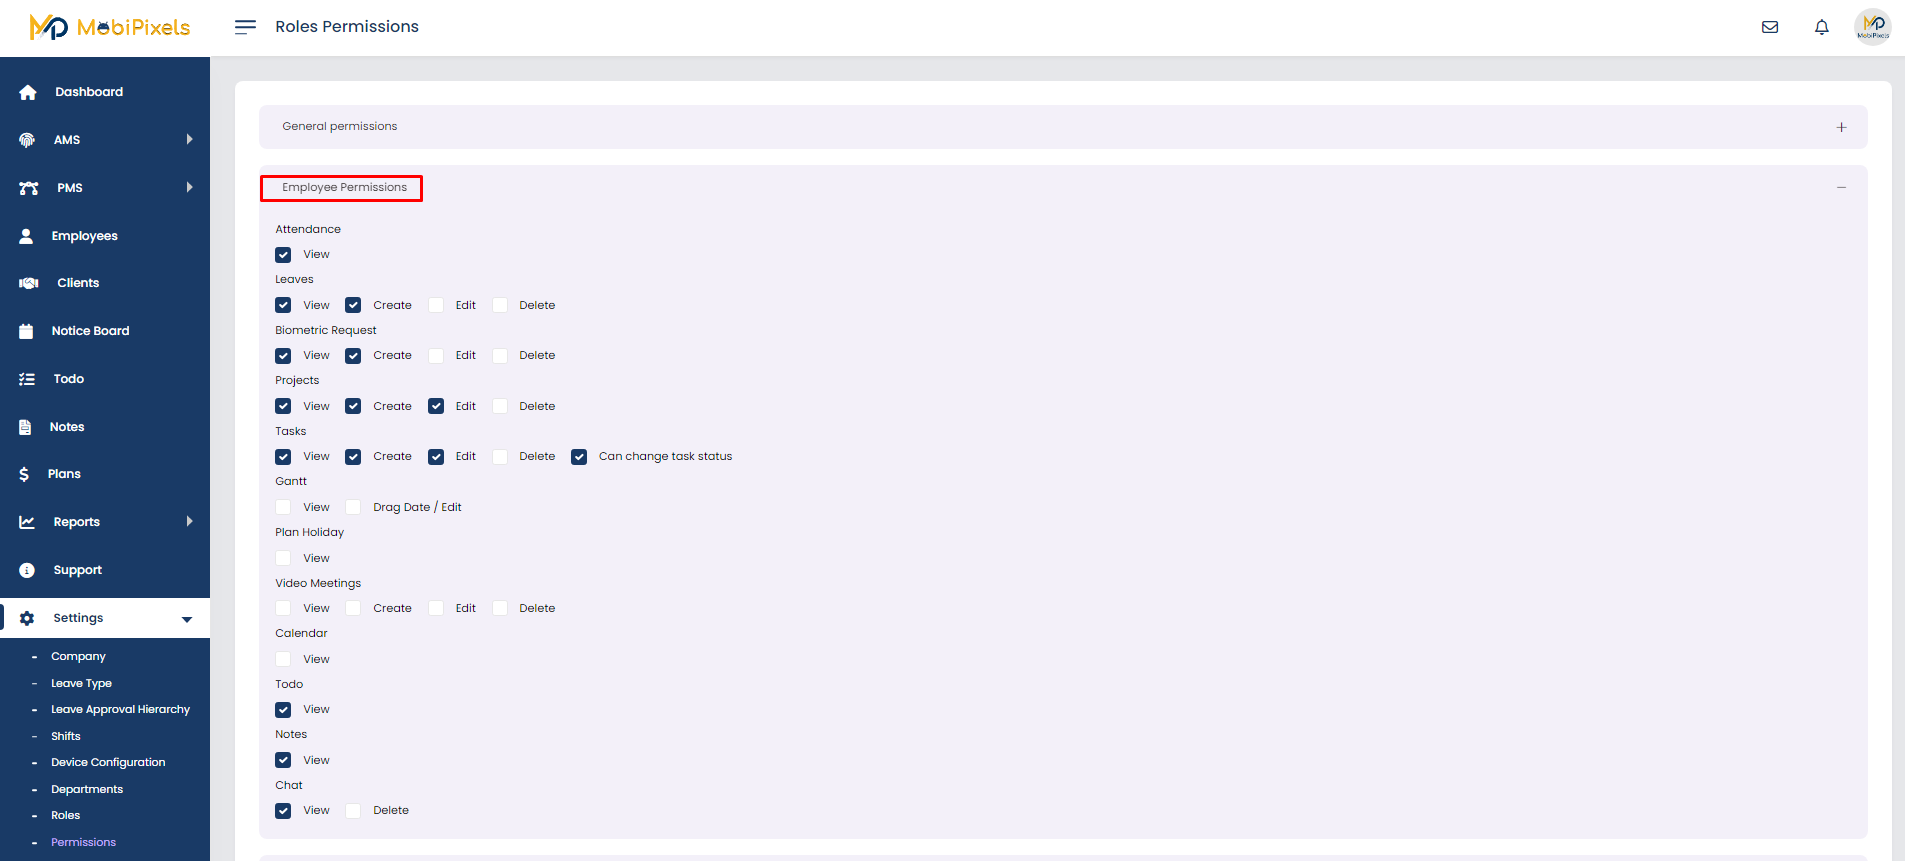
Role Permission screen will be open
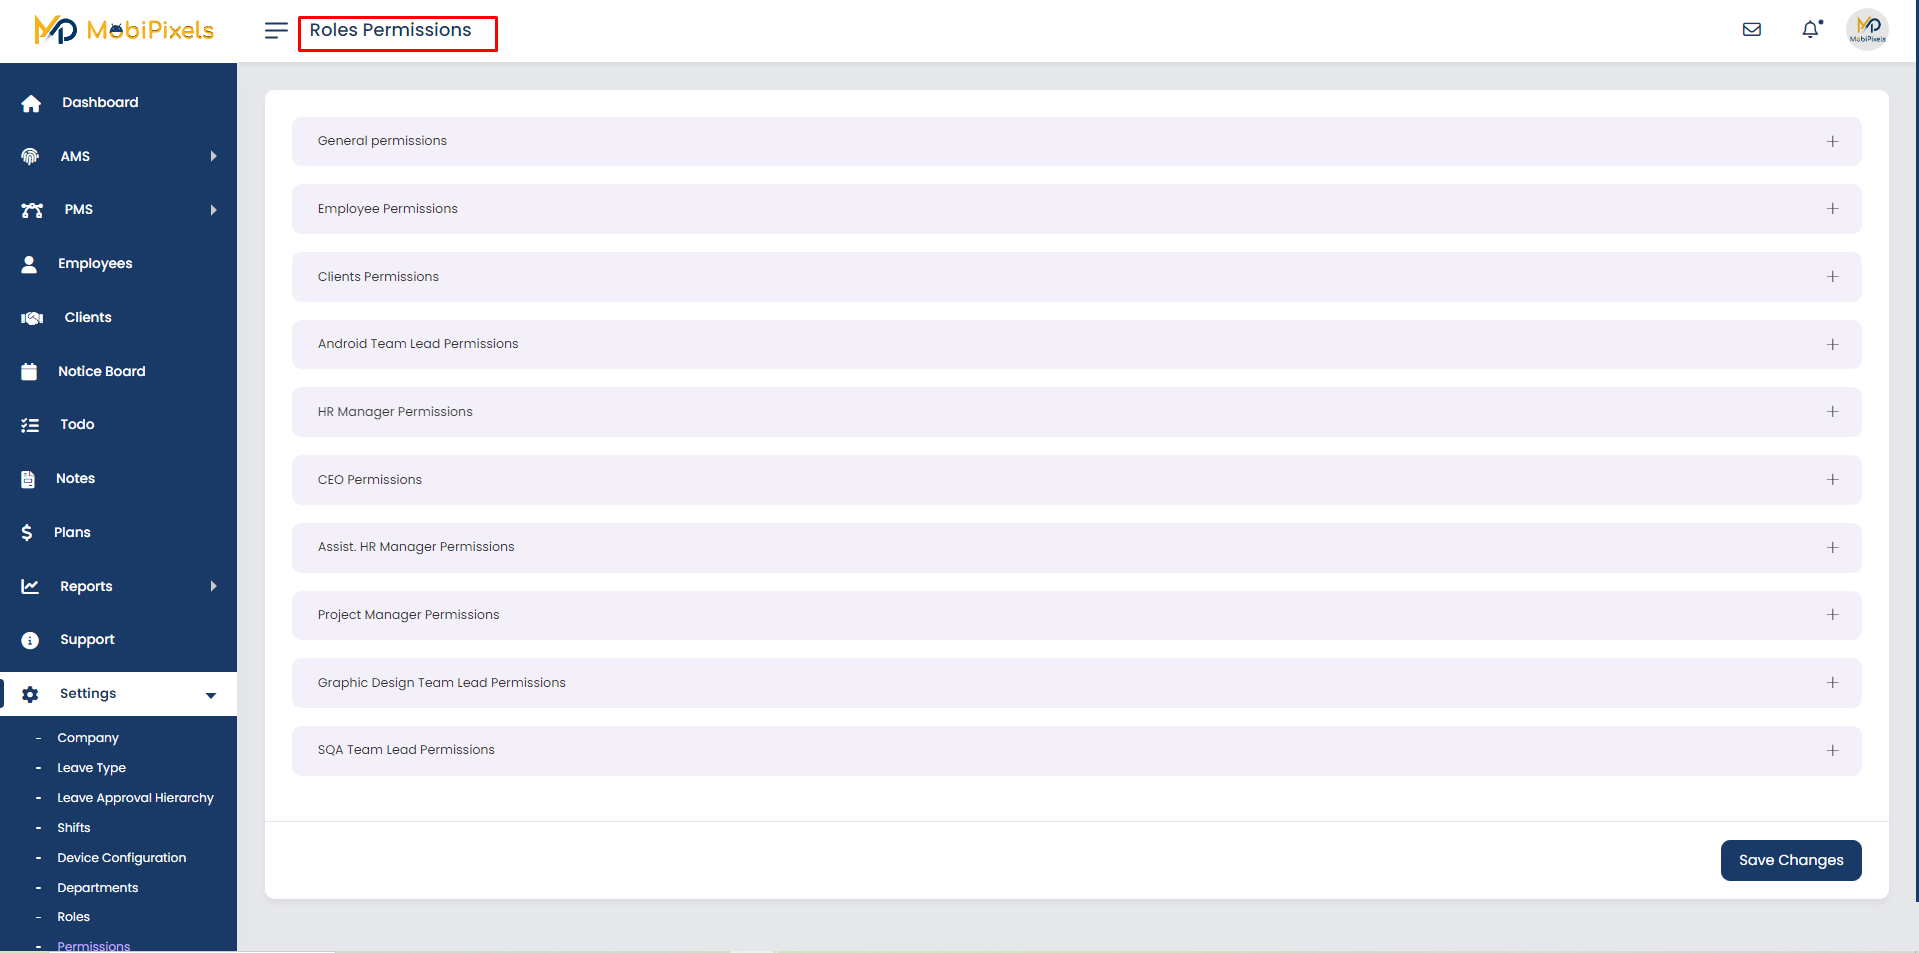
View Role and Permission by clicking on Permission Name i.e. HR Manager Permissions
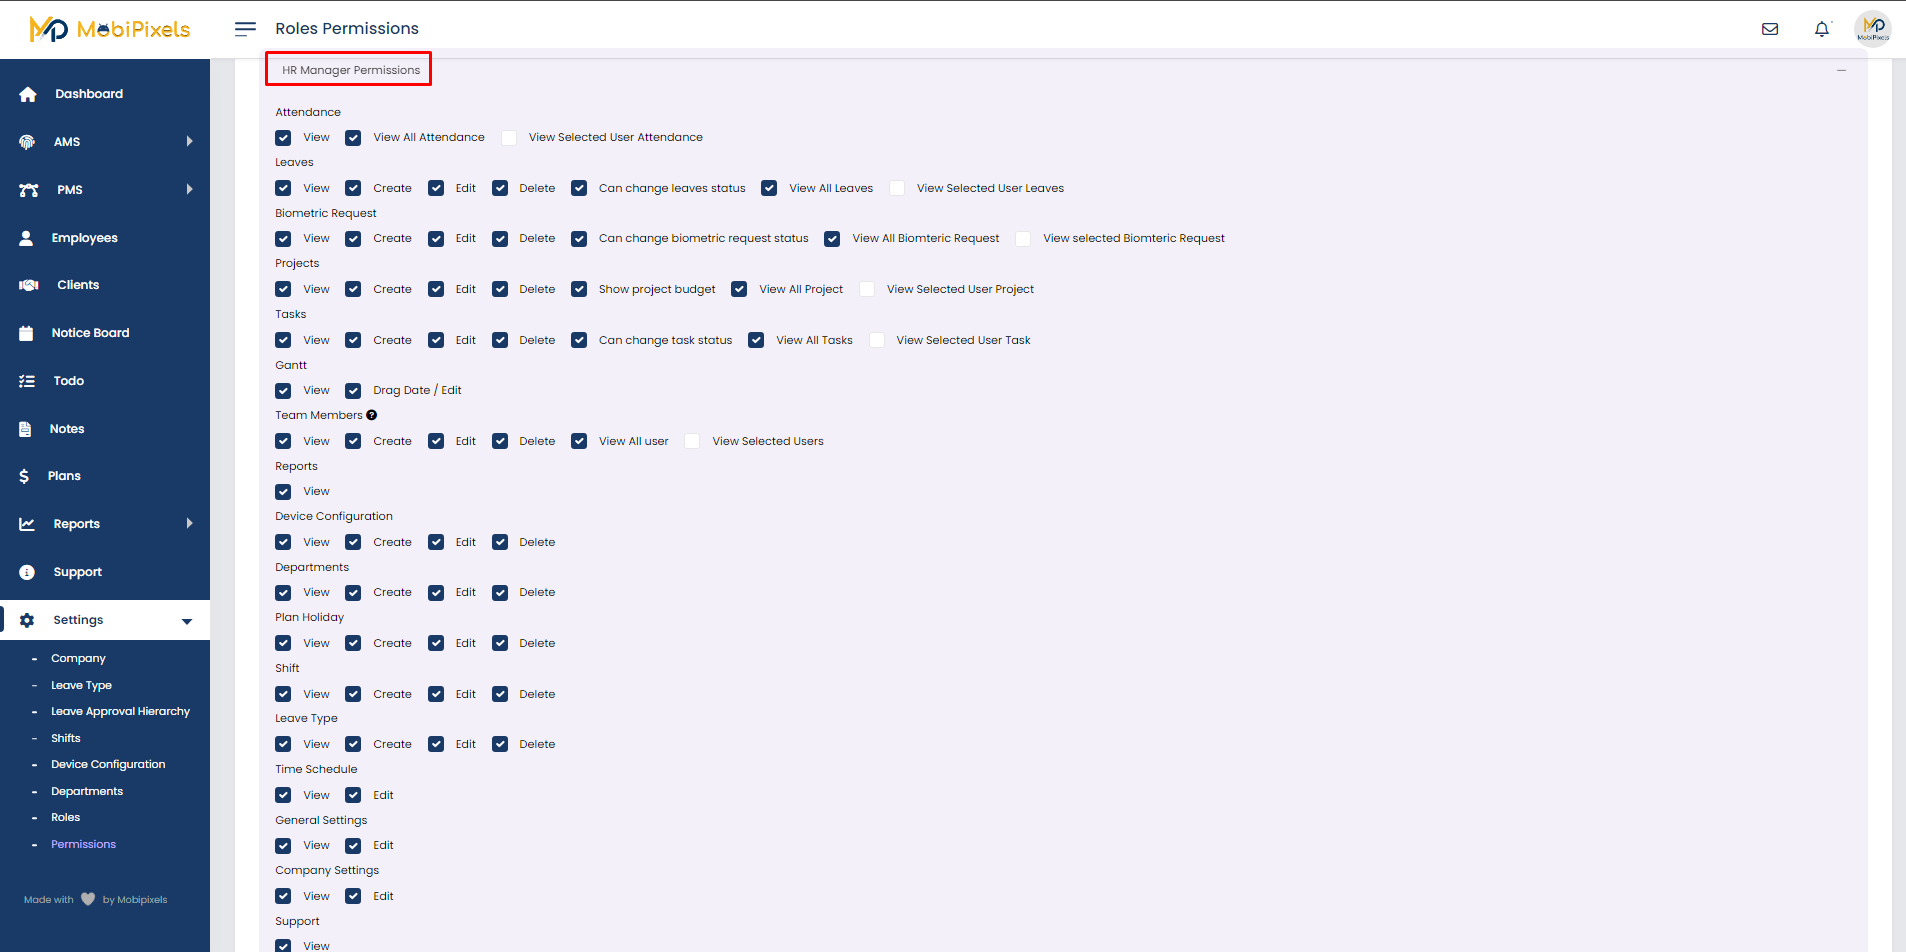
Admin has access to allow or disallow features of the system, to different roles.
Settings
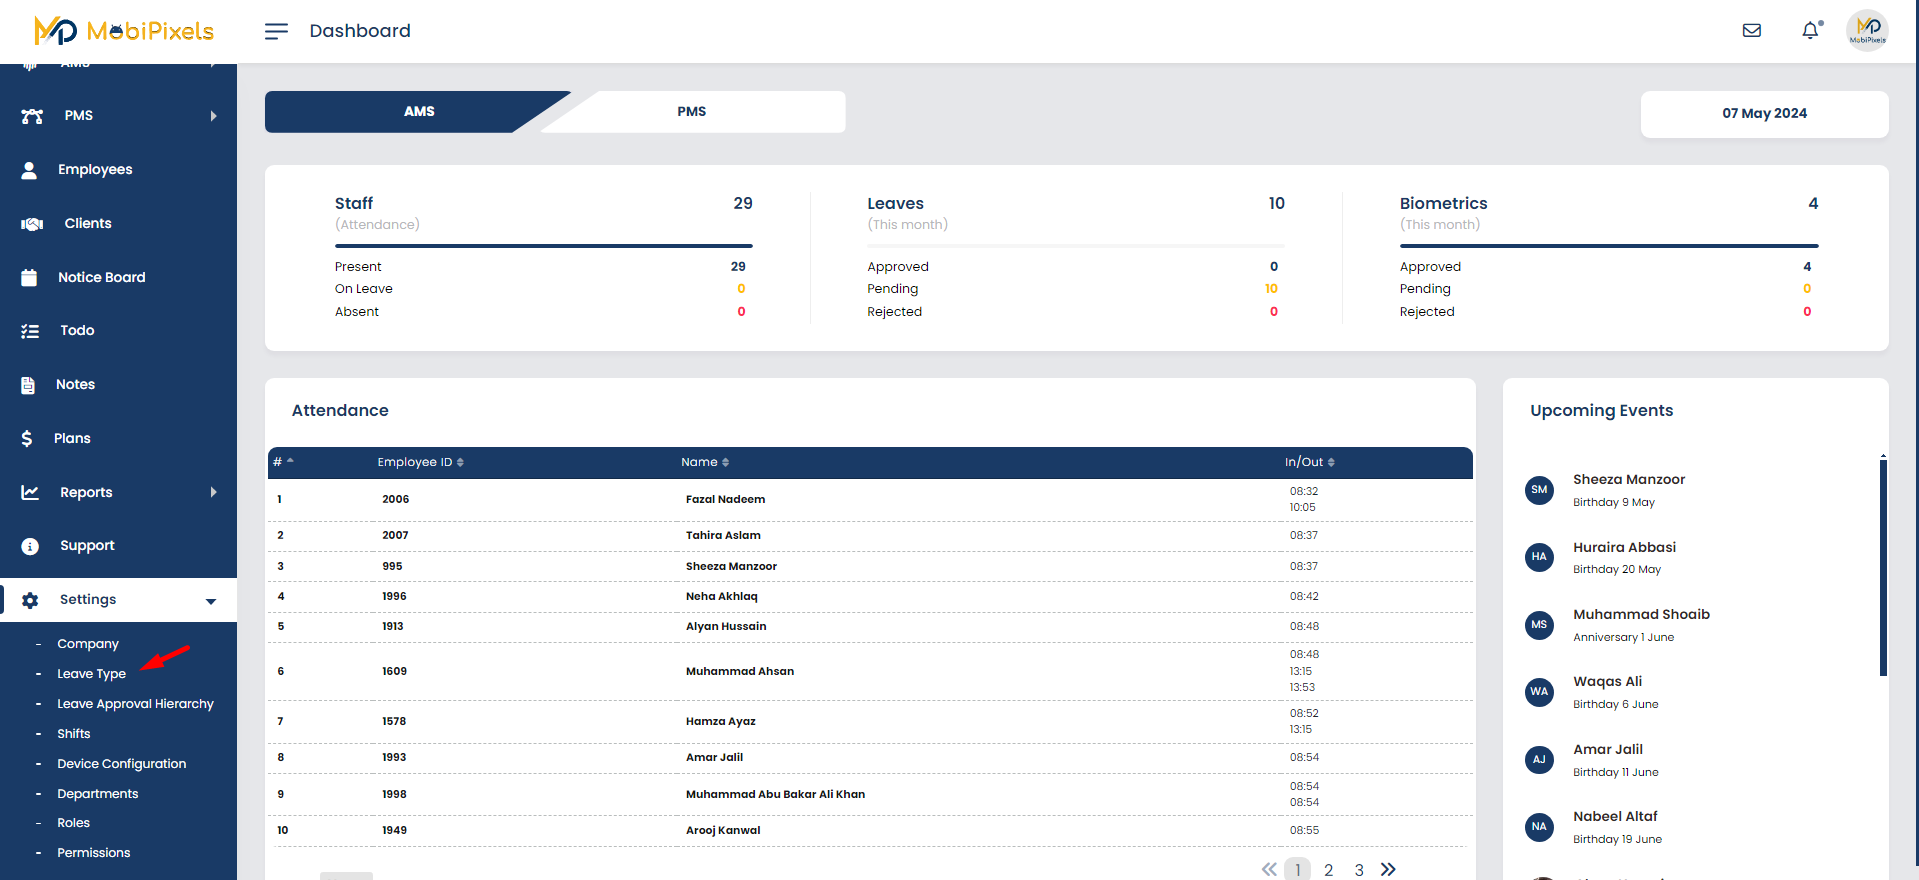
Leave Type
To Add, Edit, or Delete leave, go to the leave option by selecting Settings > Leave Type.
- Leave can be Added by clicking on Add Button
- Leave can be edited by clicking on Edit icon ✏️
- Leave can be deleted by clicking on Delete icon
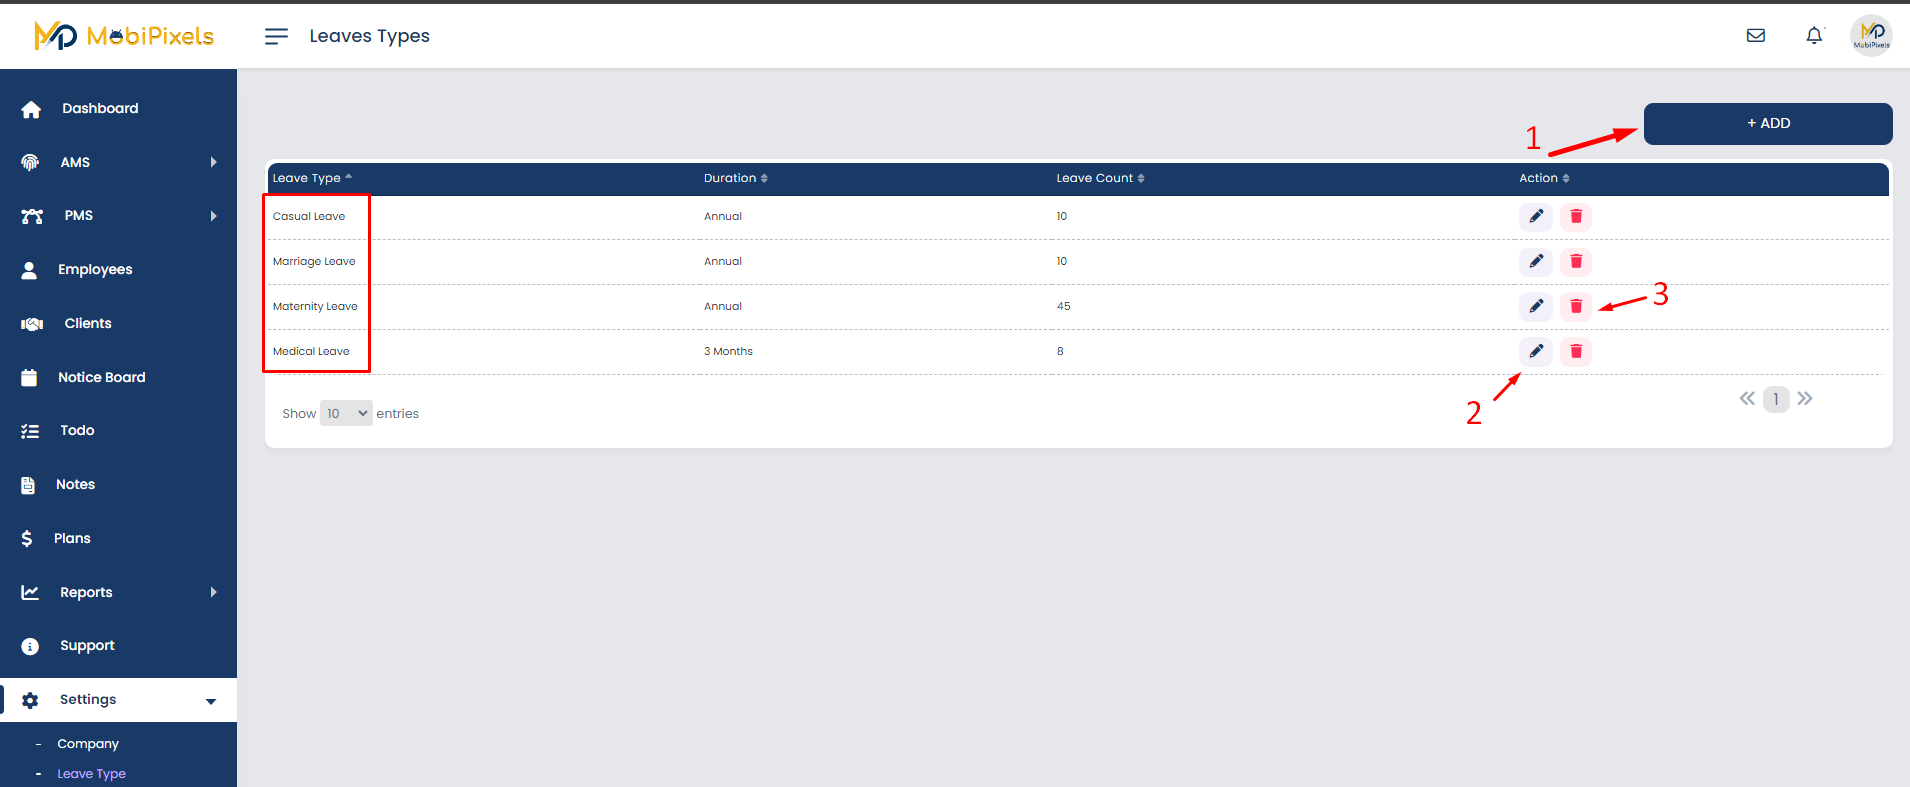
All Leave are shown under the Leave type Column.
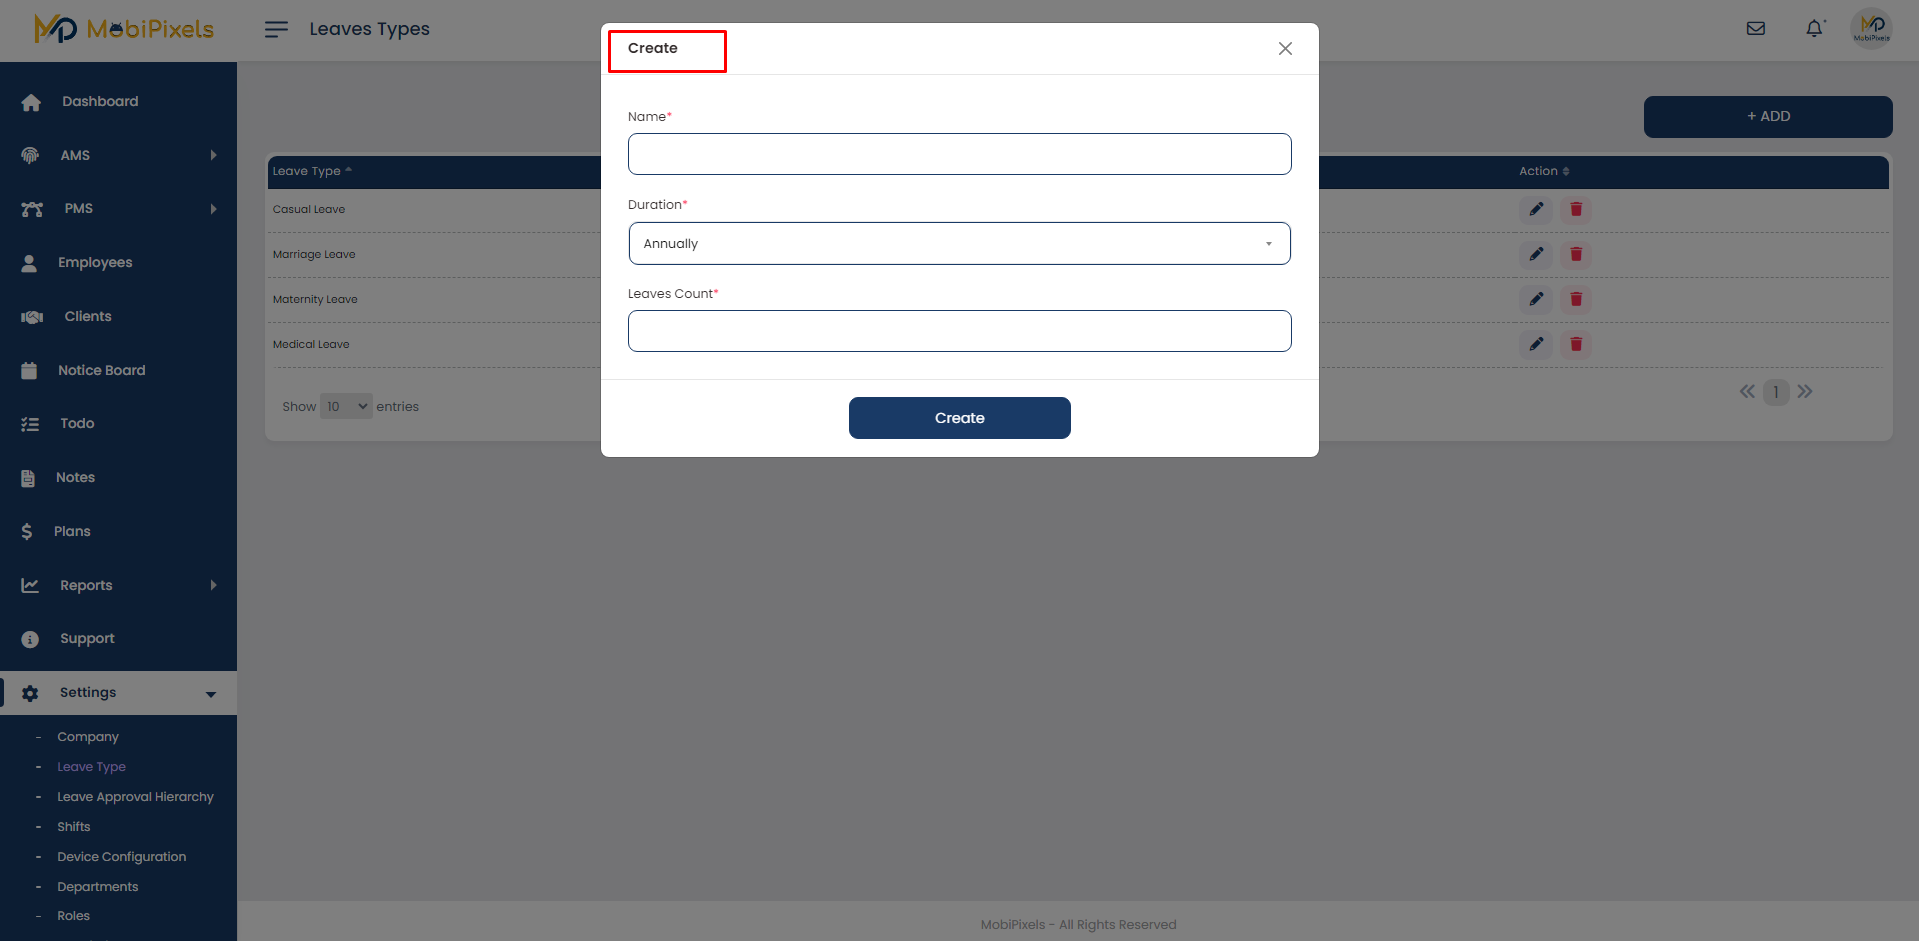
To add Leave, Click on the Add button and enter the leave type i.e (Casual Leave, Medical Leave), Leave Duration i.e.(Yearly, For 3 Months, For 6 Months) and Leave Count i.e. (total allocated leaves to leave type, i.e. Medical Leave has 10 leaves allocated)
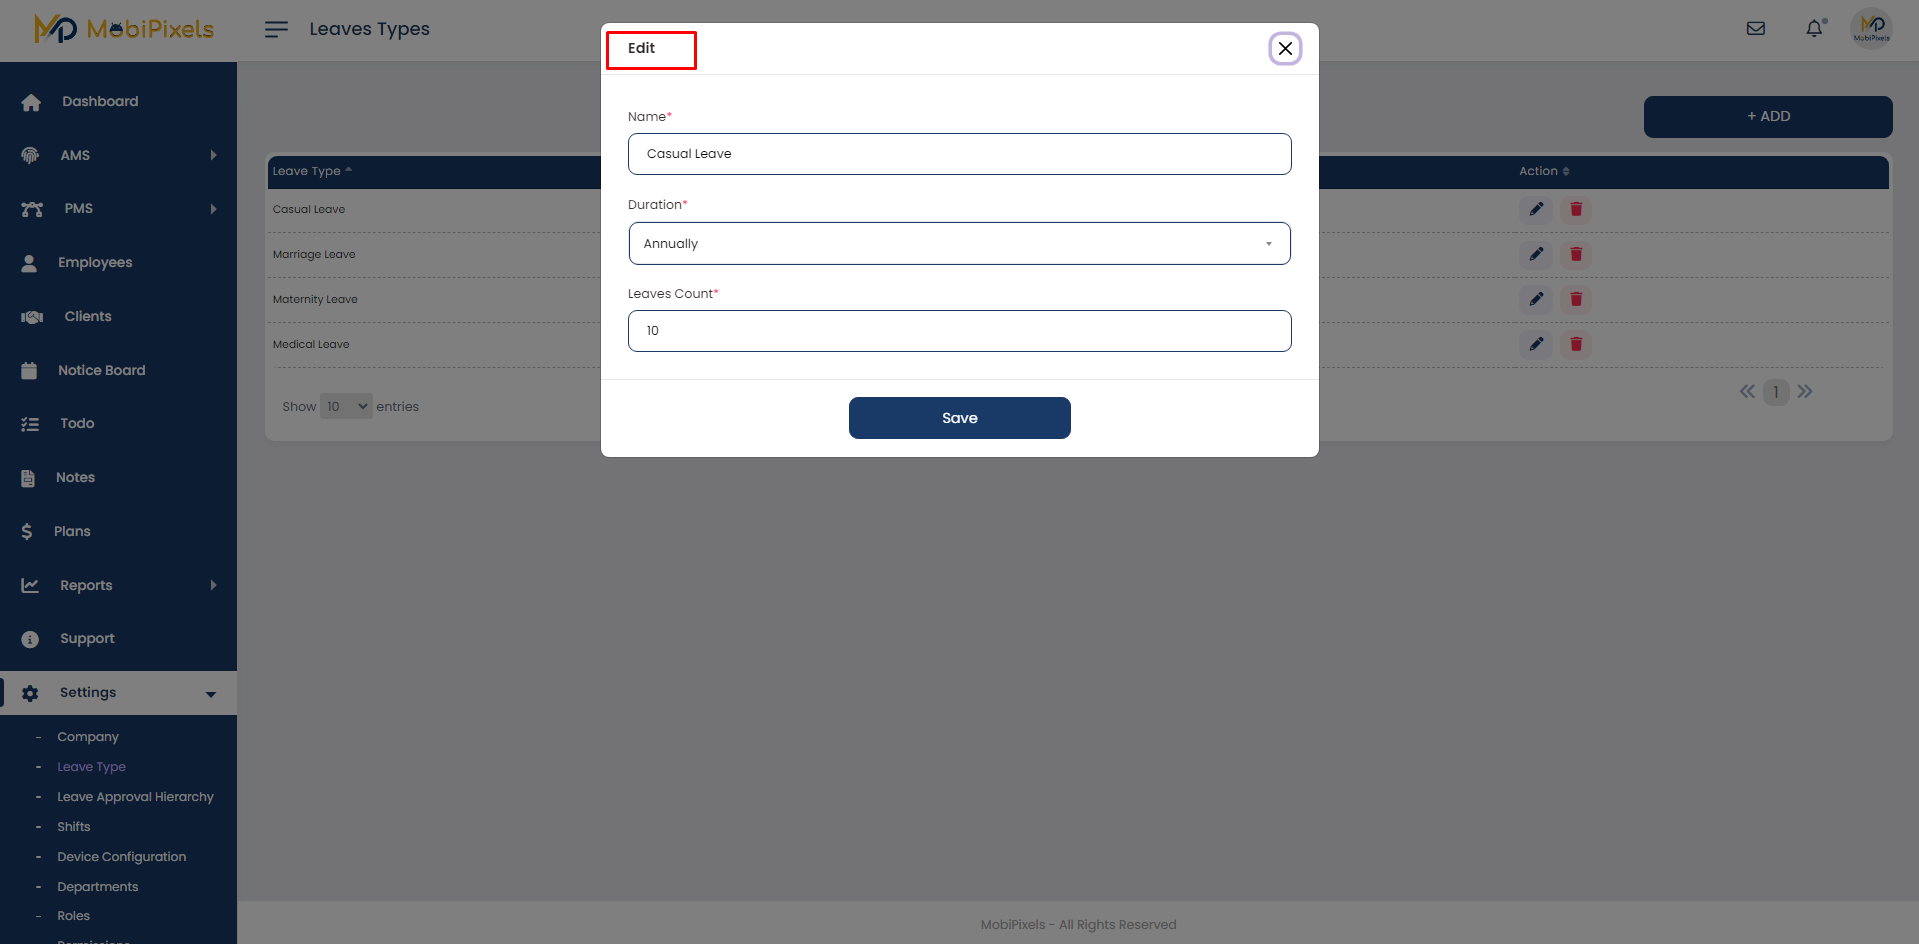
The leave can be edited once created. To edit leave click on the Edit Icon ✏️
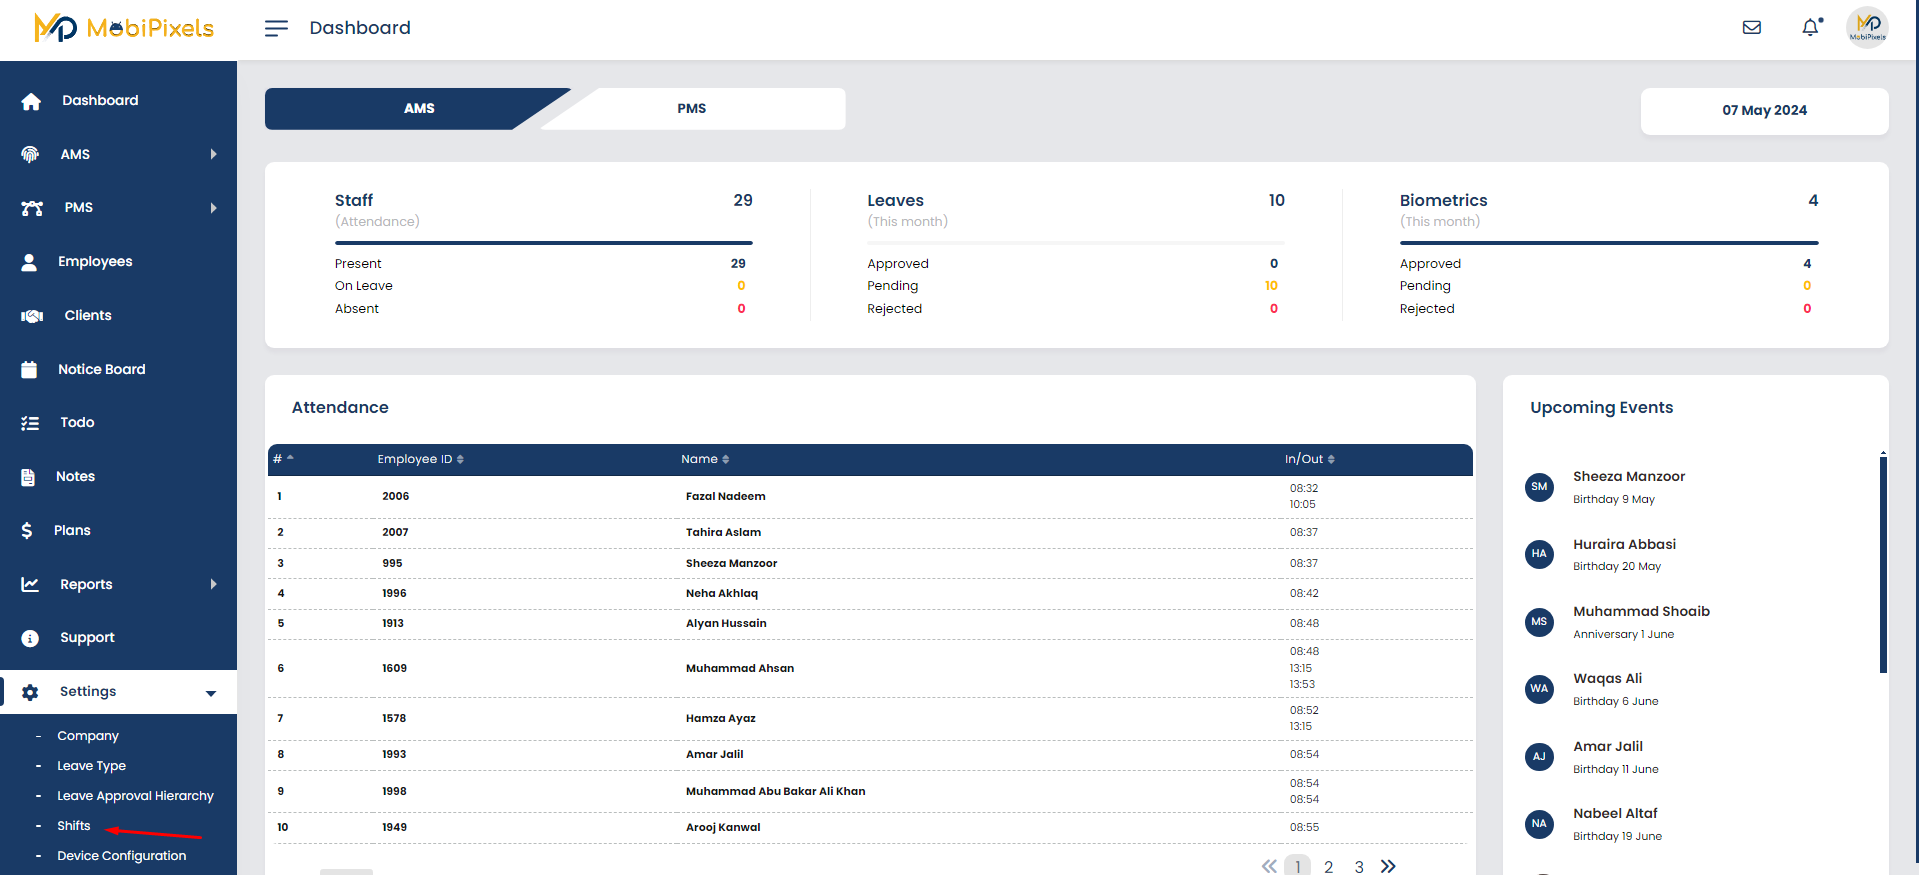
Shifts
To Add, Edit, or Delete Shift, go to the leave option by selecting Settings > Shifts.
- Shift can be added by clicking on Add Button
- Shift can be edited by clicking on Edit icon ✏️
- Shift can be deleted by clicking on Delete icon
All the shifts will be mentioned under Name Column.
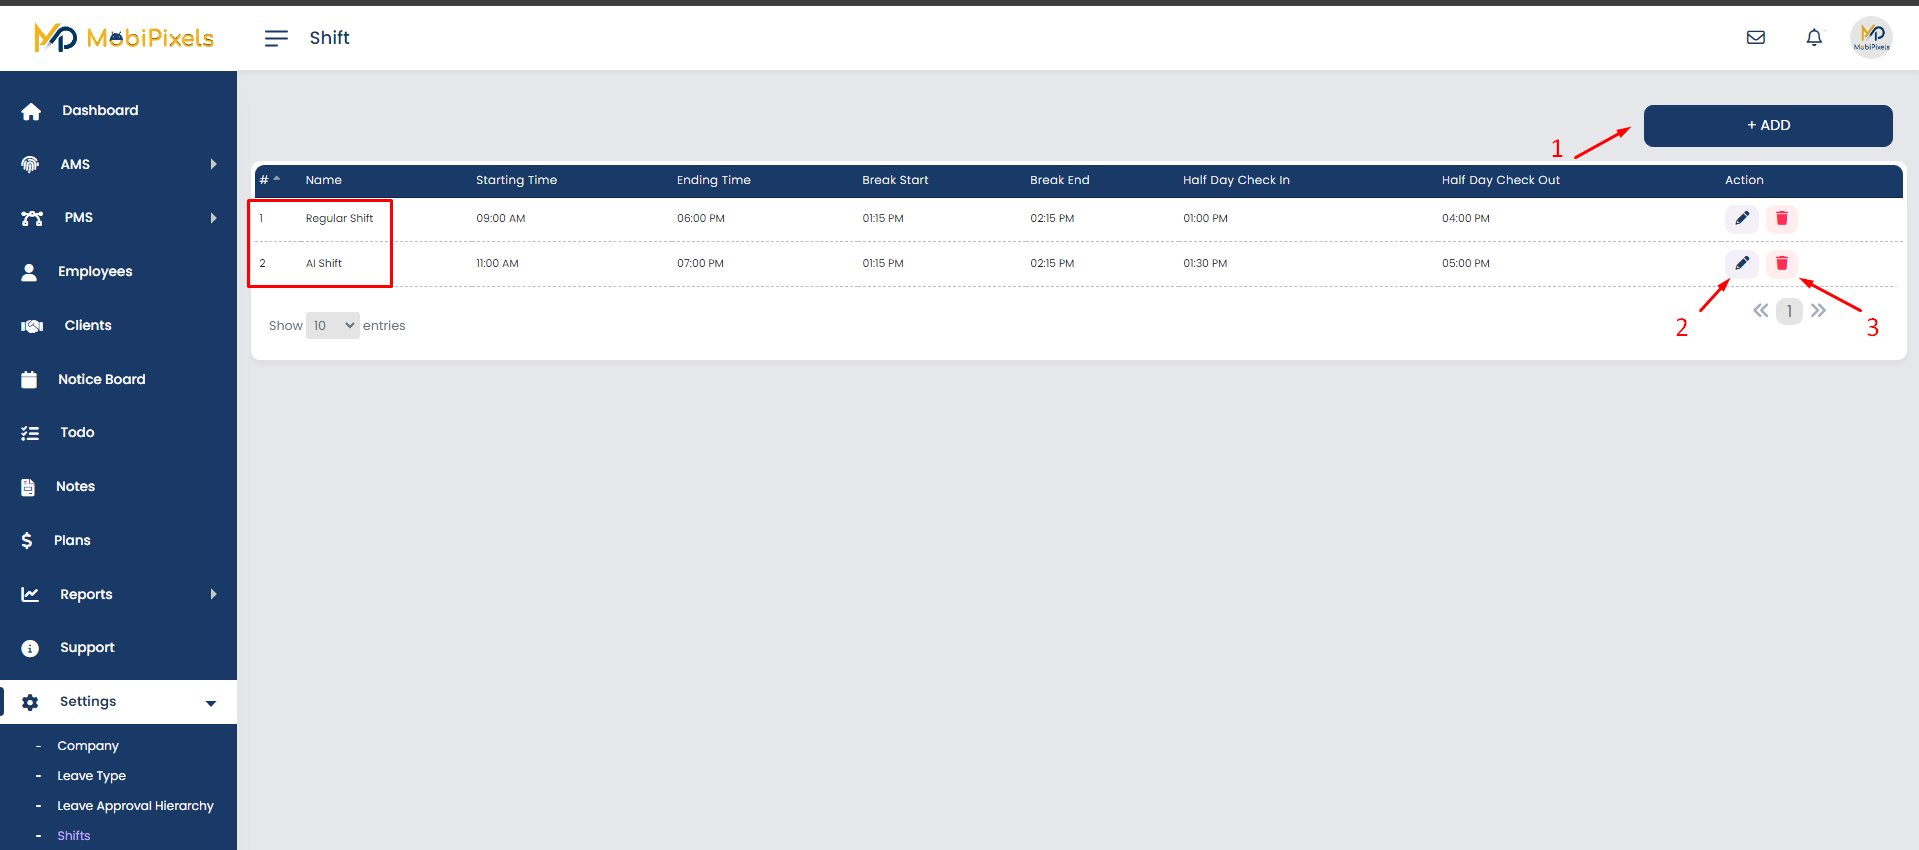
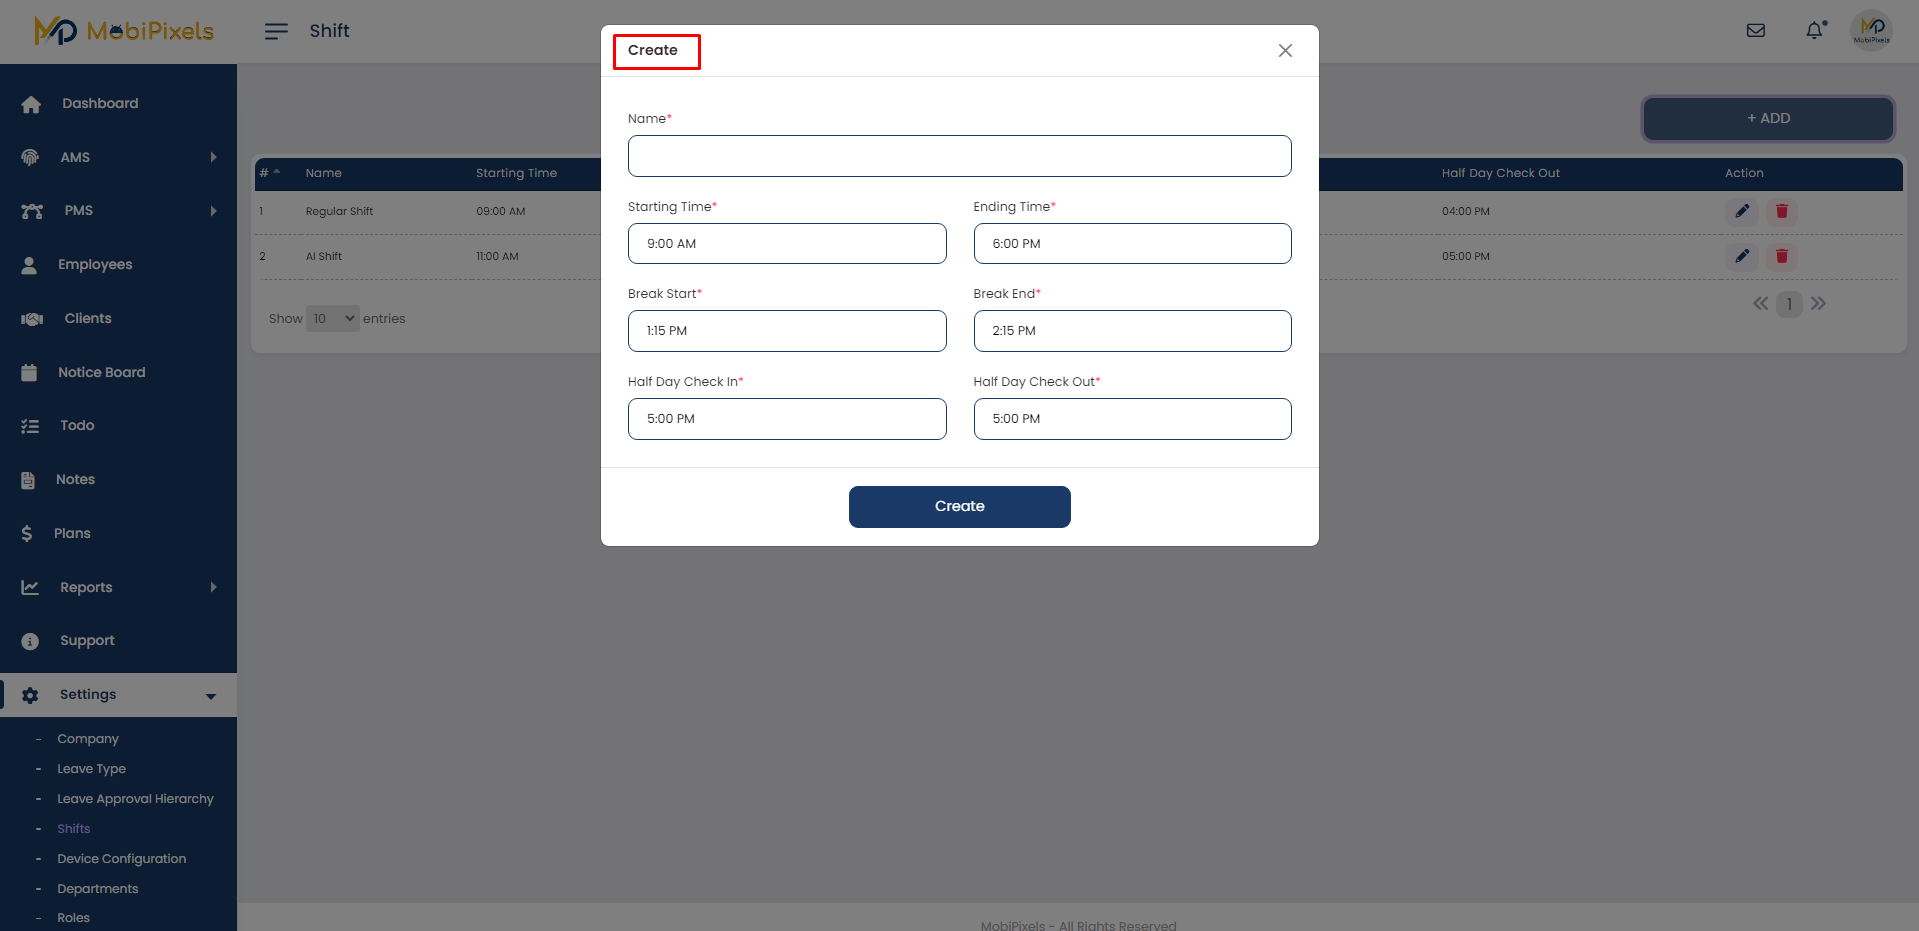
To add Shift, Click on the Add button and enter the Shift Name i.e. (Night Shift or Morning Shift), Shift Starting Time, End Time, Break Start Time, Break End Time, Half Day Start Time, Half Day End Time.
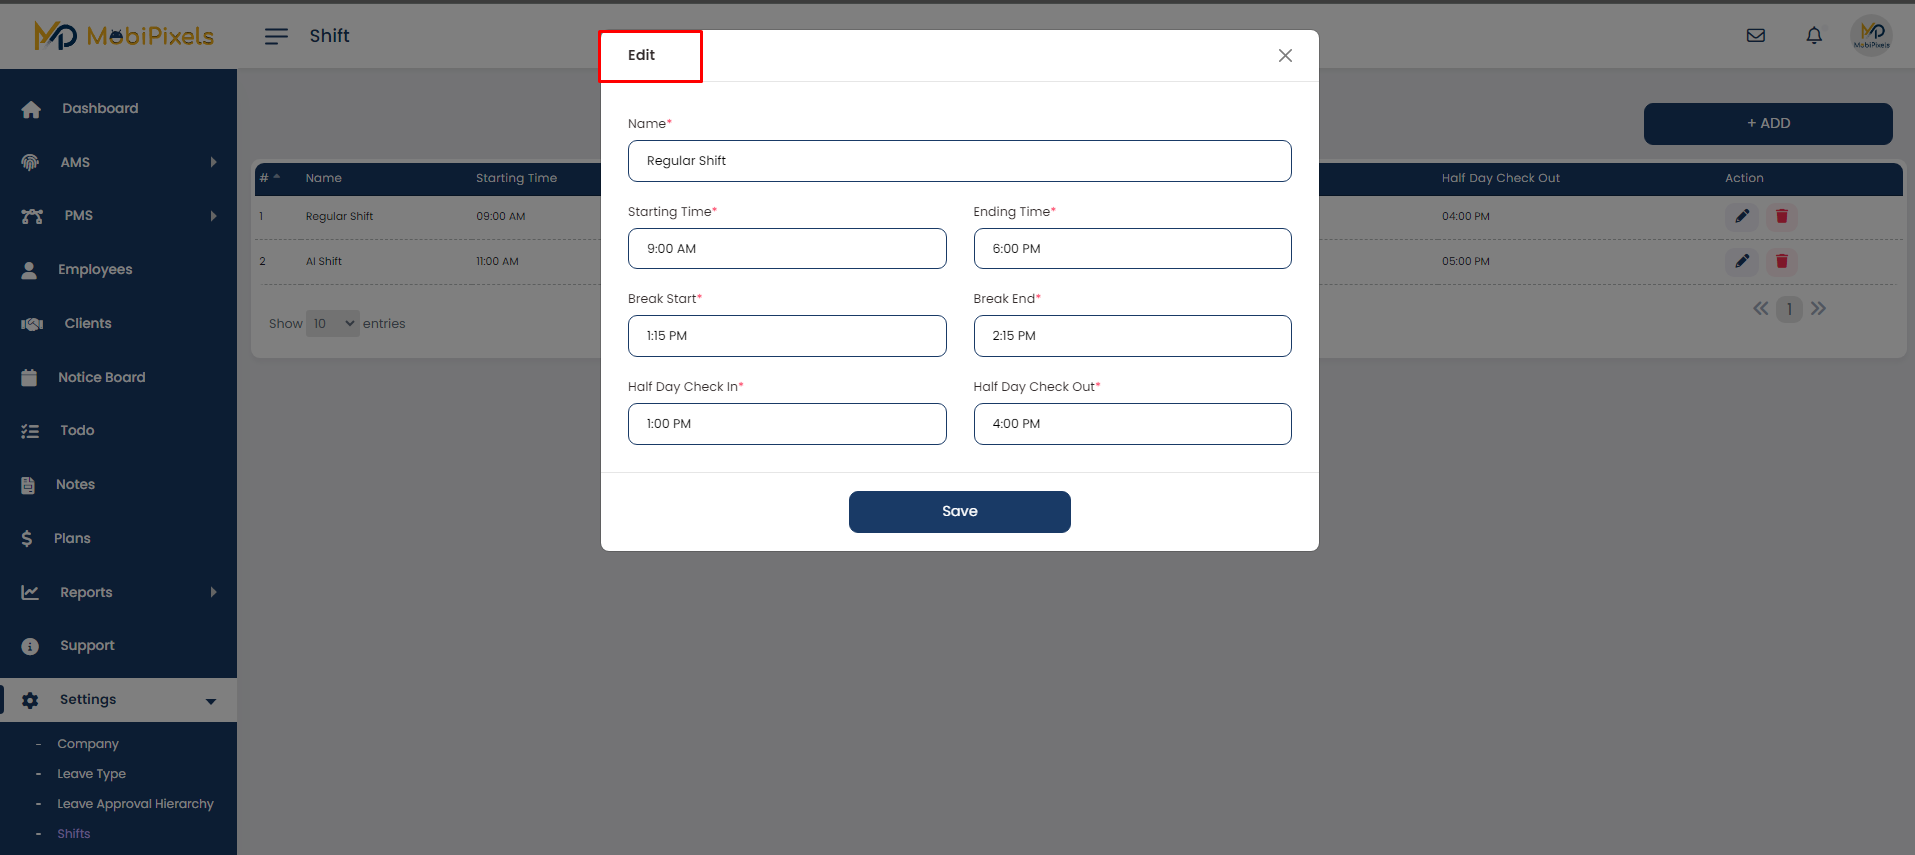
The shift can be edit once created, to edit shift, click on Edit Icon ✏️
Departments
To Add, Edit, or Delete Departments, go to the leave option by selecting Settings > Departments.

- Departments can be added by clicking on Add Button
- Departments can be edited by clicking on Edit icon ✏️
- Departments can be deleted by clicking on Delete icon
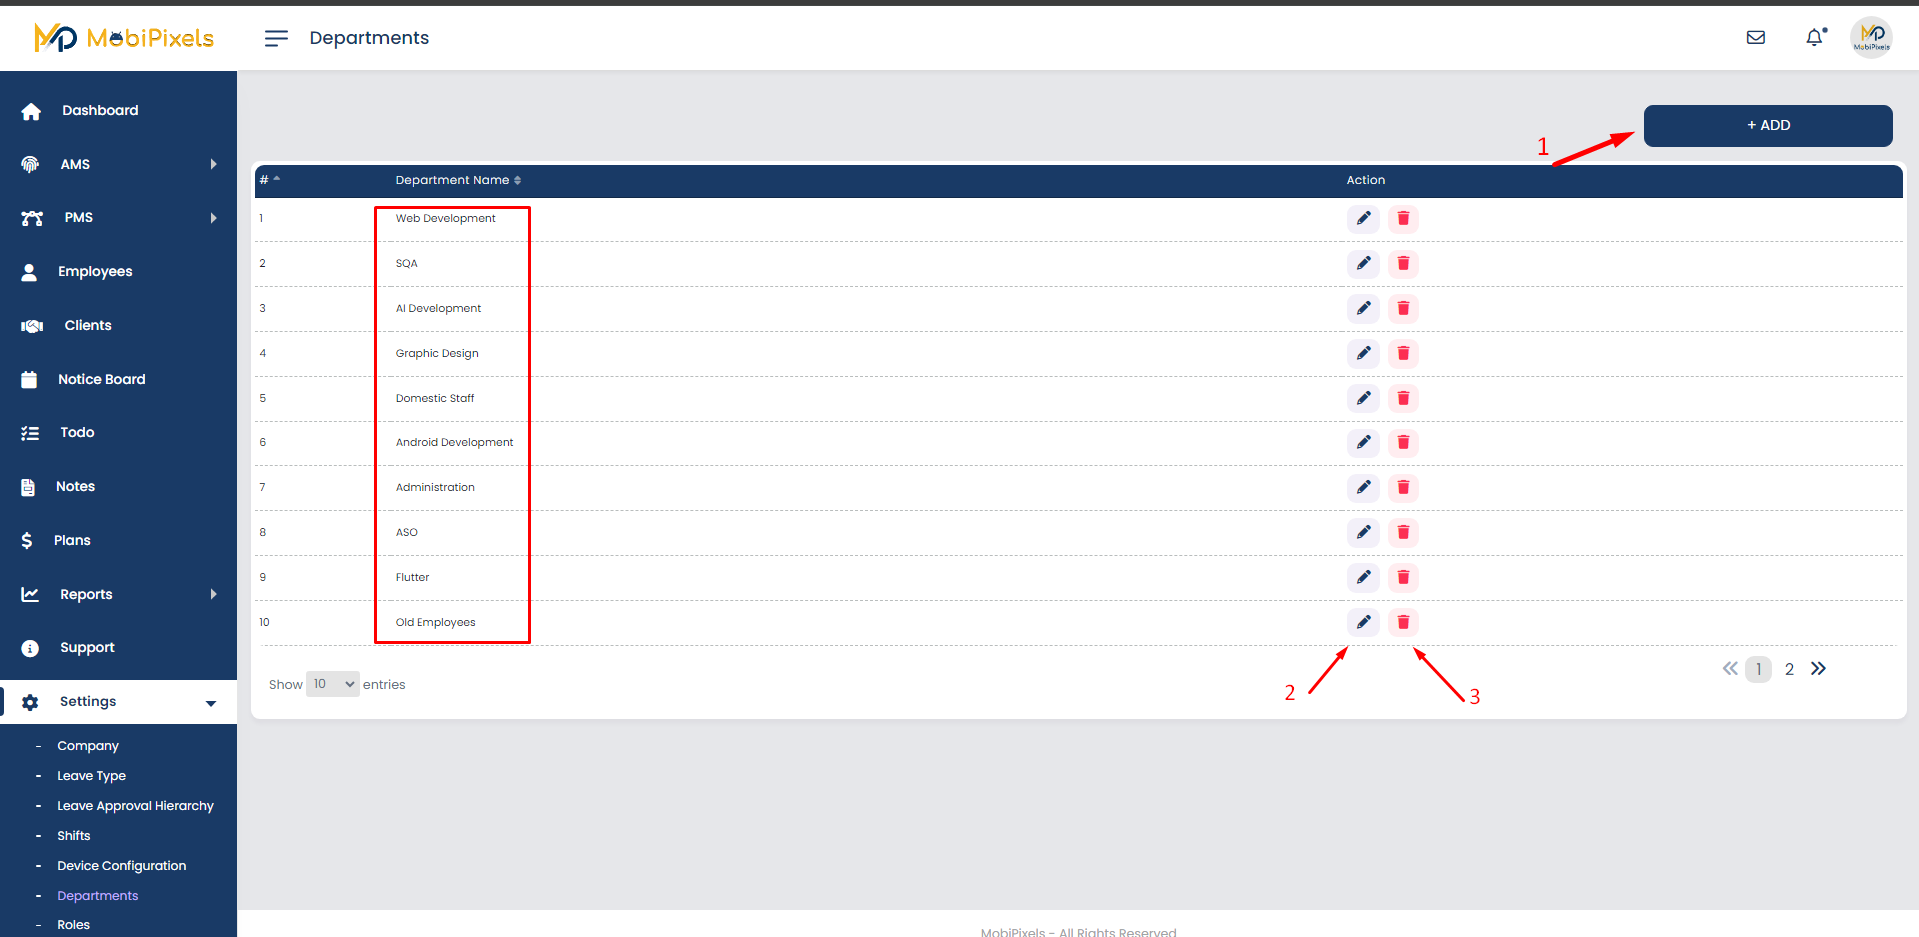
All the departments will be mentioned under Department Name Column.
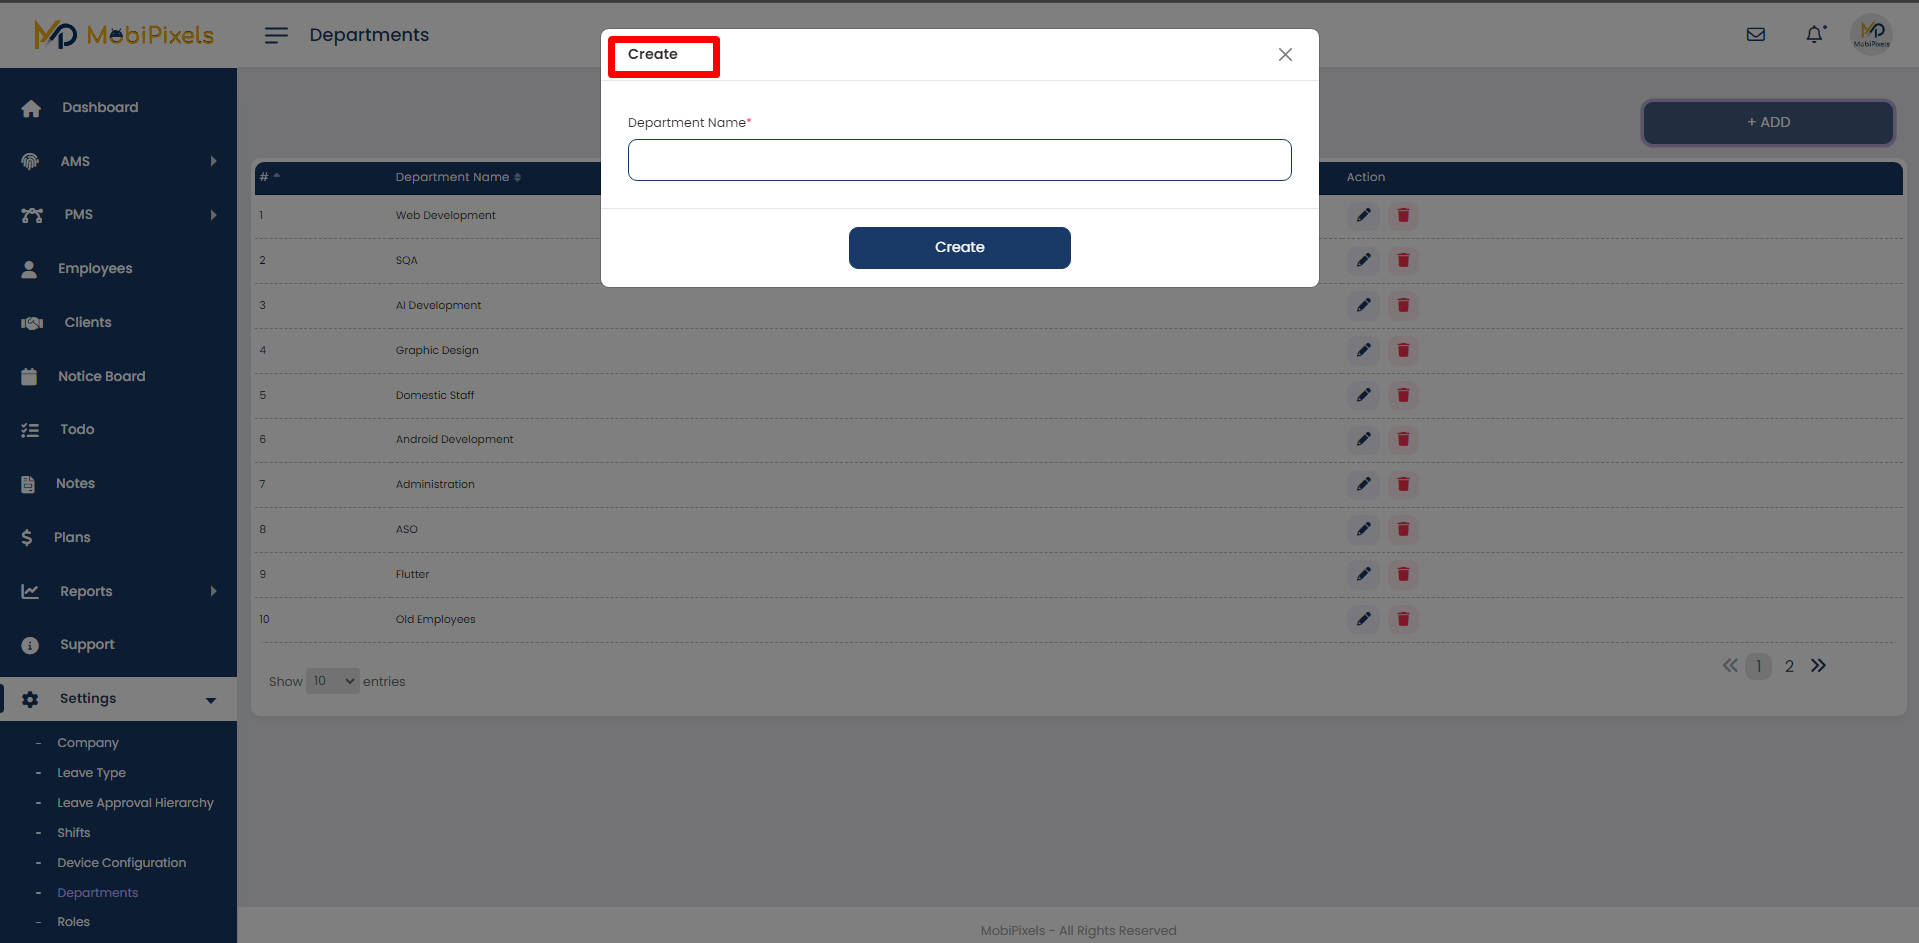
- To add departments, click on Add Button and enter Department Name
- After entering department name, click on Create button.
- Department will be created and shown on table.
The department can also be edited or deleted by clicking on the edit icon ✏️ or delete icon.
Device Configuration
To add or edit punch in/out machine configurations to go Setting > Device Configuration
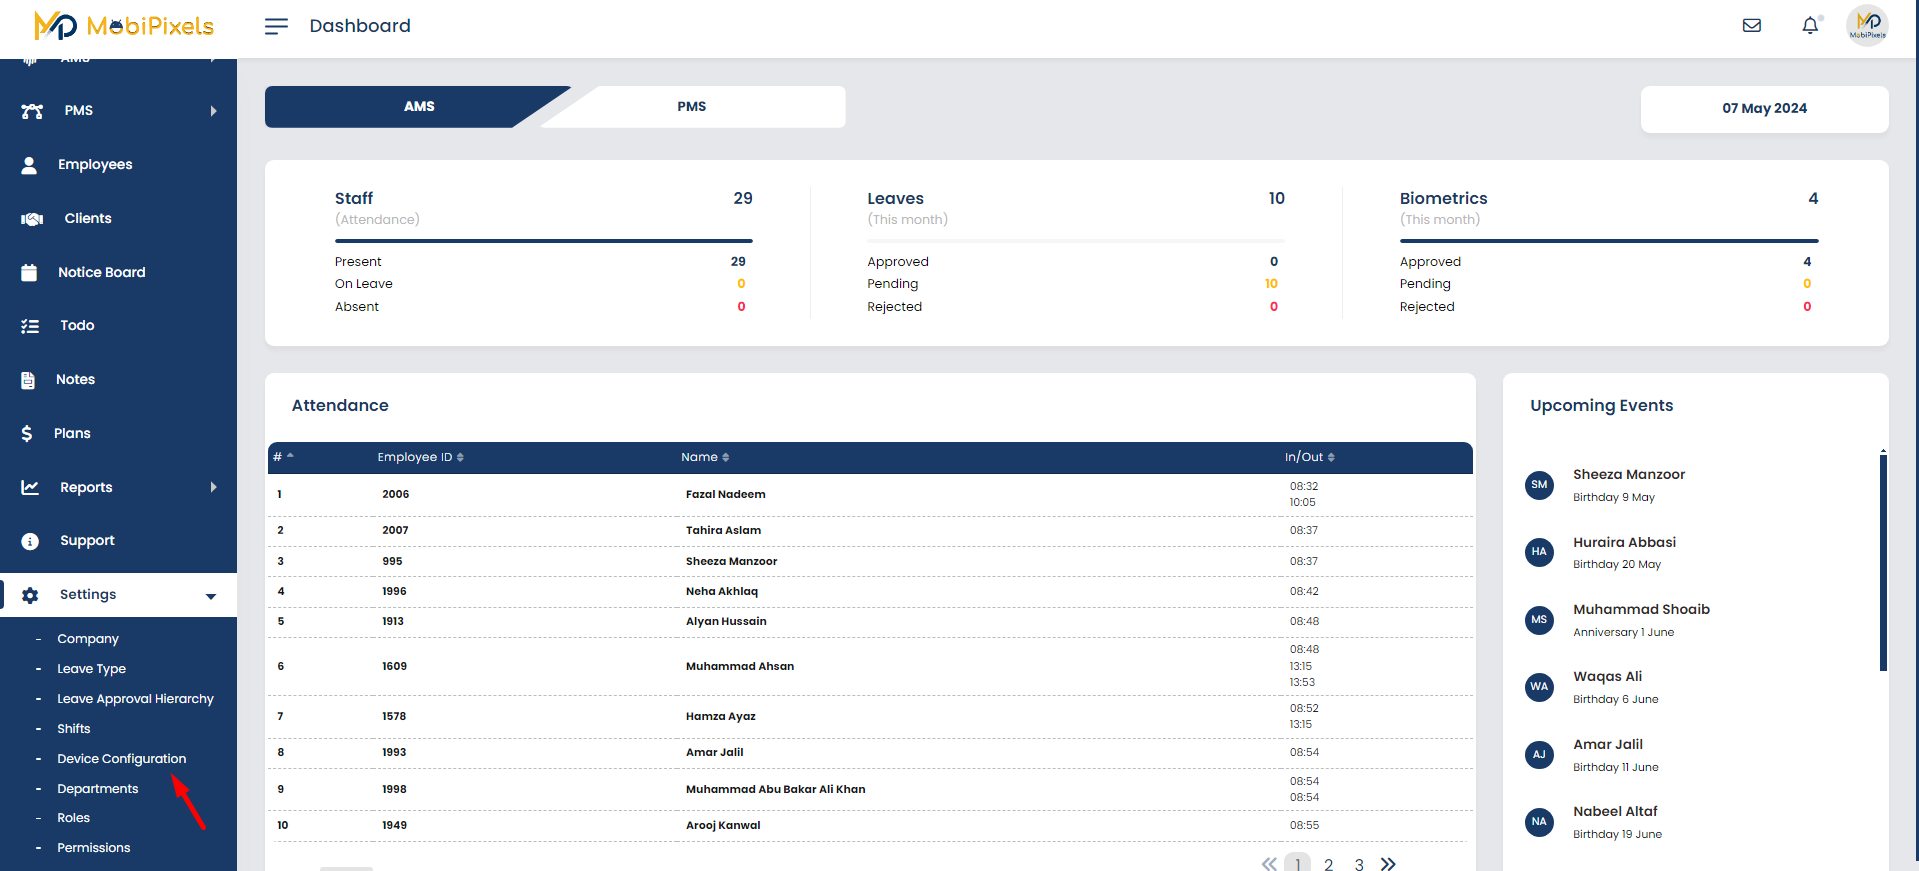
Device Configuration screen will be open where
- New Device can be added
- Device Configuration can be edit ✏️
- Device can be deleted
All the available device(s) name, device port and device ip will appear in the table.
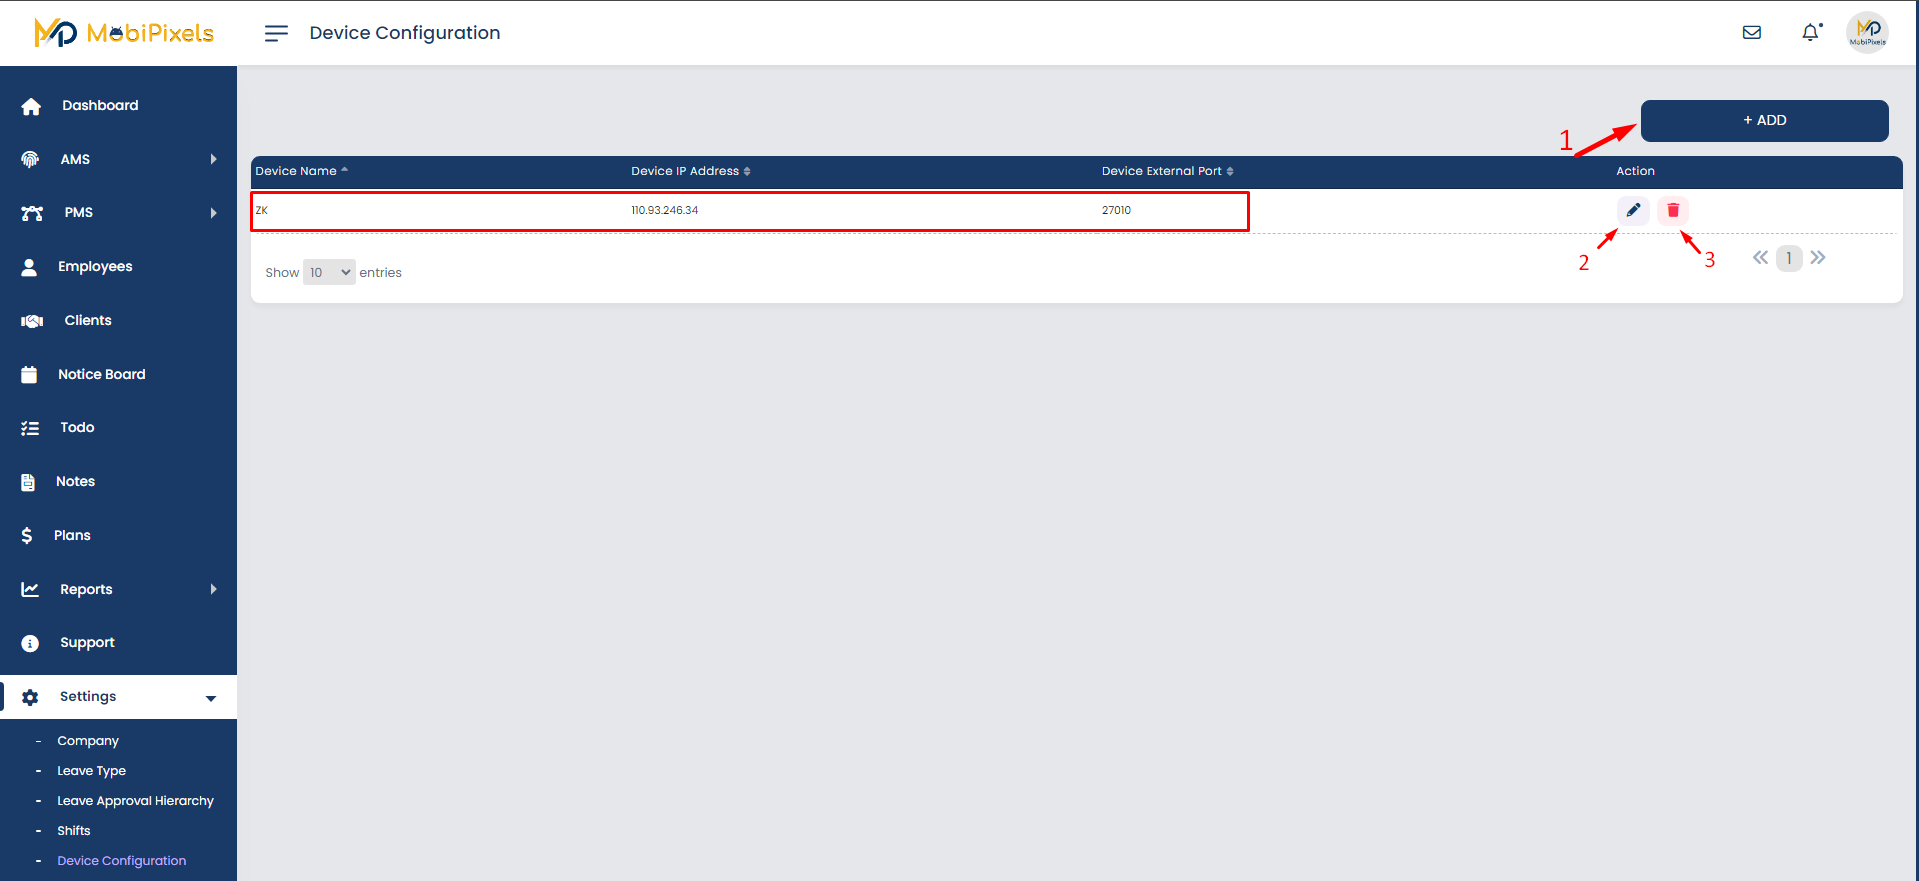
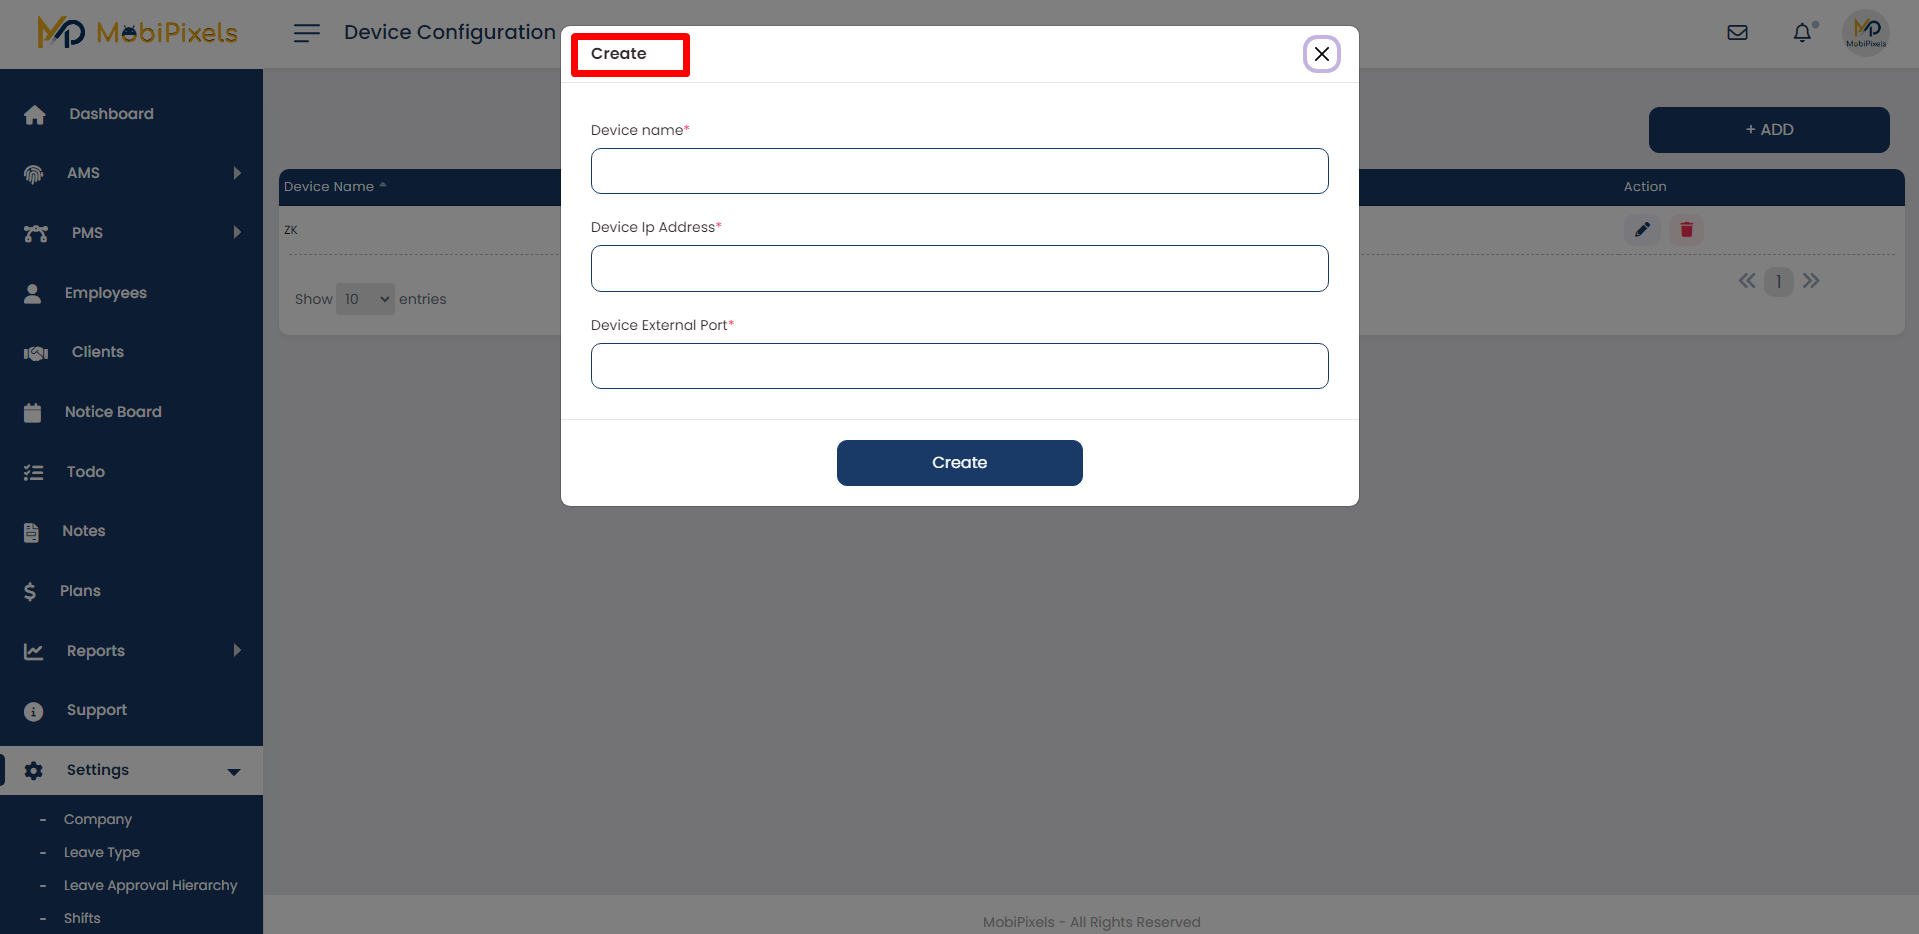
- To add a device, click on Add Button
- Enter device name, external port, and IP address of the device
- Click on Create Button to add a device.
To Edit or Delete Device information click on Edit Icon ✏️ or Delete Icon as mentioned above.
Support
In case of any support or help, Click on the Support option in the sidebar.
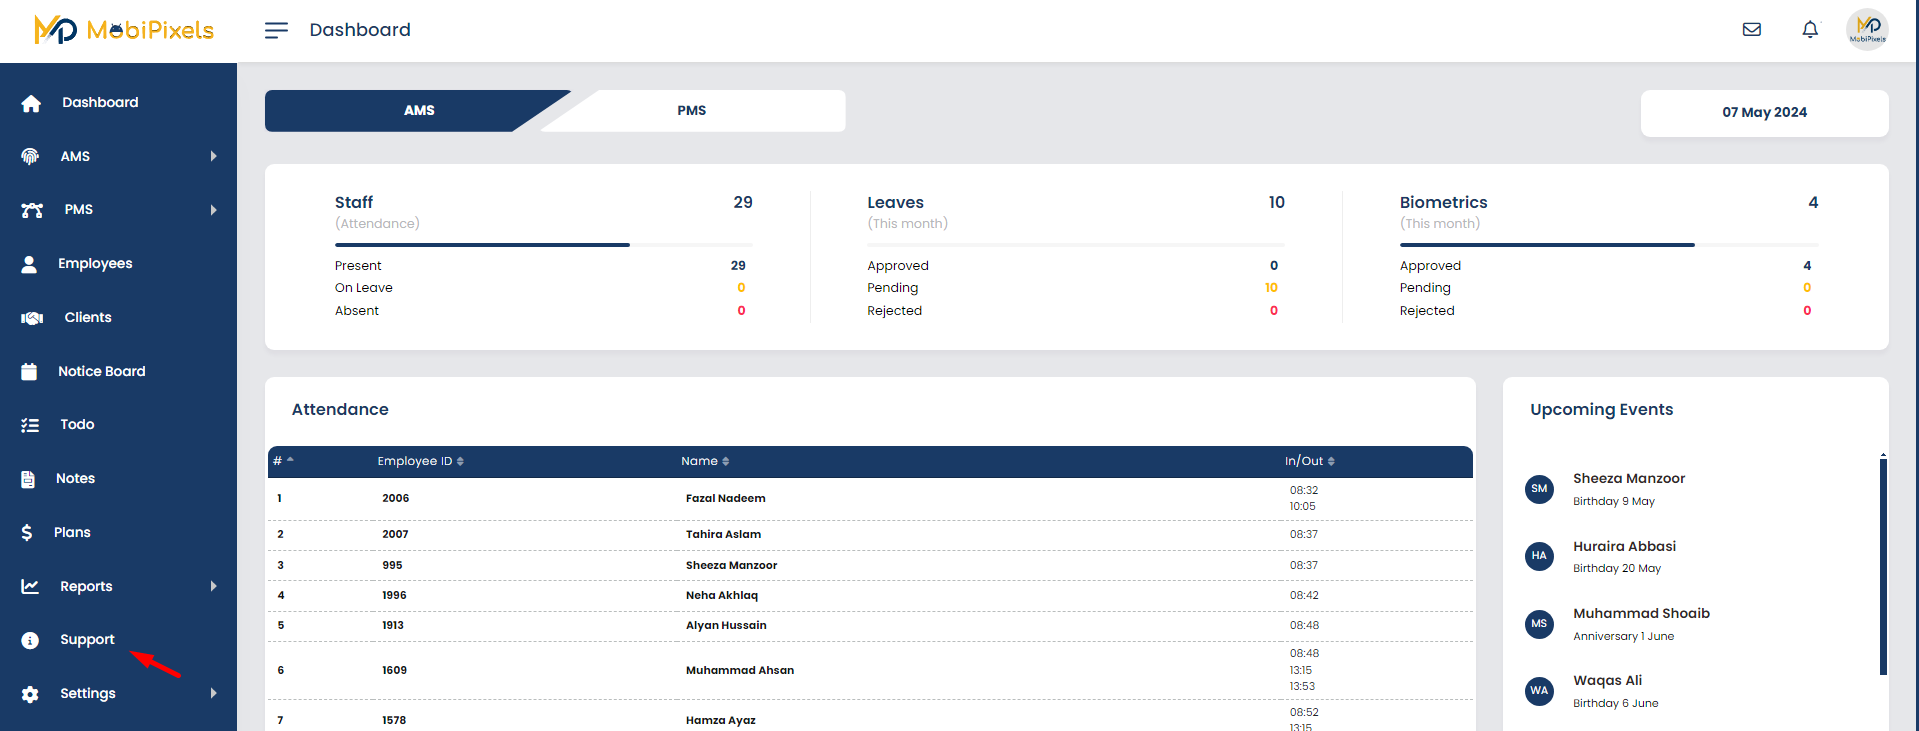
Support Screen will be open, to send a message, click on 1 Add Button
2 Filters (Sent, Open and Resolved, Resolved and Closed) can be applied.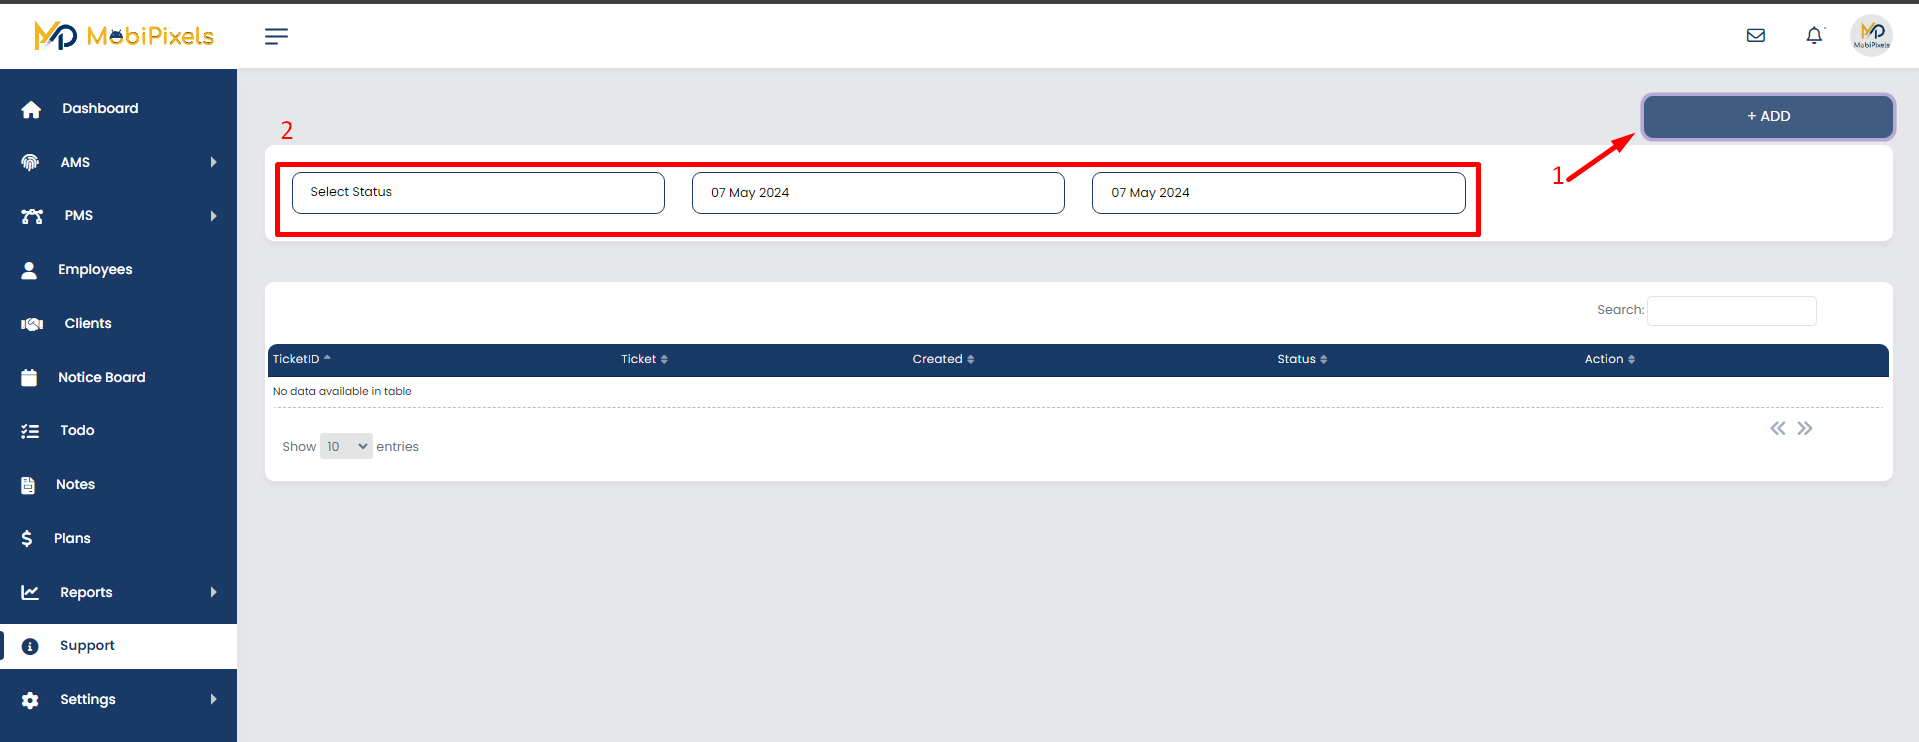
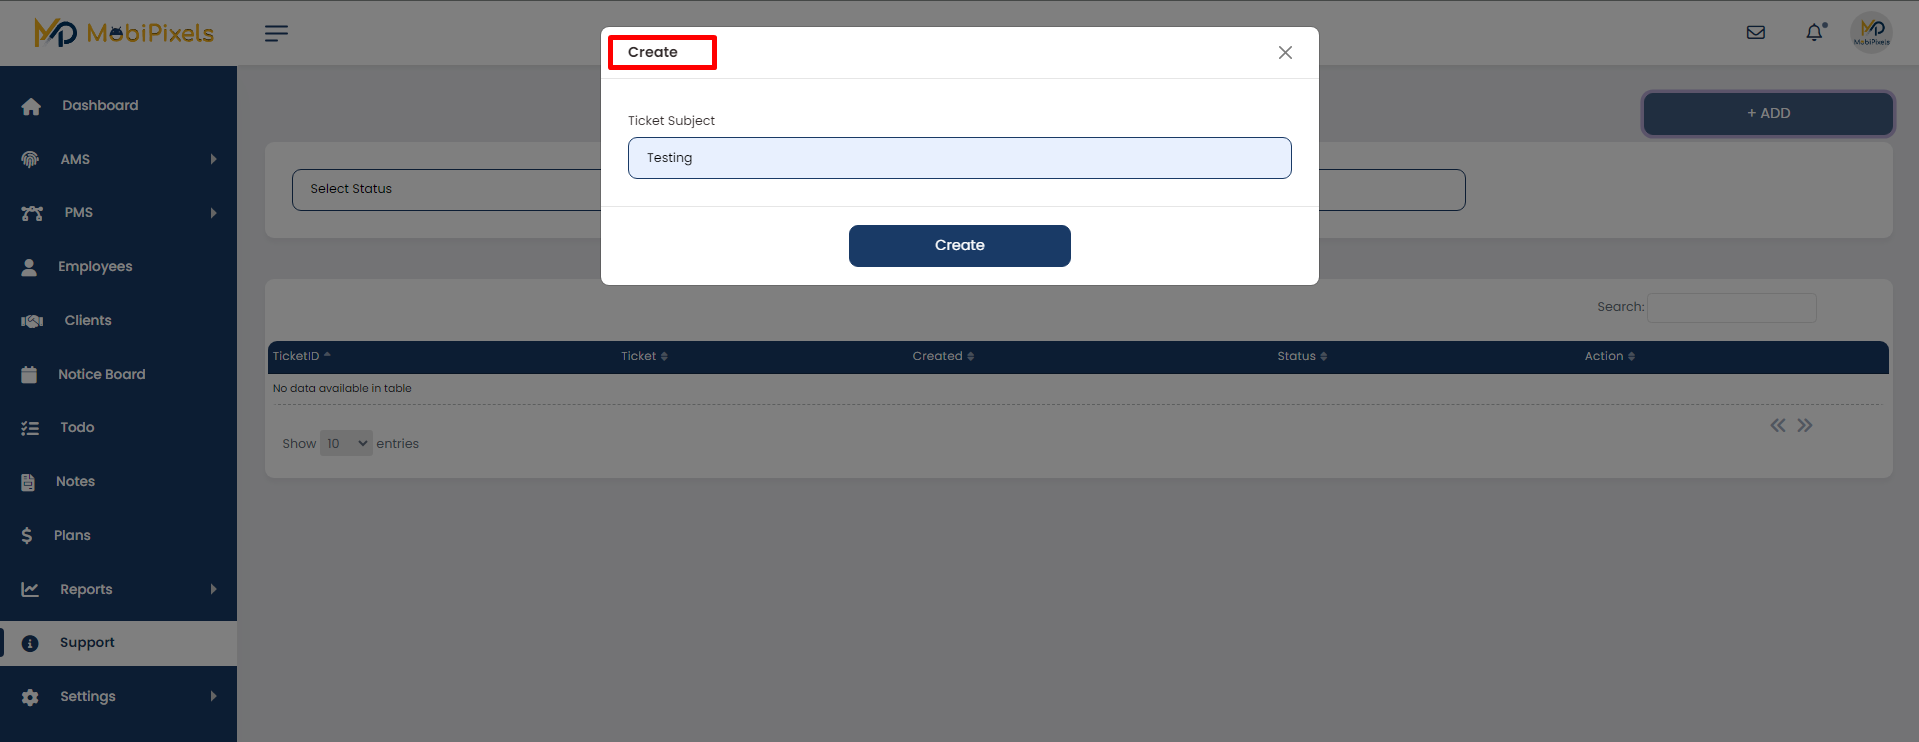
To chat with Company, click on Add Button as mentioned above image.
After clicking on the Create Button, Confirmation message will appear and the ticket number will be allocated to chat with ticket id, ticket status and chat option.shown in table.
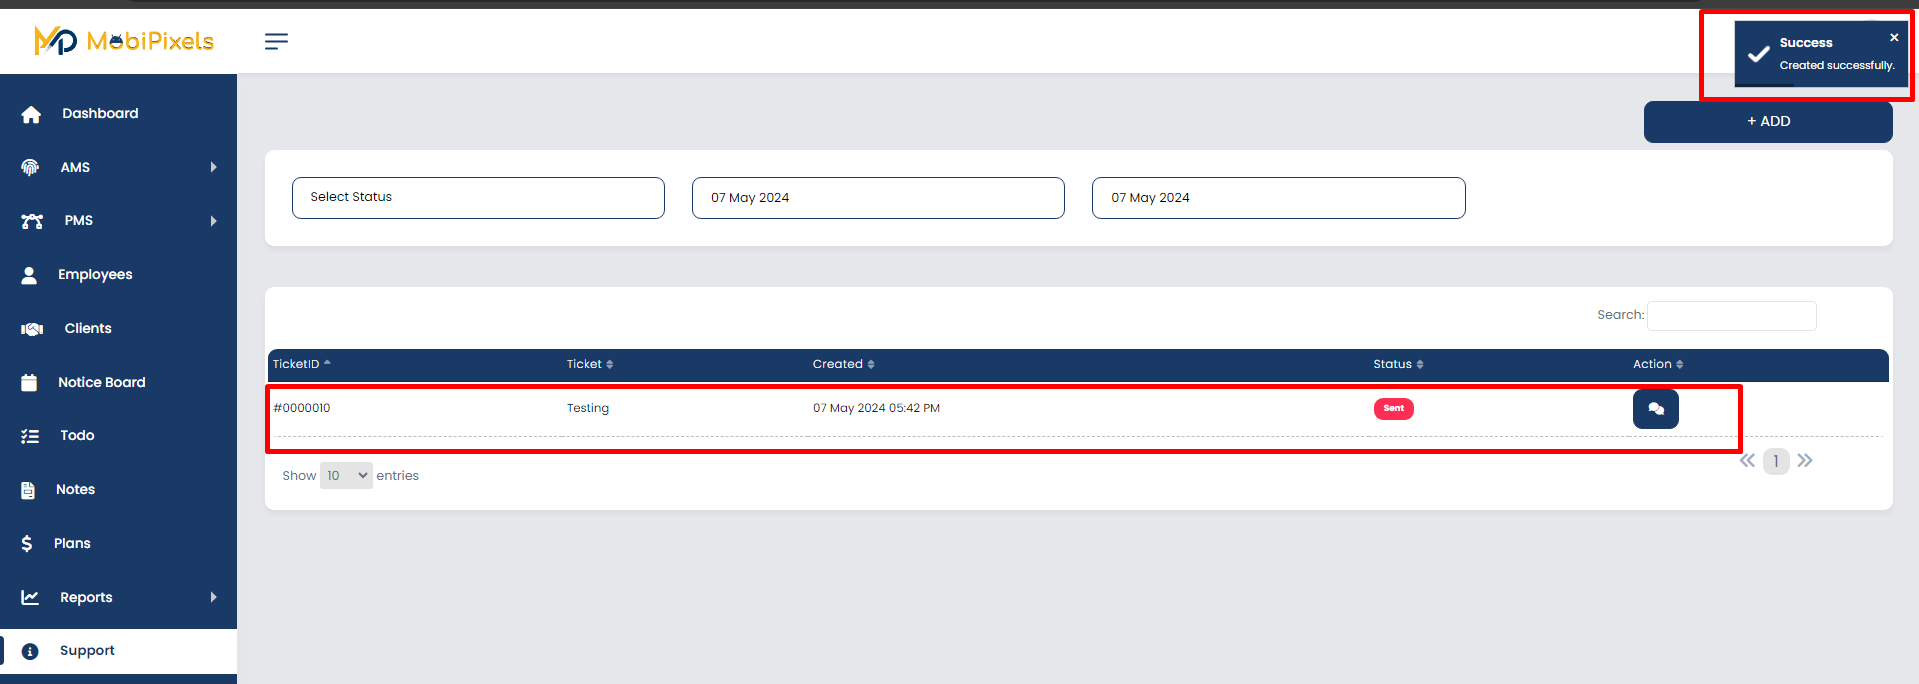
- To send detail message click on Chat Option, under Action column.
- Type detail message and click on send button.
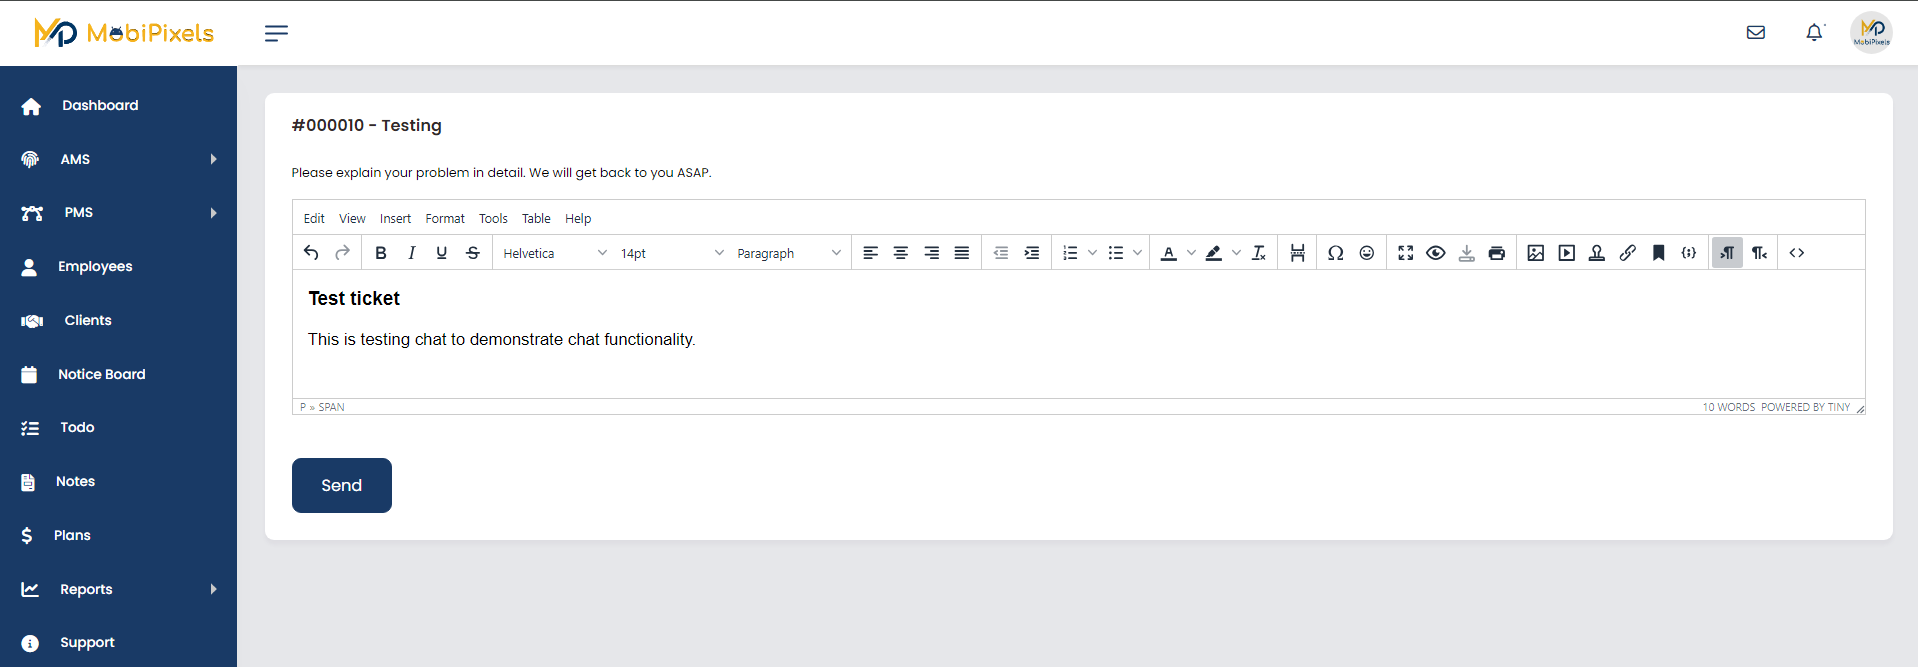
After click on Send Button, Chat will appear will a Successful message
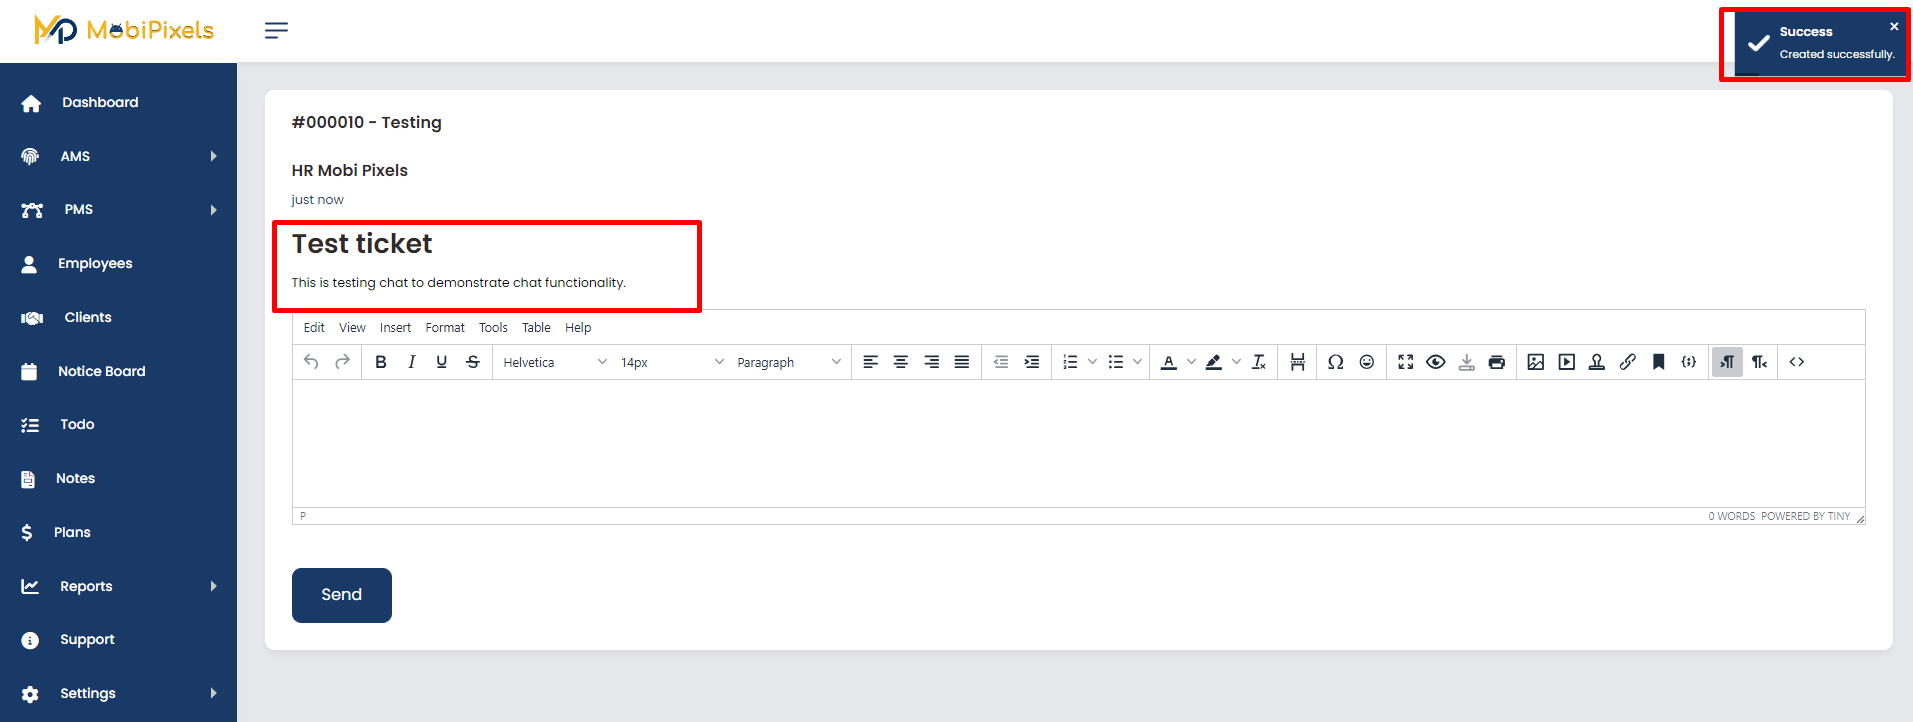
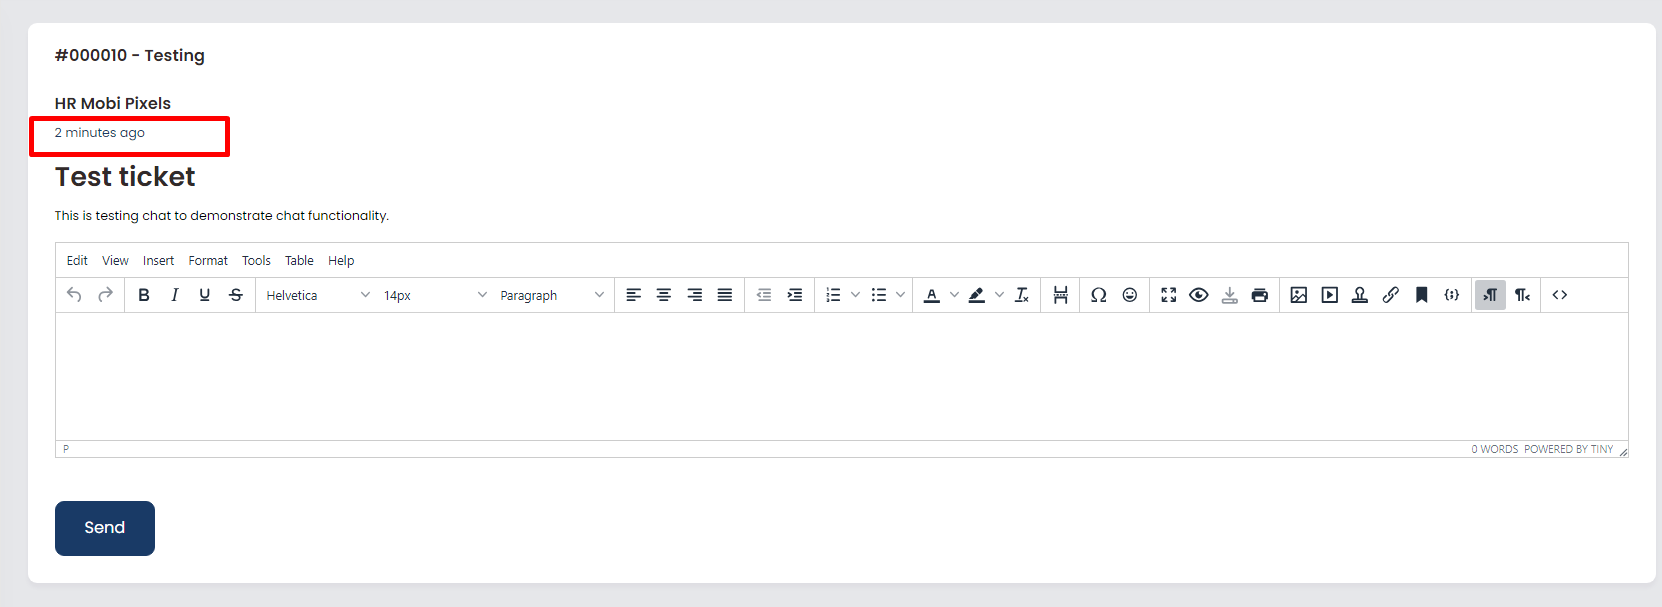
User can also keep track of chat by noticing the time
All messages will displayed at the Company Admin Panel.